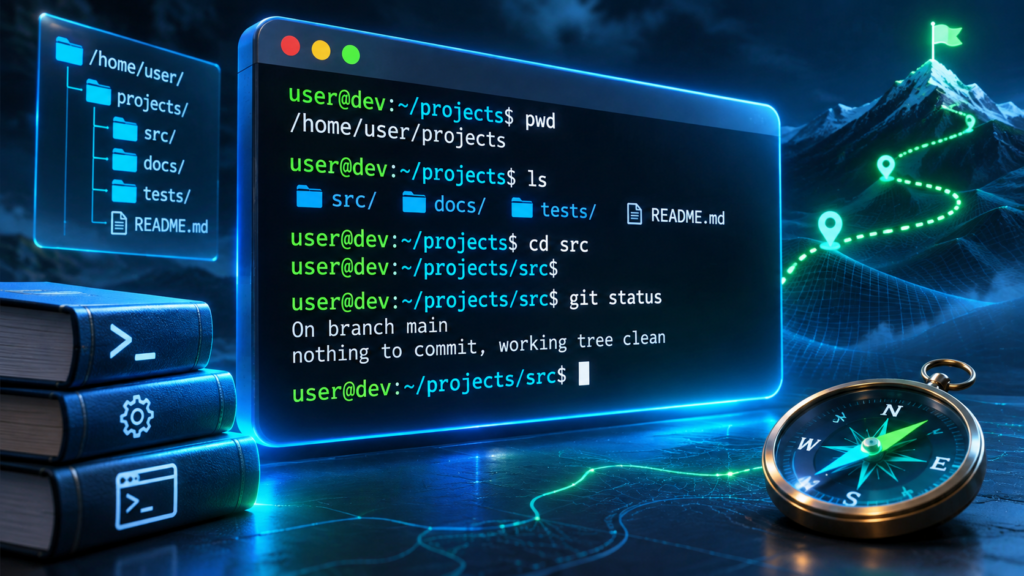
What The Integrated Terminal Does
The terminal in Visual Studio Code gives you access to a command-line shell without leaving your editor. Instead of opening a separate application every time you want to run a script, inspect a directory or check your Git repository, you can issue commands in a panel next to your source files. A command runs through the selected shell and operating system, and its output appears in the terminal.
This distinction is important for beginners. Visual Studio Code is an editor, the terminal is an interface to a running command-line session, and the shell interprets the commands you enter. PowerShell, Command Prompt, Bash and Zsh are examples of shells. Python is a programming language with its own interpreter, which you can launch from a shell. These components are related but not interchangeable.
For example, typing python –version in PowerShell asks the shell to find and launch a program called python with a version-reporting argument. Typing print(“Hello”) directly into PowerShell ordinarily does not execute a Python print statement. To interpret that statement as Python, you would need to run it in a Python interpreter or save it in a source file and execute the file through the interpreter.
The integrated terminal makes this activity more convenient, but it does not remove the need to install required command-line tools. A Visual Studio Code installation does not automatically provide a Python runtime, a Git executable or the dependencies of every project you may open. Our Python installation guide illustrates how to verify a runtime, and our command-line fundamentals guide explains how shells and commands fit together.
Microsoft’s terminal getting started guide describes the integrated terminal as a place to use ordinary shell commands while working with an editor. You can begin by learning how to open the panel, identify its context and run a harmless command. The rest of this guide develops those actions into a repeatable beginner workflow on Windows.
Step 1: Open The Terminal In Your Workspace

Launch Visual Studio Code and open a folder containing your own practice files. If you are starting from an empty computer setup, follow our Visual Studio Code setup guide first. Create a dedicated practice folder in a suitable location where your user account is allowed to save files. The folder should not contain private credentials, unfamiliar downloaded scripts or data belonging to somebody else.
Use the File menu and choose Open Folder to select your practice directory. Its name should be visible in Explorer. Opening a folder is a useful first step because it establishes the workspace context, which helps the editor and terminal organize your project. Opening a single document does not necessarily establish the same folder-level context.
From the menu bar, select View and then Terminal. You can also use Terminal followed by New Terminal to create a session. On Windows and Linux, the default keyboard shortcut to show the terminal uses Ctrl and the backtick key. Keyboard layouts and configuration can affect how a shortcut behaves, so the menu is a reliable alternative when the shortcut does not work.
A terminal panel should become available with a prompt. The actual prompt may display a user name, shell name, directory, drive or other context, depending on the particular shell and its configuration. Do not mistake a sample prompt in a tutorial for a command you are supposed to copy. Type only the command after the prompt or in the active input position.
Verify which shell is running. For many Windows installations, the default is PowerShell, but you may instead see Command Prompt, Git Bash or another shell chosen in the terminal profile. The shell determines the syntax that you can use. A command copied from a macOS Bash tutorial may require a different form in Windows PowerShell, even though both terminals look similar.
Microsoft’s Terminal Basics documentation explains that a terminal normally starts in the workspace folder when the default working-directory behavior applies. Custom settings and some project arrangements can change that location. Before running a script or changing a file, verify the actual location rather than trusting an assumption about the editor’s layout.
Step 2: Choose An Appropriate Shell And Understand Its Commands
A shell is the program that receives your typed instructions. It identifies commands, handles arguments and coordinates execution. Some shells support aliases that make several command names appear familiar across environments. However, similar command names do not guarantee identical options or output. This is why a beginner should first establish which shell the tutorial expects.
To select a terminal profile in Visual Studio Code, open the dropdown associated with creating a terminal or use the Command Palette and search for Terminal: Select Default Profile. Microsoft’s terminal profiles documentation explains how the editor detects installed shells and configures the one used by default. Choose an existing supported shell and open a new terminal to test the selection. Changing the default does not necessarily change an already-running terminal.
If you are following Windows instructions involving PowerShell, choose PowerShell and try the basic command below. It reports your current location without modifying files.
Get-LocationIn an ordinary filesystem location, the displayed result identifies the directory in which the shell is operating. Microsoft’s PowerShell management module documentation describes the location and file inspection commands used in this lesson. If you are using Command Prompt instead, typing cd without a directory displays its current directory. In a conventional Bash session, pwd prints the current working directory.
You can keep a small reference to the commands suitable for your chosen shell. A Windows PowerShell learner can begin with Get-Location and Get-ChildItem. Someone studying Linux shell fundamentals can begin with pwd and ls. Do not assume that commands for installing applications, modifying permissions or changing system settings are interchangeable between the environments.
A profile may also load startup settings or scripts when a shell begins. That behavior can be appropriate for a trusted personal development configuration, but unfamiliar startup scripts should not be enabled simply because a tutorial promises a convenient prompt. Use the default documented shell setup until you understand why a custom configuration is necessary.
A terminal usually runs with the permissions available to the editor’s user account. A beginner does not need to launch the entire editor with administrative privileges to inspect a folder or execute a Python practice program. On a work or school computer, follow the organization’s shell and software policies. Administrative access should not be used as a generic solution to ordinary development errors.
Step 3: Check Your Directory Before Running Any Program
The current directory is one of the most important pieces of information in a terminal session. When you specify a relative filename such as hello.py, the command-line program normally interprets that filename in relation to its current location. The active editor tab is not a guarantee that the terminal is located in the same directory.
Begin with a simple inspection in PowerShell.
Get-Location
Get-ChildItem
The first command reports the current location. The second identifies the visible child items in the current location when used in an ordinary file directory. Microsoft’s Get-ChildItem reference describes the latter command’s behavior. Neither of these example commands deletes or edits the files being inspected.
If you want to navigate into an existing folder called examples, use the following example only when that folder actually exists within your current directory.
Set-Location examples
Get-Location
The first command changes the shell’s current location. It does not move or rename the examples folder. You can use Set-Location .. to return to its parent. If you are working with a folder name that contains spaces, put the path in quotation marks and ensure the path identifies the intended folder. Exact path syntax differs across different operating systems and shells.
Suppose your workspace contains a file named hello.py at the root and another file with the same name inside a training subfolder. Running python hello.py from the workspace’s root can execute a different program from running that command in the training subfolder. Both commands may succeed while producing different results. Checking the terminal location and the actual saved file path resolves that ambiguity.
This matters especially when you have several terminal tabs. One terminal might remain at the project root while another moves into a subfolder. Opening a different file in the editor may leave both terminal locations unchanged. Treat each terminal as its own running session and confirm the context when returning to it.
Step 4: Run A Python Practice Program In The Integrated Terminal

For this exercise, you need a supported Python interpreter that has been installed and verified. Use your own dedicated workspace and create a file named hello.py within it. Ensure the file is plain text and has the intended extension. If another file with that name already exists, use a fresh practice folder so you do not overwrite your existing code.
Enter the following original Python example and save it.
values = [4, 6, 10]
print("Python exercise")
print("Total:", sum(values))
Open a new PowerShell terminal in the workspace if you do not already have one. Check that hello.py appears in your current directory and verify that the intended Python installation responds to the version command.
Get-ChildItem
python --version
python hello.py
The expected program output appears below. The first line is the text supplied to the print function, and the second line contains the sum of the three values.
Python exercise
Total: 20
The exact Python version displayed by the earlier command will depend on your installed interpreter. The exercise does not need to produce a specific maintenance-version number. It does need to execute the file with a compatible Python runtime.
Change the final number in the list from 10 to 12, save the file and run python hello.py again. This time, the total should become 22. If the output remains unchanged, check whether the file was saved and whether the path of the script matches the active editor document. If the command reports that the file does not exist, inspect your terminal directory before attempting a new installation.
The totals are the expected outputs of the Python code. They describe the calculation, not the computer’s performance.
You can also experiment with the interactive Python prompt by entering python alone in the terminal. In an ordinary interactive interpreter, type a short Python expression and observe its evaluated result. Use exit() to return to the operating system shell when you are finished. The interactive Python prompt accepts Python input, whereas the shell accepts its own command syntax.
This distinction becomes especially useful when an error occurs. A shell error indicating that a command could not be found differs from a syntax error reported after a source file begins executing. Read the message and determine which component produced it. Do not reinstall an editor merely because you entered a shell command at the Python prompt or attempted to execute an unsaved source file.
Step 5: Verify The Interpreter And Work Within A Project Environment
When several Python installations exist on a computer, the active editor and terminal may not automatically use the same interpreter. An application might display information about a selected Python environment while an existing terminal continues to use another copy. Verify the actual executable before assuming that a project is properly configured.
Run this command in the shell:
python -c "import sys; print(sys.executable)"Python’s sys module reports the executable used for the current process. The resulting path provides a concrete way to compare the terminal’s interpreter with the one selected through the editor’s Python tools. You do not need to share that path publicly when it contains your user name or another private directory.
Check package-tool availability through that same interpreter rather than assuming that a separate pip command belongs to it.
python -m pip --versionIf a package is missing in your future project, compare the package manager and interpreter locations first. Installing it repeatedly through unrelated commands can make the configuration harder to understand. The practice program in this article does not require an external package, so no network installation is necessary.
A future project may benefit from a virtual environment, which provides a separate package installation location. If you choose to create one in a dedicated folder and no existing .venv environment needs to be preserved, the standard Python module supports the following command:
python -m venv .venvOn Windows, the resulting environment normally contains its Python executable within the Scripts directory. You can call it directly:
.\.venv\Scripts\python.exe hello.pyThis explicit executable path is useful when activation is unavailable or restricted. You do not need to weaken PowerShell script execution policy just to run the selected interpreter. Consult the official Python and editor environment documentation if you use a different layout or a managed distribution.
A virtual environment is not a protective sandbox. Running an unfamiliar script can still affect files and services accessible to your account. Treat source code and dependencies as software whose behavior must be understood before execution. Preserve your source files and project dependency information rather than assuming that the virtual environment folder itself is a complete backup.
Step 6: Use Separate Terminals For Separate Tasks
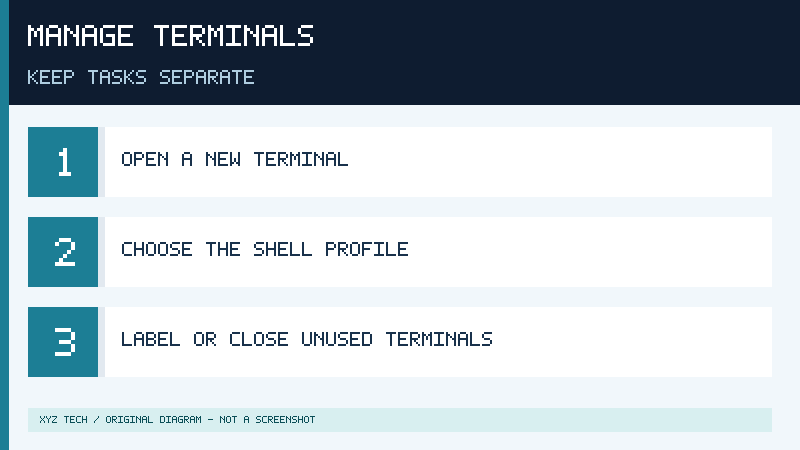
The integrated terminal allows you to keep more than one shell session open. This can be useful when a project has a long-running development server and you also need to execute a separate diagnostic command. For a beginner, multiple sessions are best introduced after you understand how a single terminal works.
Create another terminal through the new-terminal control or Terminal menu. Select the intended shell profile if prompted. In the new session, run the appropriate current-directory command. Compare the displayed location with the earlier session. If you navigate one terminal to another folder, do not assume its sibling terminal automatically follows that change.
Visual Studio Code also provides split terminal arrangements and a terminal list. A split is a layout convenience rather than a new programming environment. The sessions can run independently. The documented behavior of starting directories for split terminals differs across platforms and settings. Confirm the actual directory after creating a split instead of inferring it from what you see in the editor.
If a command is still running, the terminal prompt may not be available for a new command. For a harmless Python program that is intentionally waiting, interrupt it with Ctrl + C when appropriate. Do not use interruption casually during an installation, important data operation or other process whose abrupt termination could have consequences. If you are unsure whether a process can be interrupted safely, consult its documented shutdown procedure.
Use descriptive terminal names when the interface permits renaming. Names such as Practice, Tests and Development Server can help distinguish tasks. A terminal name is only a label: it does not guarantee which shell, directory or interpreter the session currently uses. Continue checking the actual context before consequential commands.
Close unused sessions through the supported terminal controls when you no longer need them. Hiding the terminal panel is different from terminating its running shell. A hidden session may continue executing its current process. For local development, this distinction can explain why a server remains running after you hide its output.
A simple habit is to reserve one terminal for ordinary commands and a separate session for any longer-running process. Avoid starting several identical commands unless you know why you need them. A clear task arrangement gives you more control over the project’s behavior and reduces confusion when output appears in different places.
Read Errors And Solve Common Terminal Problems
A terminal error is information about a particular operation. It is not an instruction to perform every troubleshooting step you can find. Begin by reading the actual command and the message that follows it. Identify whether the failure concerns command discovery, file location, permissions, the interpreter or the program itself.
If the terminal reports that python is not recognized, check that the intended runtime is installed and open a fresh terminal. Changes made by an installation may not be reflected in a shell that was already running. If the python command launches an unexpected application, inspect command resolution and interpreter selection using the official Python setup guidance. These symptoms do not by themselves mean that VS Code needs to be reinstalled.
If a file cannot be found, verify the working directory and filename. Use the editor’s Explorer to identify the relevant source file and the terminal’s inspection commands to check its location. A source file saved under a different extension or in another folder will not be found by a command that refers to hello.py in the current directory.
If Python reports a syntax error, inspect the specified source line and surrounding code. A missing quotation mark or indentation problem may be enough to stop a short program from running. Compare the saved file against the example without treating the terminal output as source code that should be pasted back into the file.
| Observed symptom | First useful check |
|---|---|
| Terminal panel is not visible | Use View, then Terminal, or create a new terminal |
| Unexpected shell syntax errors | Identify the active terminal profile |
| Python command not recognized | Verify installation and open a fresh shell |
| Source file not found | Check the directory, filename and extension |
| Unexpected Python version | Inspect the executable path and interpreter selection |
| Old output after editing | Save the intended file and rerun it |
| Terminal features unavailable in unfamiliar project | Review Workspace Trust and do not bypass the restrictions |
When several tools respond slowly or the entire editor becomes unresponsive, the relevant problem might extend beyond the terminal. Our Windows performance troubleshooting guide provides background on broader resource symptoms. Do not automatically close unrelated processes or force an installation to continue when its actual status is unclear.
A reproducible error report contains the operating system, active shell, relevant command and precise message. Include only nonconfidential context. A useful report does not depend on sharing your full terminal history, private file contents or access tokens.
Use The Terminal Safely And Build A Repeatable Workflow
Terminals are powerful because they can run programs and access resources through the shell. A command that merely reports a version is fundamentally different from one that removes files, modifies configuration or communicates with a remote service. Read a command before executing it and understand which working directory, program and options it uses.
Be especially cautious when opening a downloaded repository. Project settings, shell scripts, tasks and development extensions can lead to code execution. Microsoft’s Workspace Trust documentation describes a boundary intended to reduce automatic execution risks while you examine unfamiliar files. If your project is in Restricted Mode, review its origin and contents rather than disabling the protection just to make an example work.
Learn the difference between harmless inspection operations and modifications. Commands such as Get-Location and Get-ChildItem help establish context. A command that deletes files or performs a force push deserves much more care. Our Git and GitHub beginner guide explains why reviewing repository state and remote destinations matters before changing or publishing history.
Do not copy secret credentials into a terminal merely to make a service authenticate. Some commands may retain input in history or expose arguments to other software. Use the approved authentication mechanism for the service, and avoid including actual secrets in scripts or screenshots. Exercise particular caution when using any optional extension or automated assistant that can run commands.
The terminal becomes easier to use when you establish the same sequence for every small project: open the intended folder, identify the shell, check the location, verify the tool, save the source and run the appropriate command. Observe the result before changing anything else. If the workflow fails, identify the exact stage at which it failed.
At this point you can use the VS Code integrated terminal to inspect a project directory, run ordinary Python code and understand why different sessions may behave differently. You can proceed to more advanced tools one at a time. The most valuable development skill is not memorizing hundreds of commands, but understanding what a command will do and checking its result in the correct context.
Sources And Further Reading
- VS Code: Getting started with the terminal
- VS Code: Terminal Basics
- VS Code: Terminal Profiles
- Microsoft Learn: PowerShell Management module
- Microsoft Learn: Get-ChildItem
- VS Code: Workspace Trust
Frequently Asked Questions
How Do I Open The Integrated Terminal In Visual Studio Code?
Choose View and then Terminal, or create a terminal from the Terminal menu.
Does VS Code Automatically Install Python In Its Terminal?
No, you need a suitable Python runtime installed and available in the intended environment.
Why Does My Terminal Say It Cannot Find My Script?
Check the current directory, filename, extension and whether you have saved the source file.
Can I Run Multiple Terminals In VS Code?
Yes, separate terminals can use independent shell sessions and run different tasks.
Do I Need To Run VS Code As Administrator?
No, ordinary project navigation and local Python exercises can typically be performed with standard user permissions.