Understand What Visual Studio Code Does
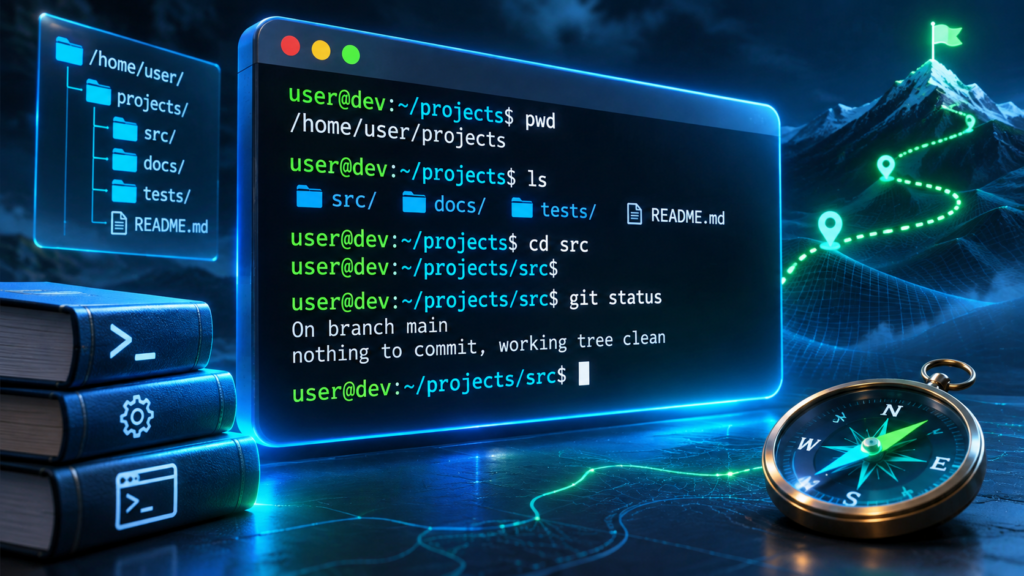
Visual Studio Code is a source code editor designed to help people write, organize and work with programming files. It can display syntax highlighting, manage folders, search across a project and provide an integrated terminal. It can also be extended with additional language tools. Its usefulness comes from bringing several parts of a development workflow together without requiring a beginner to learn every available feature on the first day.
An editor is not the same thing as a programming language runtime. When you create a Python file in VS Code, the editor helps you write and save the text. A Python interpreter executes the instructions. If you want to work with a language that requires a compiler or runtime, you must obtain the appropriate tools separately. A successful installation of the editor alone does not establish that you can execute every type of program. Our Python installation guide explains how to prepare a working interpreter on Windows before connecting it to the editor.
Visual Studio Code is also distinct from Visual Studio, a separate development environment from Microsoft. Similar product names do not mean the applications have identical installers, requirements or workflows. For this guide, the product is the desktop application called Visual Studio Code. You can complete the practice exercise with the editor, a supported Python interpreter and the relevant language extension, without creating an account for an optional coding assistant.
Think about how you would work on a small project without a specialized editor. You might create a text file, open a separate terminal, locate the file and enter a command to run it. VS Code brings those activities into one workspace. You still need to understand the source file, its location and the interpreter that executes it. The editor makes the relationships easier to observe, rather than eliminating them.
As your projects grow, you can add debugging tools, version control and project-specific configuration. Those capabilities become valuable when you know the fundamentals. Starting with a simple folder and a short program prevents unnecessary configuration from obscuring the first lessons. You should be able to explain which application edits your code, which command runs it and where the resulting files are stored.
Step 1: Download And Install Visual Studio Code On Windows
Visit the official Visual Studio Code download page. Select the Windows edition appropriate for your computer. If you are unsure about your hardware architecture, Windows Settings provides system information under System and About. Select a supported installer rather than a package intended for another operating system or an unfamiliar third-party modification.
Microsoft’s Windows setup documentation distinguishes installation for one user from installation for the whole computer. On an ordinary personal machine, a user-level installation is often sufficient. A system-wide installation is intended for circumstances where it should be available to other users and requires authorized administrative access. A ZIP-based distribution is another option, with a separate maintenance workflow. Beginners generally benefit from the straightforward supported installation route rather than creating a custom portable environment without a specific need.
Run the trusted installer and read the prompts. Select the installation location and options that suit the intended setup. An option to add the editor’s command to PATH is useful when you want to open projects from a terminal. PATH helps the operating system locate commands by name. It does not install language interpreters or change how your saved source code works. Our command-line guide introduces this relationship in more detail.
Review optional setup choices independently. Some installer versions offer additional tools or integration for coding assistants. These are not required for the basic exercises in this article. You can choose not to install an optional component that does not serve your intended workflow. On a managed computer, obtain the approved version and follow the administrator’s policies.
After installation, launch VS Code from Start. If you have enabled terminal access, open a fresh terminal and execute the following command.
code --versionThe expected response identifies the installed editor version and related build information. You may see different values from those shown in other tutorials. If the command is not recognized but you can open the editor from Start, the issue may concern command discovery rather than the application itself. Try a newly opened terminal and consult the documented installation options before manually modifying environment variables.
Keep the editor updated through its supported update process. If you downloaded an installer that behaves unexpectedly, check the real publisher and distribution address before trying another copy. The precautions in our safe Windows installation guide apply to code editors as much as other desktop software. Trusted installation matters because a development tool can access the files and commands available to your user account.
Step 2: Create And Open A Dedicated Project Folder

A common beginner mistake is to open unrelated source files from many different locations and then become confused about the terminal’s current directory. An ordinary folder devoted to one small project makes the relationship between the editor, saved files and commands easier to understand.
Create a new folder in a location where you have permission to store your work. For this article, call it vscode-practice. Choose a normal user-controlled location rather than the editor’s installation directory or a protected Windows folder. If you already have a folder with that name, inspect its contents or select a new name. You do not need to erase an existing project in order to follow this exercise.
Launch Visual Studio Code and choose File, then Open Folder. Select the new project directory. Confirm that its name appears in the Explorer view inside the editor. The Explorer represents the contents of the opened folder, so it provides a useful way to understand the project’s structure. Microsoft’s editor tutorial also starts with a dedicated folder to establish the workspace.
If you prefer the command line, you can create a new project folder and open it from a terminal. Run this example from a directory where you want a new practice folder to exist.
mkdir vscode-practice
cd vscode-practice
code .
The dot denotes the current directory in this context. The final command asks the editor to open that location. If the code command is unavailable, the graphical Open Folder method remains a valid alternative. Verify that you are in the intended folder before starting to create files.
You might encounter a Workspace Trust prompt. For an empty directory you created yourself, you know the origin of its contents. A downloaded project is different. Review unfamiliar code and configuration before trusting it, even if its filename and folder structure look ordinary. Microsoft describes the purpose and limitations of this boundary in its Workspace Trust documentation. Keep an unfamiliar project restricted until you have established that its contents are appropriate to execute.
Opening a project does not automatically send its files to a remote service or turn it into a Git repository. Some additional features may interact with online services, depending on what you enable, but a normal local folder can hold your programs without an online account. For sensitive projects, evaluate any extensions or integrations before granting them access. This is a useful habit to establish while the project still contains only a few practice files.
Step 3: Learn The Parts Of The Editor You Actually Need
The interface can appear complicated during the first launch, particularly if you have not used a development tool before. Focus on a few areas instead of studying every icon. Most beginner work consists of selecting a file, editing its contents, saving it and observing the results of executing the program.
The Activity Bar provides access to major views such as Explorer, Search and Extensions. The Explorer shows files in the current workspace. The editor area displays the source files you are working on, usually in tabs. The bottom panel can contain a terminal or other development output, while the status bar provides contextual information about the editor and active file.
Create a small file through the Explorer using the new-file control and save it with a meaningful extension. For example, a Python program uses .py. VS Code uses file information to determine appropriate language features; choosing an extension is not a way to convert formatted documents into executable source. To edit a program safely, its contents must be suitable for that programming language.
Use the Command Palette when you know the action you want but do not know where it appears in a menu. On Windows, Ctrl + Shift + P opens the palette. Type part of the desired command name and inspect the available actions. The palette is a useful complement to the visible menus rather than a separate terminal. Typing a shell instruction into it is not the same as entering that instruction in PowerShell or Command Prompt.
Another useful tool is Quick Open, which typically uses Ctrl + P on Windows. It helps locate a file by its name when a workspace contains several directories. The ordinary search view is useful when you remember a word or variable name from the contents of a file rather than its name. Learn these two kinds of search with a small project before trying to navigate a large one.
Save regularly using Ctrl + S. A tab may contain unsaved modifications even though a file with the same name already exists on disk. If your program produces an old result, make sure that the latest source was saved. Keeping the terminal visible while editing helps you compare your code with the output without switching applications repeatedly. However, the terminal does not necessarily run every modification the instant you type it.
You do not need to customize every color or move every panel during your first session. An accessible font size, readable theme and visible text are worthwhile. Learn the standard layout first so that published instructions remain easier to follow, and adjust it after you understand which parts of the interface you use most often.
Step 4: Install Only The Extensions Your Project Needs
Extensions add functionality that the core editor does not provide by itself. A language extension might offer completions, diagnostics and integration with debugging tools. Other extensions provide themes, file-format support or specialized project commands. Installing too many at the beginning makes the environment harder to understand and introduces unnecessary components.
For the Python exercise, open the Extensions view. You can access it from the Activity Bar or with Ctrl + Shift + X on a Windows desktop. Search for the Python extension from Microsoft and inspect its publisher and identity before installing it. The official identifier is ms-python.python. If another listing has a similar name, do not select it merely because it appears first. Read the description and dependencies of the actual extension.
Microsoft’s Extension Marketplace documentation explains how to locate, install and manage extensions. It also describes extension permissions and publisher trust. Treat these details as part of the installation decision rather than dismissing them as a formality. Installed extensions may operate with access comparable to that of the editor itself.
A Marketplace listing does not remove the need to assess a publisher. Examine its documentation, maintenance status, declared functionality and the reason your project needs it. A popular extension might be designed for a different language or incompatible with a particular workflow. A theme, for instance, does not need to replace your interpreter or request that you run an unfamiliar external script.
The Python extension helps connect your editor with Python development features, but it does not replace the separately installed interpreter. Confirm that Python works in a normal terminal before investigating extension errors. That separation makes it easier to determine whether a failure involves the runtime, the editor or the extension configuration.
If an extension fails to install with a signature or publisher warning, investigate the actual message rather than disabling verification. Use the publisher’s legitimate documentation and authorized organizational support where applicable. A working code editor should not require you to surrender important security checks just to add a convenience feature.
Step 5: Select The Python Interpreter For The Workspace
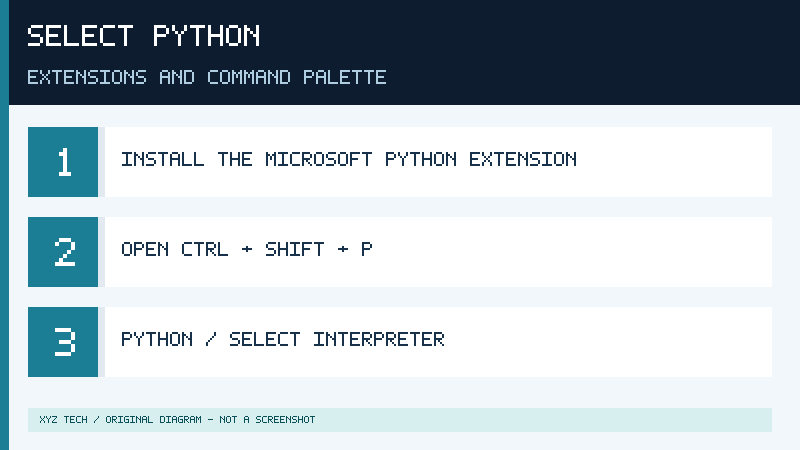
If multiple Python installations exist on a computer, the editor needs to know which one to use for the current project. A terminal may resolve the python command to one installation while the editor is configured to use another. This explains many situations where a package appears installed but a program cannot import it.
Open the Command Palette and search for Python: Select Interpreter. Review the available environments and choose the interpreter that matches your project. If you followed our Python installation guide, compare the location and version with the one you verified outside the editor. The official Python environments documentation for VS Code explains the connection between the selected environment and language tools. Selecting an interpreter is a project configuration decision, not a request to install an unrelated new copy of the language.
For a beginner project that needs additional packages, a separate virtual environment is a useful option. It provides an isolated location for that project’s dependencies. The official Python tutorial for VS Code describes its guided environment creation process. Use the command for creating a Python environment, select the appropriate environment type and select an installed base interpreter when prompted. For a standard personal Python project, a conventional venv environment is a reasonable choice.
A virtual environment can also be created from the terminal. Once you have verified that python points to the desired base interpreter, run the following command inside the practice folder if there is no existing environment with that name.
python -m venv .venvReturn to Python: Select Interpreter and select the environment’s interpreter when it appears. Open a new integrated terminal and check the Python version and executable location.
python --version
python -c "import sys; print(sys.executable)"
An existing terminal may retain different configuration from a newly opened terminal. Compare the printed executable with the environment you intended to use rather than assuming that every shell changes immediately. If you are using PowerShell and activation is not permitted by its execution policy, you can invoke the local environment executable directly without changing that policy.
.\.venv\Scripts\python.exe --versionRemember that a virtual environment separates dependencies, not security permissions. A Python program still runs with the access available to its user. Use trusted code and packages. Keep important source files and reproducible dependency information separately from the runtime environment, which is normally recreated when needed.
For this article’s small exercise, a working Python interpreter and its standard library are sufficient. Do not install extra packages until a particular project actually requires them. The goal is to establish a reliable, understandable connection between your editor and interpreter before adding complexity.
Step 6: Write And Run A Small Practice Program
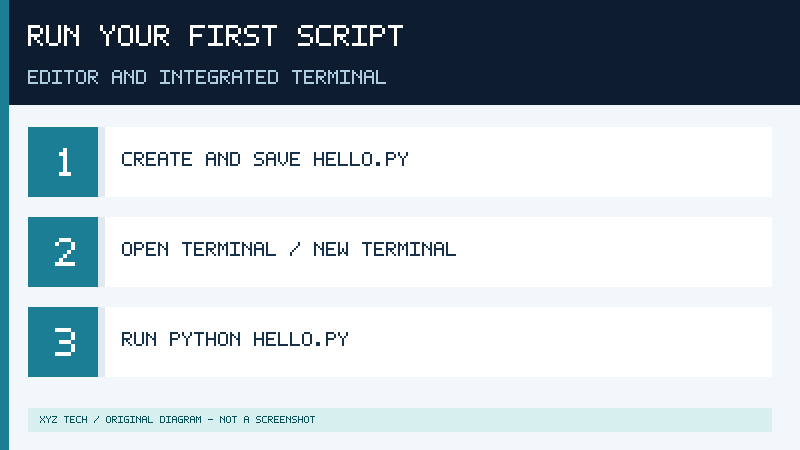
Create a file named hello.py inside the workspace. Confirm the filename in Explorer and type the following original Python example. It calculates the count and sum of three sample task durations.
items = [4, 7, 9]
print("Tasks:", len(items))
print("Total:", sum(items))
Save the file. Open Terminal, then New Terminal. A workspace terminal commonly begins in the project folder, but you should verify its current location. On Windows, the dir command can help you inspect the files available in that directory. The integrated terminal is an ordinary shell embedded in the editor, not a new programming language.
Run the script using the interpreter you selected and verified.
python hello.pyFor this example, the expected output is:
Tasks: 3
Total: 20
If your selected interpreter is the one inside a local virtual environment but your terminal uses another Python installation, use the explicit path to the intended executable. The Python extension also offers a command to run the active file in a terminal. That is a useful convenience once you understand the underlying operation. For beginners, observing the equivalent terminal command makes the relationship between the saved source and execution clearer.
Now extend the exercise by adding one instruction after the existing list definition and before either print statement.
items.append(5)Save the updated file and run it again. The expected count is four, and the expected total is twenty-five. If you still see the earlier results, check whether the file was saved and whether the terminal is running the copy inside your current workspace.
The two calculations in this exercise were checked with a local Python interpreter during preparation. The numerical results do not depend on VS Code’s appearance or on a particular Windows application version.
If you see an error, read its final line and identify the filename and line number where appropriate. A syntax error can result from an instruction that was typed incorrectly. A file-not-found message can result from running the command in another folder. The appearance of an error is part of learning how a development environment works; it is not evidence that the entire installation is defective. Change one factor at a time and test again so that you understand what corrected the problem.
Step 7: Understand Debugging, Settings And Source Control
Printing a result is a good first diagnostic technique. Debugging tools become useful when a program performs more steps than you can conveniently observe through its ordinary output. A debugger can pause execution so that you can inspect variables and understand how the program arrived at a particular result.
For a small Python file in a trusted workspace with the appropriate Python debugging support installed, you can begin with a breakpoint near the first print instruction. Use the editor’s breakpoint control beside the line numbers, then start a Python file debugging session. Choose the appropriate configuration if the editor asks for one. Observe the variable items and the execution position when the debugger pauses. Resume or step through the program using the available debugging controls.
Debugging does not automatically correct a program or guarantee its behavior for every possible input. It helps examine what is happening in a particular run. The list example is deliberately small so that you can predict the result before inspecting it. That approach remains valuable in larger programs: form an expectation, run a controlled test, and compare the observed result with the expectation.
VS Code also supports settings at different scopes. A user setting may affect many projects, whereas a workspace setting applies to a particular project. If you decide to change formatting preferences or other behavior, review the scope before making the change. A preference appropriate for one language or team may not be desirable across all projects.
Version control is a separate topic worth learning after the initial setup. Git enables recording changes in a repository, while VS Code provides an interface that can integrate with Git tools when they are installed and configured. Saving a file is not the same as committing it to a repository, and a local commit is not the same as uploading it to a remote hosting service. You can complete the exercise in this article without Git, an online account or a remote repository.
Keep private information such as passwords, API keys and access tokens out of source files whenever possible. Our API fundamentals article explains why software interfaces may involve authentication and sensitive credentials. If a future project uses a service key, follow its supported secret-handling practices rather than placing the key into an example you intend to share.
Develop the habit of making deliberate modifications, saving your work and observing the outcome. Those habits are more important at the beginning than the number of editor features you have configured.
Troubleshoot The Most Common Beginner Setup Problems
When the editor opens but a terminal command fails, determine which component is failing. A missing code command concerns how the shell discovers VS Code. A missing python command concerns runtime installation or command discovery. A program that begins running but reports an error concerns its source or execution environment. Distinguishing these situations can prevent an unnecessary reinstall.
If the editor does not offer Python commands, check that the correct extension is enabled and the active file is recognized as Python. Confirm that the workspace is trusted when you intend to execute your own reviewed code. Extensions and terminal features can be restricted for security reasons. Do not treat Restricted Mode as an error that must be disabled for every folder you download.
When imports fail, compare the interpreter shown by the editor with the executable and pip information printed by the terminal. Use the intended interpreter when installing genuinely required dependencies. A package installed in another environment does not automatically become available in the one running your script. This is especially relevant on machines with several Python installations.
If the terminal shows a different directory, verify where the workspace opened and where your file is saved. Open the intended folder instead of continually copying a script into arbitrary locations. If the code appears correct but the output seems old, save the active file before executing it. Check the actual path used by the command.
| Symptom | First useful check |
|---|---|
| code command unavailable | Open a fresh terminal and review documented PATH setup |
| Python commands absent from palette | Check the Python extension and workspace configuration |
| Unexpected interpreter version | Compare selection against sys.executable |
| Cannot find hello.py | Check the current directory and filename |
| Output does not reflect edits | Save the active file and verify the script path |
| Extension installation warning | Verify publisher and investigate the actual warning |
If the entire editor freezes or unrelated Windows programs struggle to start, assess the broader system. Our Windows 11 performance guide discusses resource and operating system conditions. If the fault occurs only when one nonessential extension is enabled, compare the behavior with that extension disabled, where authorized. Preserve essential project files before attempting any disruptive repair.
Your environment is ready for basic programming when you can open the intended folder, save a source file, select the correct interpreter and obtain the expected result. Keep this working foundation small, then add tools when their purpose is clear. A reproducible starting point makes later tutorials and troubleshooting considerably easier.
Sources And Further Reading
- Visual Studio Code: Windows setup
- Visual Studio Code: Editor tutorial
- Visual Studio Code: Extension Marketplace
- Visual Studio Code: Workspace Trust
- Visual Studio Code: Python tutorial
- Visual Studio Code: Python environments
Frequently Asked Questions
Is Visual Studio Code Free To Use?
Yes, the desktop editor is available without a purchase. Separate optional services and extensions can have their own terms.
Does VS Code Come With Python Installed?
No, the Python runtime is a separate installation. The Microsoft Python extension provides development integration rather than the runtime itself.
How Do I Open A Project Folder?
Choose File and Open Folder, then select your project directory. Alternatively, use code . from the desired folder if the command is available.
Do I Need Git Or An AI Assistant To Learn VS Code?
No, you can edit and run the local Python practice script without either of those optional tools.
Why Does My Code Run With The Wrong Python Version?
Check the selected interpreter and your terminal’s executable path. Different environments can coexist on the same computer.