Git Vs GitHub: The Essential Difference
Git and GitHub solve related problems, but they are not two names for the same application. Git is a distributed version control system that records the development of a project’s files. GitHub is an online software development platform that can host Git repositories and provide tools for sharing, reviewing and coordinating work. Git is useful even when you have never created a GitHub account.
Consider a student learning to program. On Monday, the student writes a small script. On Tuesday, the student adds a feature. On Wednesday, an experiment introduces an error. Without a record of earlier versions, the student might create several copies of the script with names such as final, final-new and final-corrected. Those names communicate little about what changed or why. Git allows the student to build an organized sequence of recorded changes instead.
Now imagine that the student wants another person to review a proposed improvement. The project could be shared through an approved remote Git server. GitHub provides one such hosting platform with a web interface where the other person can inspect the project and discuss proposed modifications. The local history and the online discussion are connected, but they have different responsibilities.
GitHub is not necessary to use Git, and Git is not dependent on one particular hosting provider. Other services and privately operated Git servers can also exchange repository data. Conversely, a user can perform several repository-related tasks through GitHub’s browser interface without first installing a command-line Git client. The choice depends on the work being performed.
The official GitHub introduction explains the relationship between local version control and its collaborative platform. For a beginner, the most useful approach is to learn the underlying Git concepts first and then see how a remote host extends the workflow.
In the exercises below, we will use an ordinary local folder and a small text document. No existing repository, GitHub subscription or real application credentials are required for the local portion. This is intentional: the simplest example makes it easier to identify which activities happen on your own device and which require an online service.
How A Git Repository Records A Project
A Git repository consists of project history and the information Git needs to manage it. In a typical local working repository, the files you edit exist alongside a hidden .git directory. This directory contains repository data. Do not manually remove it from an existing project merely because you cannot recognize the files inside it. Removing it can discard the local version control history.
The working tree is the collection of checked-out files that you can edit. The staging area is where you prepare the contents you want included in the next recorded version. A commit captures the selected project state and associates it with descriptive information, such as the commit message and author identity. Commits have identifiers that distinguish them from one another. A branch provides a movable reference to a line of development.
An ordinary file save and a Git commit are different events. For example, you might save a text document after correcting a spelling error and later add another paragraph. Both changes can exist on your disk before you record either of them with Git. If you deliberately stage the spelling correction before adding the paragraph, the staging area can still hold the earlier version until you update it. That gives you control over the contents of a particular commit.
The staging area is especially useful when working on several independent improvements. Suppose you correct the title in a README file and change a configuration file for an unrelated experiment. You can choose to record only the README improvement first. A later commit can record the separate configuration change when it is ready. The project history then explains two specific decisions instead of grouping them together without a clear reason.
Git generally works well with text-based source files because differences can be inspected directly. It can also track many other file types, but that does not mean it is the ideal storage mechanism for every file you own. Large generated files, temporary build results and private data may be unsuitable for inclusion in a repository. The project’s intended workflow should determine which materials are recorded.
A local commit also does not automatically provide an independent backup. If the only repository copy and working files are on a failing drive, both may be lost. Important projects deserve an appropriate backup strategy, including relevant materials that are not tracked by Git. Our computer fundamentals guide explains the distinction between software, memory and persistent storage; the same distinction matters when protecting source files.
Compare Git And GitHub Before Choosing A Workflow
The following comparison separates version control features from the services provided by a common hosting platform. Online plan features, collaboration limits and administrative policies can vary. The table focuses on basic concepts rather than presenting a subscription recommendation.
| Aspect | Git | GitHub |
|---|---|---|
| Primary purpose | Version control | Repository hosting and development collaboration |
| Local history | Records commits in a local repository | Hosts history made available to the platform |
| Internet access | Not required for ordinary local commits | Normally required to interact with hosted repositories |
| Account | Not required for an ordinary local repository | Required for account-based repository management |
| Branches | Creates and manages lines of development | Provides additional ways to inspect and collaborate on branches |
| Reviews | Provides differences and merge operations | Provides pull requests, review discussions and related controls |
A personal practice project can begin entirely offline. You can create a series of commits, inspect earlier changes and experiment on a separate branch. When the project becomes suitable for sharing, you can decide whether to connect it to an approved remote. A team project may instead begin by cloning a repository that the team has already prepared.
If you work with a commercial codebase, the choice of hosting provider may be governed by an employer. A useful technical tool is not automatically an approved destination for confidential intellectual property. A private repository can offer access controls, but it does not replace organizational authorization or appropriate data handling.
A public project has another consideration: permission to use its material. Visibility on a website does not automatically give every visitor permission to redistribute, modify or commercially exploit it. Review the applicable license and contributor instructions before reusing somebody else’s code. If you are publishing your own work, consider how others should be permitted to use it.
These distinctions help you decide what to learn next. To understand changes and local history, begin with Git. To inspect a collaborative project, learn the hosting interface and its contribution rules. To share your own project, understand both the local repository and the intended remote before transmitting anything.
Step 1: Install Git And Prepare A Practice Folder
Windows users can download Git for Windows from the official Git installation page. Choose the appropriate maintained build for your computer and follow the supported installer. Our safe Windows software installation guide covers the importance of selecting a trusted download and reading software installation prompts. On a managed device, use the approved distribution channel.
Open a fresh terminal after installation. You can use a compatible shell such as PowerShell or Git Bash. Enter the following command to check that Git can be located:
git --versionThe version varies with your installation. The examples here assume a reasonably modern Git version with support for initializing a named branch and using the switch command. If your version lacks those features, consult the official documentation or obtain an appropriate supported update through your normal software-management process.
Create a new folder named git-practice in a suitable user-controlled location. If a folder with that name already exists, choose another name rather than overwriting your work. Open the folder in a text editor or in Visual Studio Code, and start a terminal in the folder. The beginner VS Code guide explains how to open a project folder and its integrated terminal. You may also work with another editor.
Initialize the empty project with the following command:
git init -b mainThe option specifies the initial branch name for this exercise. Naming it explicitly helps the later examples work consistently. An existing project may use another branch name, so do not assume that every repository begins with main.
Git associates commits with author information. For this disposable practice project, configure a demonstration identity only in this repository. The fake address below is intentionally not a working email address.
git config user.name "Example Learner"
git config user.email "learner@example.invalid"
For real projects, use the name and appropriate email identity that you intend to associate with your work. Commit metadata may be visible to others when you share history. GitHub’s account settings provide options for protecting an email address when contributing to hosted repositories. Setting a local author name does not sign you into a hosting account.
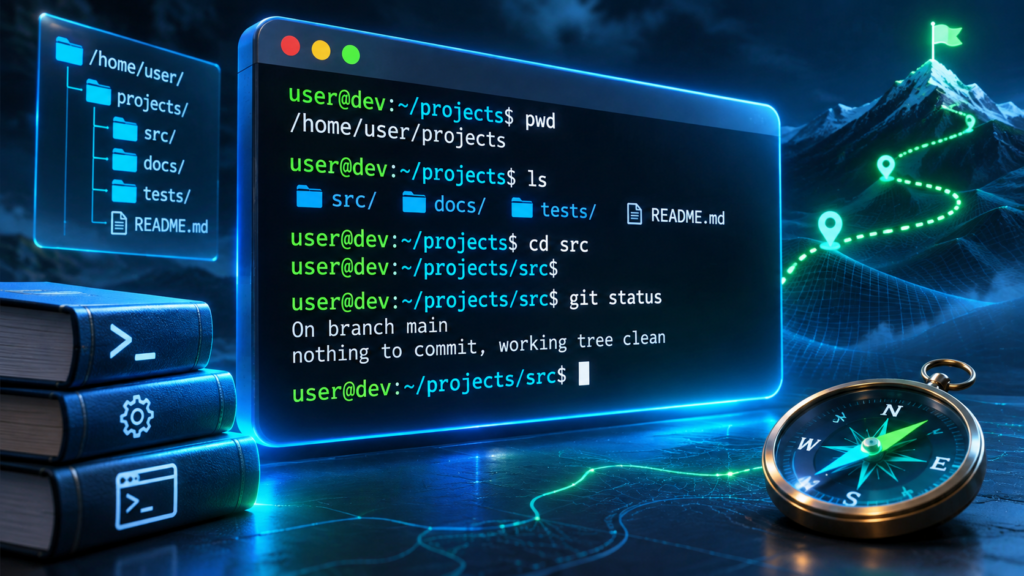
Run git status to inspect your new repository. If the command reports that the current folder is not a repository, verify your directory before trying initialization again. The practice project should be a small dedicated folder, not your entire home directory. Initializing a repository in an overly broad location can make it easier to include files you never intended to share. For more background on navigating a terminal, see our command-line fundamentals article.
Step 2: Make A First Commit And Inspect Changes
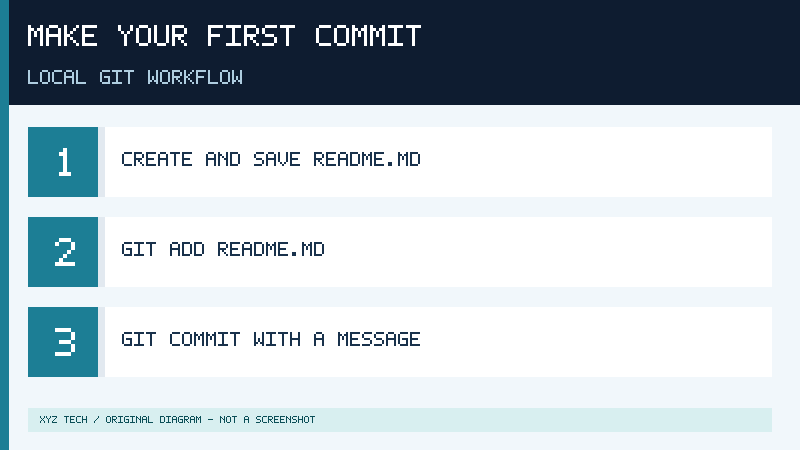
In the new practice folder, create a plain text file called README.md using your editor. Add a simple heading and save it. The .md extension indicates Markdown, a plain text format commonly used for project documentation.
# Git practiceReturn to the terminal and run git status. The new file should appear as an untracked item. It exists in the working folder, but no Git commit has recorded it yet. This is a useful first observation because it demonstrates that creating a file does not automatically include it in project history.
Stage the particular file, then inspect the proposed change before committing.
git add README.md
git status
git diff --staged
The staged difference should show the new file and its content. Inspect the output to confirm that it contains only information suitable for this practice repository. In a larger project, this habit can help you notice accidentally included configuration or changes belonging to a different task.
Create your first recorded project version:
git commit -m "Add practice README"
git log --oneline -1
Your actual commit identifier will differ from those produced on another machine. Check the descriptive message rather than expecting a particular identifier to appear. If Git reports missing author information, verify the configuration you made in the intended practice directory.
The official Pro Git chapter on recording changes provides a more detailed account of tracked and untracked files. In this simple exercise, the essential result is the ability to identify three different states: saved but not yet staged, prepared for the next commit, and already included in a commit.
To explore the difference further, add a new sentence to README.md and save it. Run git diff before staging the change. You should be able to inspect the unstaged difference. If you decide the change is appropriate, run git add README.md again. The staged comparison now describes the version you have prepared for your next commit.
If you accidentally stage a harmless file in a repository that already has a commit, you can remove the file from the staged changes without discarding its working copy using git restore –staged followed by the specific filename. Verify the result with git status. Do not use similarly named commands that discard working changes unless you understand their effects and have protected any important work.
The exercise demonstrates why a commit message should tell a reader what was intentionally changed. A message such as Add practice README is more useful than an arbitrary word or a series of numbers. When a project has hundreds of recorded versions, clear descriptions make it easier to locate the historical change you are investigating.
Step 3: Experiment On A Branch And Merge The Result
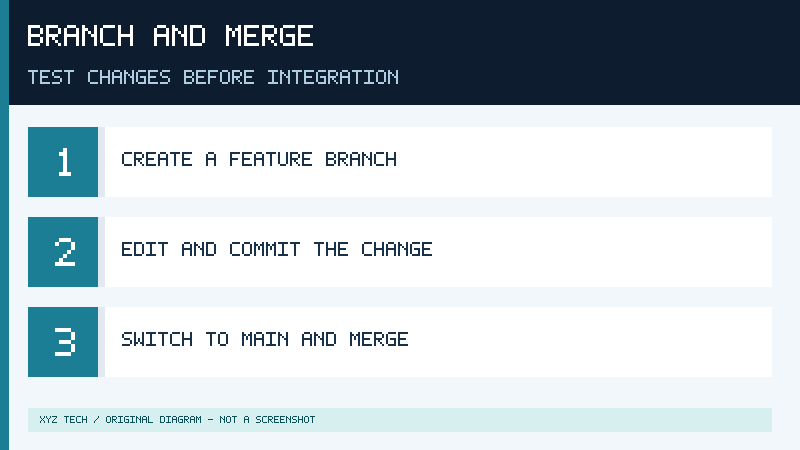
A branch allows you to separate a development task from another line of work. In the practice repository, main is the initial branch. You can create a separate branch for an improvement, record the improvement and decide whether it should become part of main. The same idea scales to a real project with independent bug fixes and feature development.
If you made extra unstaged or staged changes during the first exercise, first save a copy of any work you want to keep. For the following demonstration, begin with a clean working tree containing the first commit. If necessary, use your editor to restore the simple original README content and stage or unstage the intended changes appropriately; do not discard unrelated work. Confirm the repository state with git status.
Create and switch to a new branch:
git switch -c improve-readme
git branch --show-current
The output of the second command should identify improve-readme. Edit README.md and add the following sentence beneath the original heading:
Learn one Git command at a time.Save the document and record the improvement on the new branch.
git add README.md
git diff --staged
git commit -m "Explain practice goal"
The improvement now has its own recorded version. Switch back to main and inspect the document before combining the development branches.
git switch main
git merge --ff-only improve-readme
git log --oneline -2
git status
In the deliberately simple example, main has not developed independently since the branch was created. A fast-forward merge is therefore possible. The project history should contain both commit messages, and the working tree should be clean after the operation.
The –ff-only option asks Git to stop if this particular type of merge is not possible. In real collaborative work, separate branches can contain overlapping changes. A merge may require integration or conflict resolution. If Git reports that the operation cannot proceed as intended, inspect the history and understand the situation instead of forcing the operation.
A conflict is not necessarily a failure of the version control system. Two people might have changed the same sentence independently, and the system may need a human decision about the desired final wording. Review both contributions, discuss ambiguous requirements and test the merged result. Do not assume that choosing one side indiscriminately preserves all necessary behavior.
The local practice commands were executed in an isolated test repository using Git 2.47.3 during the preparation of this guide. The test confirmed two commits, a branch switch, a fast-forward merge, a clean working tree and subsequent push and clone operations using an isolated local remote. For Windows installation and GitHub interfaces, follow their official documentation.
Step 4: Understand Remotes, Pushes, Clones And Pulls
A remote is a repository location known to your local Git configuration. That location can be on another computer, on a hosting service or even in another directory used for local testing. The remote relationship allows compatible repositories to exchange history without requiring you to distribute project folders manually after each change.
Cloning creates a local copy of a repository with the history and configuration needed for ordinary development. A clone is useful when you want to begin working from an existing shared project rather than create unrelated history. However, a clone does not automatically include every service attachment, issue discussion, secret, deployment setting or other platform-specific resource. The remote Git repository and the hosting platform have different scopes.
Pushing sends the relevant commits to a remote repository according to your permissions and the selected reference. It does not simply upload whatever is visible in your active editor. Unsaved text and ordinary unstaged changes are not included as new committed history. If a colleague cannot see your work after a push, check whether you saved, staged, committed and pushed it to the correct branch and remote.
Fetching obtains remote information and updates relevant remote-tracking references without automatically integrating it into your current working branch. Pulling combines fetching with an integration strategy. The precise behavior can depend on configuration and command options. Beginners should inspect their working state and understand their team’s procedure before pulling into a branch that already contains important local changes.
The remote name origin is a common convention, not a universal requirement. There may be several remote names corresponding to team or personal repositories. The command git remote -v helps you inspect the configured addresses. If a URL contains an embedded credential, treat the output as sensitive and correct the configuration through the appropriate secure process rather than sharing it in a public support request.
GitHub’s Git basics documentation covers remotes, local configuration and authentication. Much of the remote workflow can also be practiced locally. In the test accompanying this article, an empty local bare repository initialized with main served as the remote; the practice project pushed its history there, and a separate clone confirmed the most recent commit message. No project content was transmitted to an external service during that test.
This is an important conceptual result: Git’s exchange of repository history is not a feature exclusive to GitHub. GitHub makes repository hosting accessible and adds collaboration services, but the version control operations have a wider range of uses.
Step 5: Connect A Safe Practice Repository To GitHub
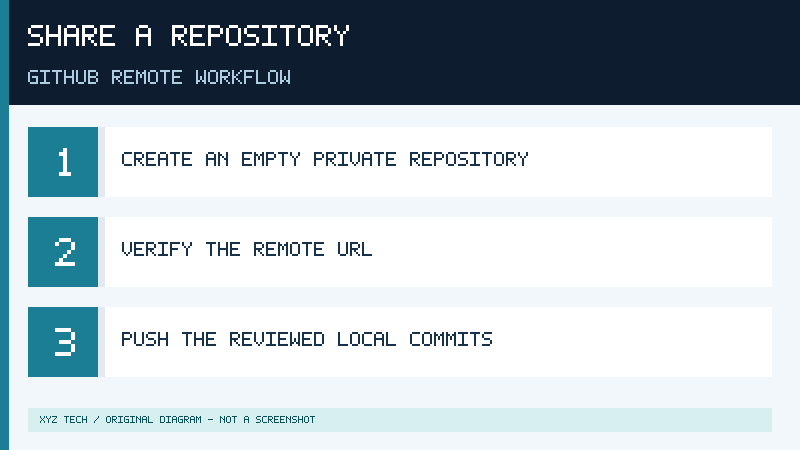
If you want to extend the local exercise to an online platform, create an account through the legitimate GitHub website or use an authorized existing account. Protect that account with suitable authentication. Our two-factor authentication guide explains why account protection matters for services that contain valuable work.
Create an empty private repository for the harmless practice project if you intend to keep its contents private. Do not initialize the remote with a new README, license or ignore file for this particular example, since the local repository already contains its own history. Starting with a separate set of remote commits would change the integration task. Use the remote URL shown by the official repository setup interface.
Before connecting it, inspect the project contents and its entire recorded history. A private repository is not an appropriate destination for information you lack permission to transfer. This exercise needs only the sample README text and demonstration identity.
In the following commands, replace the example URL with the actual HTTPS URL of the repository you just created. The shown owner and repository names are placeholders.
git remote add origin https://github.com/EXAMPLE-OWNER/git-practice.git
git remote -v
git push -u origin main
The final command requests that the main branch be pushed and establishes its upstream relationship when successful. Follow the supported GitHub authentication process, such as an appropriate credential manager or an approved SSH configuration. Do not paste access tokens into public code, screenshots or support messages. GitHub’s guide to importing local code documents the connection and initial push workflow.
If origin already exists, stop and inspect it before adding or changing a remote. You could already be connected to another repository, including a production project. If the remote contains independent history, do not use a force push merely to overcome a rejected operation. Understand the branch history and follow the correct integration process.
After an authorized successful push, visit your repository through the legitimate website. Check the displayed branch and commit messages and verify that the README contains only the intended exercise. Review the repository visibility and access settings. Do not make a repository public merely to test whether a push succeeded.
For a later collaboration exercise, a separate feature branch can be pushed to the authorized remote. A pull request can then propose integrating that branch into the target branch. GitHub’s pull request documentation describes the review process. A pull request is not the same as running git pull: it is a proposal and discussion mechanism for changes hosted on the platform. Reviewers can inspect the proposal and request improvements before an authorized merge.
An actual online contribution should follow the repository’s ownership and review rules. The local exercise is complete without performing an online push. No real remote GitHub repository was created for this article.
Protect Secrets, Files And Repository History
Source code often lives alongside material that should not be shared. A development folder might contain local environment configuration, database exports, temporary logs or personal notes. An accidental commit can preserve sensitive information even after the latest working copy has been cleaned up. Consider what belongs in the repository before creating a commit, not only just before pushing it.
A .gitignore file can describe intentionally untracked paths that should normally be omitted from Git operations. For example, a small Python project might include the following patterns to omit its local environment configuration, virtual environment and cached bytecode files:
.env
.venv/
__pycache__/
These patterns are examples rather than a complete security policy. The official gitignore reference explains that ignored paths already tracked by Git are not automatically removed from tracking. A rule cannot erase information from an earlier commit. Check which files Git actually tracks and inspect proposed changes before recording them.
The distinction is especially important for credentials. A project that communicates with an online service may need an API key or access token. Our API fundamentals article explains why authorization is part of many software interfaces. Use the service’s documented secret-handling process rather than including a working credential in your source file.
If a real credential has already been exposed in a repository, revoke or rotate it through the issuing service and notify the relevant security or repository administrator. Removing it from the latest file is not enough. GitHub’s sensitive data removal guidance explains why history changes require coordination and why other repository copies may retain exposed material. Avoid giving an unfamiliar cleanup tool unrestricted access to the complete project.
Review additional risks when using collaborative automation. A repository may contain workflows that execute tasks when changes are pushed or proposed. Those workflows should be reviewed and appropriately restricted, particularly when a project accepts outside contributions. A successful automated check does not prove that all project code is safe.
Keep an independent backup of material you need to recover. Decide which project files, local data, release artifacts and collaboration records require protection. Git is valuable for recording deliberate changes, but it should be one component of a broader data protection strategy. A good version control workflow makes it easier to reconstruct development decisions without exposing the data that never belonged in the public record.
Which Tool Should You Learn First?
Begin with Git if your immediate goal is to understand how changes are recorded. Create a small local repository and practice checking status, preparing selected changes and making meaningful commits. Then create a branch and merge a harmless improvement. These activities teach the version control concepts without the distractions of online account configuration.
When you can explain what a commit contains and why your current branch matters, learn the relevant features of GitHub or another approved host. Inspect repository files, check the history of a branch and read a sample pull request. Compare the proposed changes with the target branch and consider which checks would establish that the change is correct.
Develop the habit of confirming your intended repository, branch and remote before publishing. It is better to spend a few extra moments checking a destination than to submit confidential material to the wrong host. In team work, preserve the project’s review conventions and do not bypass protected branches or rewrite shared history without appropriate coordination.
You do not have to memorize every Git command to use the tool effectively. A small set of dependable commands and a clear mental model provides enough foundation for productive learning. Whenever you encounter a new operation, understand whether it changes your working files, the staging area, recorded history or a remote reference. That distinction will make complex situations less confusing.
The simplest answer remains the most useful one: Git manages version history, while GitHub hosts repositories and supports online collaboration. They work well together, but each has a separate purpose.
Sources And Further Reading
- GitHub Docs: What is GitHub?
- Git: Install for Windows
- Pro Git: Recording Changes to the Repository
- GitHub Docs: Git basics
- GitHub Docs: Adding locally hosted code to GitHub
- GitHub Docs: About pull requests
- Git: gitignore documentation
- GitHub Docs: Removing sensitive data from a repository
Frequently Asked Questions
Are Git And GitHub The Same Thing?
No, Git is a version control system, while GitHub is a platform for hosting repositories and collaborating online.
Can I Use Git Without GitHub?
Yes, you can create local repositories, record commits and manage branches without a GitHub account or internet connection.
Does A Git Commit Automatically Upload Files?
No, a local commit records staged project content in the repository. Sending it to a hosted remote requires a separate operation.
What Is The Difference Between A Pull And A Pull Request?
A Git pull obtains and integrates remote changes, while a pull request proposes and discusses an integration through a hosting platform.
Does A Private GitHub Repository Make Secrets Safe To Commit?
No, sensitive credentials should remain outside repository history. If a credential is exposed, revoke or rotate it and follow the appropriate recovery guidance.