
A black camera preview can interrupt everything from scanning documents to talking with family. Instead of erasing your phone or assuming the camera is broken, use this guide to narrow the problem down with a few controlled tests.
Identify Which Kind Of Black Screen You Have
If the Camera app opens normally but its live preview is black, the phone may be having difficulty delivering an image from its camera to the app. A completely black iPhone display, a missing Camera icon and a black preview inside one messaging app are different symptoms. Before attempting any repair, determine which description matches your problem.
Try returning to the Home Screen, opening Photos and looking at a photograph you previously saved. If those screens look normal, the display itself is working at least in those circumstances. Open Apple’s built-in Camera app and note whether its controls and shutter button appear over an empty view. Check whether tapping the shutter produces a usable saved image. A preview that fails while the saved image remains visible is different from a complete inability to capture a picture.
If the entire device is unresponsive or you cannot see any apps, start with our iPhone Power And Startup Checks instead. The troubleshooting below assumes that you can use the iPhone’s display and controls. If the issue started after a severe drop, liquid exposure, or visible damage, prioritize assessment rather than repeated attempts to activate the camera.
Remove Cases, Covers And Magnetic Accessories
Take the phone out of any removable case and detach lens covers, magnetic mounts and clip-on lenses. Examine the camera area in good light. Try the Camera app again while holding the phone normally, keeping your hand away from the lenses. If a cover has shifted across the camera, correcting that obstruction may be enough to restore a usable image.
Magnetic accessories near the rear cameras can interfere with autofocus or optical stabilization on some models. Apple’s explanation of magnetic interference describes how strong magnetic fields affect the lens-position sensors. This is a reason to test without suspect attachments, not proof that a magnetic case necessarily causes a black preview.
If the glass appears dirty rather than broken, wipe its exterior gently with a clean microfiber cloth. Do not pry at a lens cover that is part of the phone, use abrasive substances, or introduce liquid into the camera opening. A smear normally affects image clarity or contrast; it does not by itself establish that an electronic camera has stopped functioning.
Compare Front, Rear And Flashlight Functions
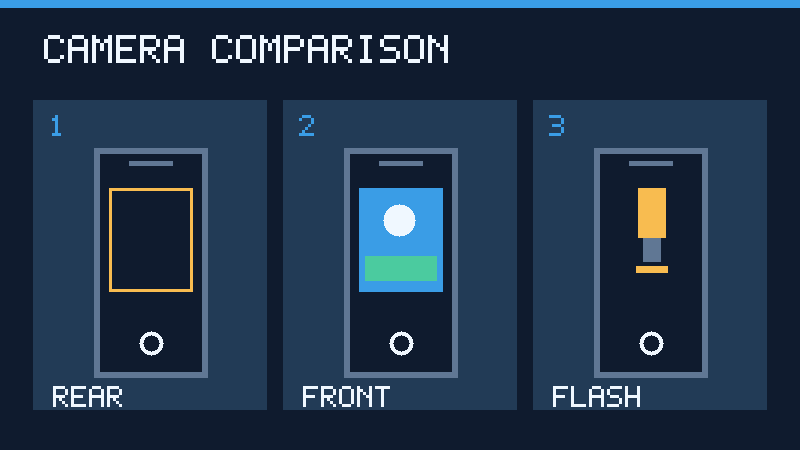
Test the camera in normal indoor lighting using Apple’s own Camera application. Choose a scene with obvious detail, such as a book on a desk. Keep the scene and lighting reasonably consistent throughout the comparison.
- Open Camera and select Photo mode. Examine the rear-camera preview and try taking one picture.
- Use the camera-switch control to select the front camera. Repeat the preview and capture test.
- Check both saved images in Photos. If appropriate, repeat the comparison in Video mode.
- Close the Camera app and use the flashlight control in Control Center. Observe whether the LED illuminates.
On iPhones with multiple rear lenses, testing the available zoom settings in bright conditions may provide additional clues. However, the Camera app can select different physical cameras or digital crops according to the scene. Therefore, a particular zoom button does not reliably identify a failed physical module in every situation.
Apple’s camera and flash troubleshooting guide recommends testing the cameras independently and checking the torch. If one camera works and another does not, write down the difference. The result narrows the investigation, but it cannot establish whether a sensor, connector, software component or another part is responsible.
Distinguish A Flashlight Failure From Automatic Flash Behavior
The LED may remain off during ordinary photographs simply because the selected flash setting does not require it. That is why the independent flashlight test matters. Exit Camera, open Control Center and select the flashlight control. On Face ID models, Control Center generally opens with a downward gesture from the upper-right area. On older Home button models, it generally opens by swiping upward from the bottom edge.
If the flashlight works but the photographic flash does not fire under suitable conditions, review the flash setting and the selected photographic mode. If the flashlight control is unavailable or the LED never illuminates, check whether the device is hot and whether the same problem occurs following a normal restart. A persistent failure affecting both camera and flash merits further investigation.
Do not shine the flashlight directly into someone’s eyes or leave the LED on unnecessarily during the test. A short check is enough. Avoid inferring a specific internal component failure solely from the flashlight’s behavior.
Check Whether Only One Application Is Affected
If the Camera app can capture clear images but a video calling or messaging app displays black video, the first priority is the affected application. Check its in-call camera toggle, make sure you are not deliberately sharing a blank or disabled video feed, and try switching cameras within that app if it offers the option.
Review camera access through Settings, Privacy & Security, and Camera. Find the affected app and enable access only if you trust it and intend to use its camera functionality. If the app is not listed, it may not have requested access so far. Open the application’s camera feature and follow its legitimate permission prompt. Reopen the app and repeat your test.
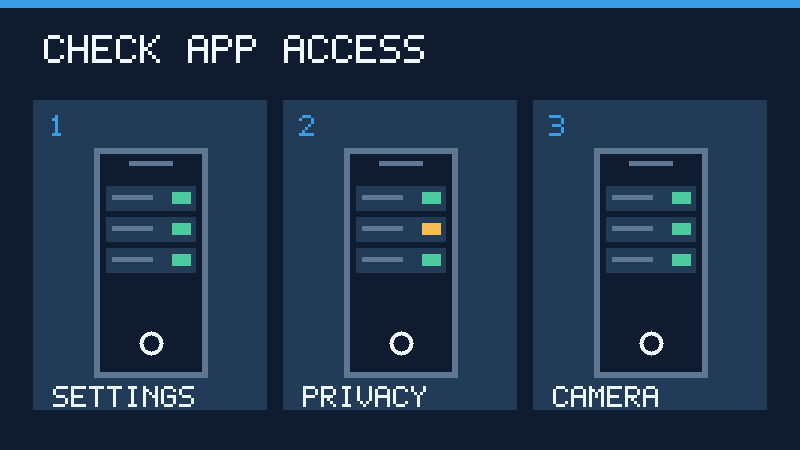
Apple’s hardware privacy documentation explains app permissions and the camera-use indicator. A green indicator shows camera access, but it does not guarantee that another participant receives usable video. Connectivity, video processing and application errors can still affect the result.
If the affected app has important local conversations or recordings, check its backup arrangements before deleting it. Try its supported update and help options first. For problems that also affect call audio, use our related iPhone Microphone Troubleshooting Guide to separate audio capture from the camera issue.
Investigate A Missing Or Restricted Camera App
A missing Camera icon does not mean you have a black camera preview. Search for Camera using the phone’s app search and inspect the App Library where available. If it is still missing or its controls are restricted, check whether Screen Time has limited built-in features. Apple documents the ability to restrict Camera in its Screen Time feature controls.
Only change restrictions you set and are authorized to manage. A school or employer-owned phone may use a managed configuration that intentionally limits the camera. Ask the administrator rather than attempting to circumvent restrictions. Similarly, do not remove a child’s restrictions without the appropriate parental authorization.
If you can open Apple’s Camera app but only one particular camera mode displays black, return to ordinary Photo mode before escalating the problem. Note whether the failure occurs immediately or only after selecting a mode. This distinction is useful when describing the condition to Apple Support or an application developer.
Allow An Overheated iPhone To Cool Naturally
Temperature can temporarily limit camera capability. A lengthy video session in direct sunlight, navigation in a hot vehicle or charging while running demanding applications can increase the device’s internal temperature. Apple explains in its temperature management guidance that protective measures can temporarily disable the flash or other camera functions.
If there is a temperature warning, stop the active task, switch the phone off as appropriate, and relocate it away from direct sunlight. Let it cool naturally before using the camera again. Do not place it in a refrigerator or freezer, or try to cool it with water.
If there is no temperature warning but the phone feels warm after demanding use, a normal cooling period followed by the same camera test can help distinguish temporary thermal protection from a persistent issue. Abnormal heat, swelling, smoke or a deformed enclosure are reasons to stop use and obtain qualified assistance, not to continue diagnostic photography.
Our iPhone Battery Drain Guide provides related context on heat and demanding workloads. Temperature-related behavior and battery wear should not be confused with definite camera hardware failure.
Restart The Phone And Check For Supported Software Updates
If the phone is otherwise functioning normally, close the affected camera application and reopen it. A normal restart is reasonable when the issue persists. Save open work, then shut the phone down using its normal power-off controls. Settings, General, Shut Down is an alternative where available. Restart the device and repeat the same rear, front and flashlight checks.
For the physical button method, consult Apple’s iPhone restart instructions, which distinguish devices with Face ID from earlier designs. A normal restart is not a factory reset. If the entire phone is frozen, use the correct model-specific force restart rather than repeatedly pressing unrelated buttons.
Check for an available compatible iOS update under Settings, General, Software Update. First confirm that important data is backed up. Use reliable Wi-Fi and power, and follow the instructions appropriate to the installed release. Apple’s software update guidance covers preparation and update availability.
After the phone restarts, repeat the tests before changing other settings. A software update may resolve some software faults, but cannot repair a physically damaged component. Avoid unofficial firmware, configuration profiles or applications promising a universal camera fix.
Use Apple Diagnostics Where Your Device Supports It
For a black camera display that remains after these reversible checks, consult the current Apple troubleshooting instructions. As of the November 2026 review, Apple also describes an iOS Diagnostics route through Recovery Assistant for supported devices. This is an additional diagnostic option, not a requirement for every iPhone and not an instruction to reset your phone.
Follow the official instructions for your actual model and software version if the diagnostic option is available. Record any reported issue and use the service recommendation that accompanies it. If you cannot access the documented diagnostic menu, do not assume that your phone is defective merely because that feature is unavailable. The supported diagnostic path can vary.
Do not confuse device diagnostics with recovery mode restoration. A restore can erase the device. A persistent camera problem alone is not a reason to deliberately erase an unbacked-up phone. If you need to preserve or recover backed-up data, see How To Restore iPhone From Computer Backup.
Use This Decision Table To Choose The Next Step
| What You Observe | What To Investigate | What To Do Next |
|---|---|---|
| Only a third-party app shows black video | App access, app behavior or call connection | Check permissions and compare with the built-in Camera app. |
| Black preview, but saved photos look normal | Preview or application rendering | Restart and compare other modes and apps. |
| Front works, rear remains black | Rear-camera-specific capture problem | Remove attachments, repeat controlled tests and arrange service if persistent. |
| Both cameras fail and the torch is unavailable | Temperature, software or hardware issue | Check temperature, restart and consult official diagnostics or service. |
| Camera returns after cooling | Possible thermal protection | Monitor normal use without excessive heat. |
| Camera icon is missing | App location or authorized restrictions | Check app search, Screen Time or the device administrator. |
| Failure follows an impact or liquid exposure | Possible physical damage | Protect the device and seek professional assessment. |
These observations are not conclusive hardware diagnoses. The same symptom can have more than one explanation. Change one factor at a time and repeat the same capture test so the results remain useful.
Know When Camera Repair Is Appropriate
A repair assessment is appropriate when either camera consistently fails in the built-in application despite reasonable accessory, temperature and software checks. Contact Apple or a trusted repair provider if failure began after damage, or if Apple’s supported diagnostics report a problem. Avoid attempting to reseat an internal camera connector without the necessary repair skills and equipment.
If the problem started after a previous repair, tell the technician when it began and which camera functions are affected. Apple’s camera parts and repair guidance describes the importance of proper installation and compatibility. Where supported, parts and service information on the iPhone may provide additional context, but a service-history entry alone does not diagnose a black preview.
Before service, back up accessible content and follow the repair provider’s official preparation instructions. Keep account credentials private. Record the device model, iOS version, recent damage or repair history, and the results of the three camera and flashlight checks. This is much more useful than saying only that the camera does not work.
After a repair, test both camera orientations, ordinary photos, video and the flashlight, as appropriate for the model. Confirm that the repaired function behaves consistently before resuming important photography.
Frequently Asked Questions
Why Is My iPhone Camera Screen Black But Everything Else Works?
The problem may be specific to camera capture, its preview, an application or the camera hardware. Compare the built-in Camera app, both camera orientations and a saved image before deciding how to proceed.
Why Is My Rear Camera Black But The Front Camera Works?
A rear-camera-specific fault or capture configuration is possible. Remove accessories and repeat the built-in camera tests after a normal restart. Seek assessment if the difference persists.
Can A Case Or Magnetic Mount Cause Camera Problems?
Yes, a case can obstruct a lens, and certain strong magnets can interfere with stabilization or focusing. Test the phone without those accessories to determine whether they contribute.
Why Are Both My Camera And Flashlight Not Working?
Temporary heat protection, a software issue or hardware failure can affect these functions. Check for a temperature warning and use official troubleshooting guidance if they remain unavailable.
Why Does My Camera Work In Camera But Not In A Messaging App?
Check the messaging app’s permissions, video toggle and software version. An application-specific problem is more likely than a general camera failure when ordinary local photos work.
Will A Factory Reset Fix The Camera Black Screen?
Not necessarily. A factory reset cannot repair physical damage and can erase important data. Complete the safer diagnostic checks and seek appropriate service first.
Does A Black Camera Preview Mean My Photos Are Deleted?
No, an unusable live preview does not by itself delete existing photographs. Check your Photos library and maintain a verified backup.
Official References And Editorial Review
This guide is based on Apple Support’s camera and flash guidance, current camera diagnostics guidance, magnetic interference explanation, hardware privacy guide, temperature guidance, restart instructions, software update guidance, Screen Time controls and camera repair information. Editorial review: November 15, 2026. The original diagrams are illustrative rather than actual iOS screenshots. The procedures have been checked against documentation, not physically tested on every model.