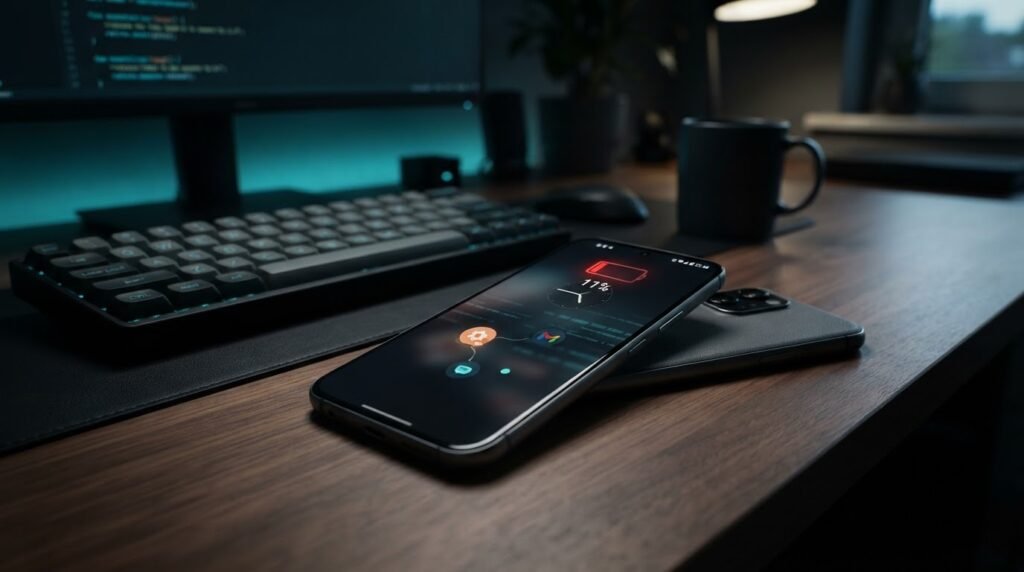
Start With Safety And Identify The Symptom
A phone that refuses to charge can have a problem anywhere along the path from the wall outlet to the battery. The cable might have failed, the adapter might not supply compatible power, or the connector might no longer make reliable contact. A protection mechanism may deliberately stop charging when it detects moisture or an unsuitable temperature. In other cases, the phone is receiving power but a damaged display prevents you from seeing the charging indicator.
Before connecting another charger, look at the physical condition of the device and accessories. Stop using the phone if its case is bulging, its screen is lifting away from the frame, or you notice smoke, an unusual chemical odor, scorching or severe heat. Disconnect power only if doing so is safe. Do not squeeze a swollen battery, try to flatten the enclosure or open a sealed phone. Arrange assessment by an appropriately qualified technician. If the device is smoking or burning, move away and contact local emergency services rather than attempting further troubleshooting.
A damaged charging accessory is also a reason to stop. Exposed wiring, a melted plug, cracked adapter housing or a connector that becomes unusually hot should not be part of a diagnostic test. Do not connect a questionable accessory to another valuable device just to find out whether it works. Replace it with a compatible accessory in good condition.
Once you establish that the equipment is safe to handle, describe the symptom precisely. Does the device display nothing at all? Does a charging symbol appear without an increase in battery percentage? Does charging stop when you move the cable? Does the phone report a wet connector or an incompatible accessory? These distinctions help you decide which part of the charging system to examine first.
Record the phone model, the charger used and any recent changes. A problem that began after dropping the phone calls for a different investigation from one that occurs only with a particular car charger. If the battery percentage still increases but does so unusually slowly, also consider the workload discussed in our Android battery drain troubleshooting guide. A phone that consumes nearly as much energy as it receives can resemble a phone that is failing to charge.
Step 1: Check The Power Source, Charger And Cable
Start with the simplest complete charging arrangement: a known working wall outlet, a compatible power adapter and a known working cable. Connect them directly to the phone. Remove optional accessories such as USB hubs, extension devices and dock adapters from the test. This reduces the number of variables and makes it easier to interpret the result.
An outlet can appear functional even when a switched power strip is off or a circuit has lost power. If there is no sign of electrical damage, check whether another ordinary appliance works from the outlet or use another outlet that you already know works. Do not dismantle a wall socket, adapter or power strip. Problems with building wiring belong to a qualified electrician, not to a phone troubleshooting experiment.
Check the adapter’s specifications and the phone manufacturer’s compatibility requirements. A USB charging connector does not tell you everything about the power source. USB-C describes a connector system, while charging protocols determine how compatible devices negotiate power. Some phones use USB Power Delivery, some support its Programmable Power Supply feature, and others have additional manufacturer-specific requirements for their highest charging rates.
An adapter rated for a larger maximum output does not normally force a properly functioning standards-compliant phone to consume that entire amount. The actual charging behavior depends on negotiation and the device’s limits. Nevertheless, the safest choice is a reputable accessory compatible with the exact model. A counterfeit or damaged adapter cannot be assumed to follow applicable specifications simply because a familiar wattage is printed on it.
Try another good cable while keeping the outlet and adapter unchanged. A cable may charge one device successfully but be unable to support another device’s normal charging requirements. Its wires or connector contacts may also be damaged internally despite an acceptable appearance. Changing only the cable provides more useful evidence than replacing everything at once.
Next, if necessary, substitute another suitable adapter while using the cable you have already tested. A charger that works with a small accessory may still fail to deliver reliable power to a phone under its expected load. Use a combination that you know is appropriate for the handset when possible.
For example, suppose the original cable produces alternating connected and disconnected notifications, while a second compatible cable charges consistently from the same adapter. That observation supports replacing the original cable. It does not establish the precise electrical defect inside it. Conversely, if two known working cables behave identically, investigate the adapter and phone rather than buying additional cables without evidence.
Avoid using a laptop’s USB port as the sole benchmark for normal charging time. Computer ports vary in the amount and type of power they provide, and their behavior can change when the computer enters sleep. A wall adapter recommended for the phone provides a clearer starting point for a charging diagnosis.
Step 2: Inspect The Charging Port Without Damaging It
Disconnect the charging equipment and remove the case if it interferes with access to the connector. Use good lighting to inspect the phone’s charging port from the outside. A plug that cannot seat fully may be obstructed by compacted lint, or the case may prevent insertion. Look for visible debris, corrosion, bent parts or damage caused by impact.
The cable should connect normally without excessive force. If you must hold it at a particular angle to keep the phone charging, stop bending or pushing the connector. Repeatedly levering a plug in a damaged port can worsen the condition. The same symptom might come from a damaged cable or the phone’s hardware, so a careful comparison with another compatible cable is valuable.
A small obstruction can prevent the connector from seating even when the exterior of the port looks relatively clean. Resist the temptation to increase pressure. A phone that has been used in a pocket or dusty working environment may need professional cleaning rather than replacement of the entire charging assembly. Conversely, a phone with a visibly loose connector after a fall may need a hardware repair.
If the replacement cable charges intermittently in both orientations or you can see damage, make a note of the observation. A successful connection once does not establish that the port is reliable. Repeated interruptions can interfere with charging and file transfers. If the phone can still operate safely, consider protecting your files while the device remains accessible.
Some devices provide a built-in diagnostic report for charging or the USB connection. Availability depends on the manufacturer, model and software release. Use a supported diagnostic tool where available, but do not interpret every warning as proof that a particular physical component has failed. Many warnings describe conditions that the phone detected rather than identifying the underlying defective part.
If you rely on USB for data transfer, keep in mind that successful charging and successful file transfer are different tests. A cable may support power without supporting the data functions you require. A phone that charges but does not appear on a computer therefore needs a separate connectivity investigation. Do not replace a battery merely because a file transfer fails.
Step 3: Respond Correctly To Moisture And Temperature Warnings
Many modern phones can detect conditions that make wired charging undesirable. A liquid or debris warning may temporarily disable the USB charging connection. Treat the warning as a protection feature rather than an obstacle that must be bypassed. Disconnect the cable and inspect whether the connector or accessory may have been exposed to moisture.
Place the phone in a dry, ventilated environment and follow the manufacturer’s specific drying instructions. Do not use a hair dryer, heater, oven or other intense heat source to accelerate drying. Do not put the handset in rice; loose particles may introduce additional debris. Avoid inserting objects into a wet connector and do not keep reconnecting the cable to check whether the warning has disappeared.
Water resistance is not a guarantee that a particular exposure is harmless. Seals can deteriorate, the device may have experienced prior damage, and a wet port can still create charging difficulties. Liquid exposure involving salt water, sugary drinks or other contaminants deserves particular attention because residues may remain after visible moisture has dried. Professional assessment is appropriate when there is persistent warning behavior or suspected internal liquid damage.
Samsung’s official Galaxy charging guidance addresses moisture-related interruptions and accessory issues. For a different manufacturer, use that manufacturer’s instructions for the corresponding phone. A seemingly similar model may have different warnings and recovery recommendations.
Temperature can also change charging behavior. The phone may deliberately reduce or suspend charging if the battery or surrounding electronics are outside their permitted operating conditions. If the handset recently sat in a hot car, ran a demanding game or was exposed to unusually cold conditions, allow it to return naturally to a suitable indoor environment. Do not refrigerate or rapidly heat it.
When the phone is safe and dry, test an appropriate charger again according to the device instructions. If the warning remains even when the environment and accessories are normal, stop repeating the experiment and seek support. A persistent indication may involve contamination, a faulty sensor or damage that requires inspection. There is no universal safe method to override a liquid-detection or temperature safeguard.
Wireless charging is not a remedy for a phone that may have internal liquid damage or an unsafe battery. For a device that otherwise meets the manufacturer’s safety instructions, an approved wireless charger may be useful when only the wired port is temporarily unavailable. Do not interpret wireless compatibility as permission to ignore the physical condition of the device.
Step 4: Give A Deeply Discharged Phone Time To Respond
A completely discharged handset may need time to accumulate enough energy before its screen displays a usable interface. The absence of an immediate animation is not conclusive evidence that charging has failed. This can be especially relevant when a phone has been stored unused for a long time.
If there are no physical safety concerns, connect the known working compatible wall charger and leave the phone undisturbed. Check the manufacturer’s recommended waiting period for a deeply depleted battery. Repeated attempts to power on the phone can complicate interpretation because each attempt requires energy. Allow the specified time before trying the appropriate power-on procedure.
Google’s Android charging and startup troubleshooting instructions explain that a very low battery may require an extended initial charging period. The exact indicator and behavior vary by device. Google’s separate Pixel charging troubleshooting page likewise describes model-specific checks and diagnostics.
Watch for ordinary signs of response, such as a charging indicator, vibration or an illuminated display. Do not rely on the device becoming warm as evidence of charging. A small rise in temperature can occur in normal operation, but excessive or unusual heat is a warning sign. Stop charging if the equipment exhibits unsafe behavior.
If the phone starts, check the battery percentage and whether it continues to rise. At this point, avoid immediately launching multiple demanding applications. Allow the device to recover a comfortable amount of charge, then investigate why it reached such a low level. A forgotten overnight charging connection is different from unexpected shutdowns occurring every day.
If the handset gives no response after the recommended charging period using verified compatible equipment, it could have a hardware problem, a failed display or another startup issue. Lack of visible response does not establish that its battery alone needs replacement. Make a record of the accessories used and the length of the test for the repair provider.
A phone kept in storage for an extended period should not be revived through improvised power supplies, external battery wiring or attempts to bypass protection circuits. Consumer troubleshooting should remain within the normal charging interface and supported service procedures. The data on a device may be valuable, but an unsafe attempt at recovery can make both the phone and its data harder to recover.
Step 5: Distinguish A Charging Fault From A Display Or Startup Fault
A completely black screen does not necessarily mean the phone has no electrical power. The battery may be charged while the display, its connection or another part of the interface fails. The operating system may also be unresponsive despite the device having power.
Look for evidence that the handset is operating. Does it vibrate when you press the power button normally? Does it ring when someone calls it? Is it recognized by a computer through a connection you already know supports data? Each observation has limitations, but a positive response can help distinguish a nonworking display from a device that is entirely unresponsive.
For instance, a phone that rings when called but shows no image has at least some functioning communications and operating circuitry. The appropriate investigation may concern the display rather than the charger. A phone that does not ring, however, might simply have no signal, be in silent mode, be switched off or lack sufficient power. Absence of a ring alone is not a definitive test.
If the phone appears frozen, consult its manufacturer’s instructions for a nondestructive forced restart. Button sequences vary across models. Avoid guessing at unfamiliar combinations, especially those that enter recovery or bootloader menus. A normal restart or supported forced restart differs from a factory reset; do not select an erase option during diagnosis.
When a device boots successfully, use the battery status screen to confirm whether it recognizes a charger. Compare what happens with the screen on and off. If the charging status appears briefly and disappears, document that behavior. It can provide a technician with more useful information than a general description of the phone having no power.
For a phone with a potentially damaged display, consider the importance of local information before authorizing repair or reset. A technician may be able to restore the existing device without erasing it, but data preservation cannot be guaranteed. Our guide to backing up an Android phone before resetting explains how to prepare when the handset is still accessible.
A screen replacement, charging port repair and battery replacement are different procedures. The symptom alone may not identify which is appropriate. If your noninvasive observations cannot distinguish between them, an accurate professional diagnosis is preferable to purchasing replacement parts on speculation.
Step 6: Troubleshoot Slow Charging And Charge Limits
A phone that recognizes an adapter but gains very little charge requires a slightly different approach. The electrical energy entering the handset must support the device’s current activity as well as battery charging. A resource-intensive game, video export or hotspot session may leave less energy available to replenish the battery.
Try a controlled charging observation with the device idle and its screen off, using the compatible wall adapter. Record the starting and ending battery percentage and elapsed time. Keep the phone in an appropriate environment and avoid running unnecessary demanding tasks. If the battery percentage rises normally during this observation, the previous combination of activity and available charging power may have contributed to the issue.
Fast charging requires compatibility among the phone, adapter, cable and relevant settings. A higher advertised adapter wattage does not guarantee that every phone will use that rate. Charging speed also changes throughout a charging session. A battery may accept energy more slowly near its upper charge range than at a lower state, and thermal management may further reduce the rate.
Some phones offer an adjustable charge limit, adaptive charging or scheduled optimization to manage long-term battery condition. A handset that stops at a particular percentage might be operating exactly as configured. Consult its battery settings and manufacturer documentation before concluding that the battery or charger is defective. If the feature meets your needs, there may be no reason to disable it permanently.
Compare charging observations at broadly similar starting percentages. An interval beginning at a low charge level does not necessarily provide a fair comparison with an interval starting near full charge. Actual charging speed varies by model, adapter and battery condition.
Check the interface for a slow-charging or accessory warning and read the explanation offered by the phone. Try a recommended charging arrangement rather than installing an application that claims to dramatically accelerate electrical charging. A software utility cannot turn a low-capacity power source into a higher-capacity one or repair a physically damaged cable.
If the phone’s problem is actually a battery that empties rapidly after a normal charge, investigate the applications and other activity using the battery usage screen. For context, our computer hardware and software guide explains the difference between physical components and software behavior. The distinction also applies to smartphone troubleshooting.
Step 7: Compare Wired And Wireless Charging Where Supported
Not every Android phone supports wireless charging. Check the exact model before buying or borrowing a charging pad. If compatible wireless charging is available and the handset is safe to operate, comparing it with wired charging may help narrow the fault.
Use an approved compatible pad with its appropriate power adapter. Remove accessories that interfere with placement, especially unsupported magnetic attachments or metal objects between the phone and the pad. Follow the manufacturer’s positioning guidance. Misalignment can prevent charging or reduce efficiency, and cases may affect the connection between the handset and charger.
A result in which wireless charging works but several known compatible wired combinations fail suggests that the wired charging path merits closer attention. It does not prove that the USB port alone is defective. Circuitry associated with the wired connection, accessory compatibility or protection behavior could contribute.
If wired charging works while wireless charging fails, inspect pad compatibility, positioning and case interference before suspecting the phone’s internal charging hardware. Try a supported pad rather than drawing conclusions from an unfamiliar in-car charger. Some combinations may be incompatible despite superficially similar charging symbols.
If neither normal wired nor supported wireless charging works, the investigation may need to include other parts of the phone, such as power-management circuitry, battery condition or startup behavior. These alternatives require proper diagnostic equipment and expertise. Do not open a sealed device to test individual battery contacts.
It is also important to recognize that wireless charging may be slower or generate different thermal conditions than wired charging, depending on the equipment. An observed difference in charging time does not automatically indicate a malfunction. Compare each method against its own expected behavior and the manufacturer’s supported specifications.
Use A Charging Troubleshooting Decision Table
The following decision table organizes observations into practical next actions. It is intentionally conservative: a symptom identifies an area to investigate, not a guaranteed replacement part.
| Observation | Next check |
|---|---|
| One cable fails, another works | Replace the faulty or incompatible cable |
| Moisture warning | Disconnect and follow manufacturer drying guidance |
| Plug cannot seat or connection is loose | Inspect externally and arrange service if obstructed or damaged |
| Phone rings with black display | Investigate display or startup behavior |
| Charges normally while idle | Check workload, power source and charging settings |
| No response with compatible equipment | Seek qualified diagnosis after the recommended waiting period |
Start: 20%
30 minutes later: 34%
The useful outcome is a reproducible observation that helps isolate a component or condition. If changing one accessory produces a repeatable improvement, you have more actionable information than a single successful connection after changing several variables simultaneously.
If your handset starts again but reports insufficient storage, use our safe Android storage cleanup guide instead of deleting unfamiliar files or resetting the device.
When Professional Repair Is The Best Next Step
Ask for qualified service when the phone has visible hardware damage, unresolved liquid exposure, a persistent loose connector, repeated unexpected shutdowns or no charging response after the supported noninvasive tests. Battery wear is one possible explanation, but the charging port, power-management electronics or other components could also be involved.
Explain what happened before the problem started and which accessories you have tested. Include the exact warning shown, whether the device can start, and whether a known compatible alternative charging method works. If the phone still operates safely, back up irreplaceable information. Store essential account recovery arrangements independently.
Check the manufacturer’s warranty and approved service options before authorizing work. Ask whether the proposed diagnostic or repair may erase data, whether replacement components are appropriate and what testing will be performed afterward. A low-cost repair is not necessarily worthwhile if the provider cannot address the suspected fault safely or explain its scope.
A factory reset does not repair worn connectors, damaged cables or chemically degraded batteries. It may be relevant to a supported software diagnosis, but it should not be your first action when the phone will not accept power. In particular, erasing a device whose charging behavior is unstable may complicate recovery without solving the underlying problem.
To reduce future charging interruptions, keep compatible cables in good condition, protect the connector from contamination and avoid mechanical strain while the device is plugged in. Maintain an independent backup rather than waiting for a power failure. A small collection of reliable accessories and a clear understanding of the phone’s normal behavior make future diagnosis much easier.
Frequently Asked Questions
Why Does My Android Phone Not Charge Even With A New Cable?
The adapter, outlet, charging port, temperature protection or phone hardware may be responsible. Test a known compatible complete charging setup before replacing parts.
What Should I Do When My Phone Says Moisture Detected?
Disconnect the cable and follow the manufacturer’s drying guidance. Do not bypass the warning or apply intense heat.
Can I Charge A Completely Dead Android Phone?
If it is undamaged and safe to charge, use compatible equipment and allow the manufacturer-recommended initial charging period before trying to turn it on.
Why Does The Battery Percentage Stay At 80 Percent?
Some models offer charging limits or adaptive charging. Review the relevant settings and supported documentation before concluding there is a fault.
Does A Factory Reset Fix A Broken Charging Port?
No, a physical hardware problem needs appropriate inspection and repair.