A screenshot failure can have several distinct causes. This guide helps you isolate the failing stage and restore normal capture functionality without unnecessary system changes.
Identify Which Screenshot Function Is Failing
When Snipping Tool stops working, identify the exact step that fails before changing Windows settings. Opening the application, starting a capture, copying an image, displaying a notification and saving a file are separate operations. A failure in one does not establish that the whole app is broken.
For example, if you press Windows + Shift + S, select a region and then see no editing window, the capture might already be on the clipboard. If you reset the application immediately, you may change its preferences without addressing the missing notification. Start with a harmless desktop test that does not contain passwords, account details or private messages.
| Symptom | First Check |
|---|---|
| App will not open | Start menu launch, restart and app updates. |
| Keyboard shortcut does nothing | Direct launch and keyboard behavior. |
| Capture completes but no preview appears | Paste test and notifications. |
| No saved screenshot file | Save manually and check destination. |
| Only a specific app produces a black capture | Content restrictions or a rendering issue. |
| Video capture fails | Recording mode, app version and storage. |
Perform A Controlled Screenshot Test
Open a non-sensitive window, such as a blank Paint document containing a simple mark. Close any unfinished Snipping Tool recording or editing work before restarting the application. This test separates the core screenshot function from shortcut and notification behavior.
- Search for Snipping Tool using Start and open the application directly.
- Choose the image capture mode rather than video recording.
- Select New and drag a rectangle around the harmless test content.
- Check the captured image in the editor. Save it to a known writable folder.
- Try Windows + Shift + S on the same content, then paste into a blank Paint document with Ctrl + V.
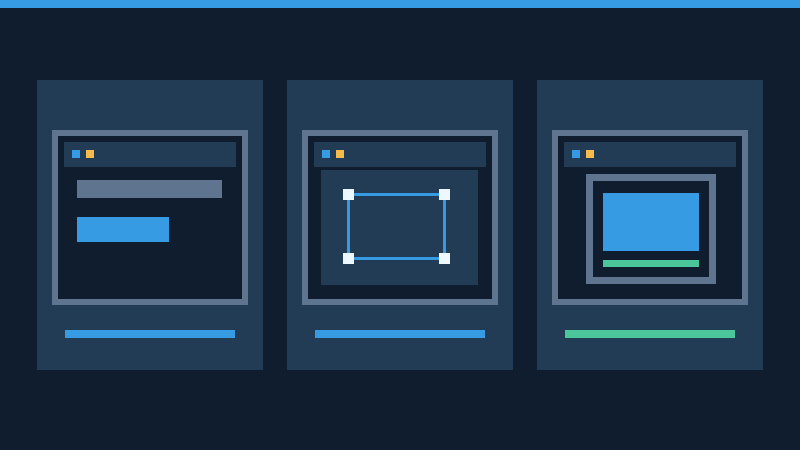
If direct launch succeeds but the shortcut fails, focus on keyboard input or shortcut handling. If both produce an image but no message appears, investigate notifications. If the editor opens but cannot save, investigate the selected output folder. Microsoft’s Snipping Tool reference describes the supported capture and editing functions.
Fix Windows Shift S Or Print Screen Shortcuts
The normal Windows 11 image-selection shortcut uses the Windows logo key, Shift and S together. Test the Windows key separately by opening Start. Test Shift and S in a simple text editor. If the keyboard itself does not respond correctly, compare another compatible keyboard where practical. Some keyboards provide a gaming mode that disables the Windows key, and some remote desktop configurations send shortcut commands to a different machine.
Print Screen behavior is configurable. Search Settings for Print Screen or open Accessibility and Keyboard, then inspect the available screen-capture option. Depending on the configuration, the key may launch a capture interface or place an image into the clipboard. On compact keyboards, a function-key combination may be required. Check the keyboard manufacturer’s instructions rather than assuming all keyboard layouts are identical.
If another screenshot or recording program runs in the background, close its ordinary interface temporarily after saving work, then retest. Consult its settings if it has registered a conflicting shortcut. Do not disable enterprise protection software or mandatory screen-capture controls to make a key combination work. The Microsoft keyboard shortcut guide provides the standard Windows combinations.
Check The Clipboard When The Preview Does Not Appear
A successful capture may be available to paste even without a visible preview. Make a fresh non-sensitive snip and immediately paste into Paint. If the picture appears, the capture and basic clipboard transfer have succeeded. You can save the image from the editor while investigating the remaining interface problem.
Do not assume that clipboard history is required for ordinary copy and paste. Windows + V opens the optional history feature; it is distinct from the current clipboard. If you copy something else before pasting, the new item may replace the current capture. Microsoft’s clipboard documentation explains the history and synchronization settings.
For a shared or managed computer, consider whether screenshot content should be stored in clipboard history or synchronized to another device. Do not enable cross-device synchronization as a universal fix. Clear sensitive history entries under the applicable security policy when necessary.
Check Snipping Tool Notifications And Do Not Disturb
When a screenshot is copied successfully but the expected notification is absent, open Windows notification settings. Inspect the global notification preference and the entry for Snipping Tool if it is listed. Check whether banners are allowed. Do Not Disturb may send notifications directly to the notification center rather than displaying them over other work.
Use Windows + N to inspect the notification center. If the capture notification is there, choose the appropriate editing action. Review whether focus settings, full-screen applications or automatic quiet periods explain the missing banner. You can retain your preferred quiet settings and simply open the application directly when needed.
Microsoft’s notification and Do Not Disturb guide describes the app-specific controls. A missing banner alone is not a reason to reinstall Windows. Retest the same harmless capture after any permitted change.
Restart And Update The App Before Repairing It
Save any unsaved snips or video clips, close Snipping Tool, then reopen it. If the application remains unresponsive, restart Windows normally after saving other open work. A restart can clear a temporary application state, but it will not fix a policy that intentionally prevents capturing protected material.
Open Microsoft Store and inspect the available application updates, using Library or the Downloads area according to its version. Apply a supported Snipping Tool update if available. Separately check Windows Update in Settings. Allow any required restart to complete before repeating your test.
Keep the installed Windows version and the Snipping Tool version in your troubleshooting notes because the app can receive separate updates. Do not obtain replacement app packages from random download websites. See Microsoft’s Store application troubleshooting guidance and our software patch explainer. If ordinary Windows updates themselves fail, consult Windows 11 Update Stuck for that separate problem.
Repair Snipping Tool Before Using Reset
Windows provides repair and reset operations for supported installed applications. A repair is the preferable first attempt when opening or using the app still fails after routine updates. Save or export any important content before changing the app.
- Open Settings, select Apps, then Installed apps.
- Find Snipping Tool and open its additional options menu.
- Choose Advanced options if available.
- Use Repair and retest the application.
- If repair fails, consider Reset only after reviewing the warning about application data.
Reset is more disruptive because it can clear local app data and settings. Do not assume that recent unsaved captures can be recovered after resetting the application. Store important captures in ordinary files first. The availability of repair or reset controls depends on the installed package and configuration. Follow Microsoft’s app repair instructions rather than manually editing the registry.
Diagnose Black Screens, Missing Files And Video Failures
Black Or Empty Captures
Compare a normal desktop capture with the problematic application. Protected video, secure desktop prompts and some organizationally restricted windows may not permit ordinary capture. Do not try to defeat these restrictions. If even an ordinary Paint window produces a black image, record whether the problem affects an external monitor, remote session or particular display configuration. Check approved graphics updates if appropriate; our Windows driver guide explains trusted sources.
Missing Saved Files
Use the editor’s Save action to write a harmless test image to a folder where you have permission to create files. Confirm the filename, open the saved image and check the app’s automatic saving preferences if present. A clipboard image and a saved file are different outputs. Folder redirection, available capacity and organization-controlled storage can affect where the image is written.
Screen Recording Problems
Check that you selected Record rather than the image capture function. In supporting versions, Windows + Shift + R invokes the recording overlay. Choose a permitted region and make a brief recording of non-sensitive content. Stop it normally and verify the output before starting important work. Confirm available storage and required microphone permissions if audio is involved. Do not presume that all versions provide identical recording capabilities.
Reinstall Only If The Supported Repairs Fail
If the app remains broken, confirm that the Microsoft Store listing or another authorized deployment method is available before uninstalling it. Preserve previously saved files and finish any accessible editing first. Where removal is supported, use the installed app settings and reinstall the official Snipping Tool. A managed PC may need its administrator to perform this step.
A single failing application rarely justifies a full Windows reset as an early troubleshooting measure. If several built-in apps are also damaged, investigate the wider operating-system issue with appropriate support. Our Windows reset backup guide explains how to protect important files before broader recovery. Record the exact error, Windows version, app version, capture mode and results of your direct-launch and paste tests.
Frequently Asked Questions
Why Does Windows Shift S Not Work?
The key combination may be intercepted, affected by keyboard configuration or unable to open the capture overlay. Test direct app launch and individual keys first.
Does Snipping Tool Need Clipboard History Enabled?
No, ordinary clipboard copying does not require the optional history feature.
Why Is My Screenshot Not Appearing In File Explorer?
It may only be on the clipboard or in a different destination. Save a test capture manually and inspect the configured saving behavior.
Will Resetting Snipping Tool Remove Its Settings?
Yes, reset can remove local application data and preferences. Save important work and try Repair first.
Can Snipping Tool Capture Every Window?
No, protected content and some secure or restricted interfaces cannot be captured normally.
Should I Reinstall Windows To Repair Snipping Tool?
No, start with the app, its shortcut, clipboard and notification settings, then supported repair options.
Official References And Technical Review
Reviewed November 16, 2026. Microsoft Support references: Snipping Tool, Windows Shortcuts, Clipboard Settings, Notifications, App Repair and Microsoft Store Troubleshooting. The graphics are original conceptual illustrations, not captured Windows screens. Menu names depend on the Windows build and app version. The procedures are documentation-reviewed; a physical Windows 11 installation was not tested.