

Understand Windows Security And Microsoft Defender Antivirus
Windows Security is a built-in Windows application that brings several security controls into one place. Its antivirus area is relevant when you want to inspect malware protection, check the status of the active antivirus provider or perform an additional scan. The application also brings together other features, such as firewall and device security information. These features support different protective tasks, so an antivirus scan should not be confused with a complete assessment of every account, application and network setting.
Microsoft Defender Antivirus is the antivirus component supplied with Windows. Windows Security is the interface through which you can inspect its status and, in an ordinary supported configuration, manage relevant settings. Some Windows devices instead use another antivirus product. In that situation, the Windows Security interface can report the provider responsible for protection even when Defender is not operating as the primary real-time scanner.
This matters when a tutorial tells you to turn on a particular setting. If another legitimate antivirus product is actively protecting your computer, the absence of the expected Defender control may reflect the intended configuration. Installing a second product or trying to force both to provide the same real-time scanning function can create unnecessary conflicts. First identify what is actually protecting the device.
A manual scan is a useful additional check, not a substitute for continuous protection. Microsoft Defender can examine files and activity automatically in a supported configuration, while a manual scan lets you ask for an additional examination at a time or location that is relevant to your situation. A scan result describes what the tool detected under the conditions of that scan. It cannot certify that your computer, browser sessions and online accounts are entirely free from compromise.
Microsoft’s Windows Security overview provides the official description of the application and its principal protections. Our antivirus explanation describes how security scanning fits into a broader defensive workflow. This guide concentrates on using the Windows interface safely, choosing among the common scan options and understanding what the results mean.
Step 1: Open Windows Security And Check The Active Protection Provider
On a Windows 11 computer, open Start and search for Windows Security. Select the built-in application rather than a sponsored web result or an unfamiliar product offering a similarly named utility. The device’s security controls do not require you to download a random scanner merely to inspect their status.
Within the Windows Security application, open Virus & threat protection. The interface can show current protection information, available scan controls and links to relevant settings. Read the displayed status before changing anything. If a legitimate third-party antivirus product manages protection on your computer, the options may differ from those available on a device using Microsoft Defender as its primary provider.
Microsoft’s guide to scanning with Windows Security explains how to inspect the antivirus provider through the application’s provider management area. The relevant control may be presented under Who’s protecting me. Inspect the listed provider and its current status. If you recognize an active, approved security product, consult that vendor’s documentation before attempting to replace or duplicate its protection.
A warning in the interface deserves investigation. It may identify an outdated component, an inactive feature or an action that the account is not authorized to perform. Read the actual wording rather than clicking through every recommended change automatically. On an organization-managed computer, some controls may be governed by policies rather than the preferences of the person currently using the machine.
If the Windows Security application itself does not open or fails to display useful status information, avoid downloading an unknown repair script. Check Windows updates and consult supported Microsoft troubleshooting or your authorized administrator. An inaccessible management interface does not independently establish the exact cause of the problem.
Before moving on, establish three facts: which antivirus is expected to be active, whether the interface reports that protection is operating and whether your user account is permitted to manage it. Those facts make the remaining instructions much easier to interpret. If the device uses a managed product, perform subsequent scanning and remediation through the appropriate approved controls.
Step 2: Enable Or Confirm Real-Time Protection
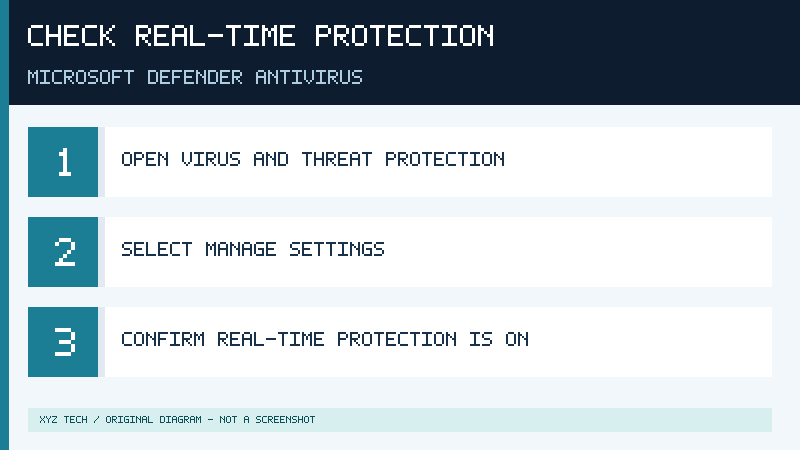
If Microsoft Defender Antivirus is the intended active antivirus, return to Virus & threat protection and locate its settings area. Select Manage settings where that control is available. Review the current real-time protection setting. If it is off and the device’s supported configuration permits you to enable it, switch it on.
In its Windows Security guidance, Microsoft describes the real-time protection controls and the built-in scanning workflow. On a device where a different antivirus is registered and active, Defender itself may not be available in the same role. This reinforces why you should inspect the provider before deciding that an unavailable control must be repaired.
The application can expose additional protective features, including cloud-delivered protection and automatic sample submission. These settings have practical security and privacy implications. Microsoft recommends cloud-based capabilities for its supported protection configuration, but organizations can have specific rules governing what diagnostic information may leave a device. Review the policy applicable to your machine and follow the official configuration rather than enabling or disabling features without understanding their purpose.
Tamper protection and management restrictions can also influence the controls available to the current user. If an expected setting is locked or repeatedly changes back, do not try to defeat the security policy by modifying the registry or running an arbitrary privileged command. Consult the organization responsible for the device or official support if it belongs to you.
For a personal computer, document an unexplained protection warning and investigate it through the genuine application. A tutorial that asks you to disable antivirus, add an entire drive to the exclusion list or permanently silence security warnings before installing unrelated software deserves caution. Our software installation guide explains the value of using verified software sources rather than weakening device protection to make a questionable installer run.
After any authorized change, return to the status screen and check the result. The goal is to establish that the intended protection is active, not simply to move a switch whose practical effect you have never verified.
Step 3: Check Security Intelligence And Update Status
Security software needs current information and maintained components to recognize newly encountered threats. Even a properly enabled antivirus can be less useful when its updates consistently fail. Before a discretionary manual scan, inspect the protection update area where available and follow the genuine application controls to check for relevant updates.
In Windows Security, look within the Virus & threat protection area for protection updates or security intelligence information. Microsoft supplies supported mechanisms for obtaining its antivirus updates, and Windows Update also participates in maintaining the device’s protection components. Use an ordinary trusted network connection to obtain updates when appropriate.
A device without working internet access may fail to obtain new information. That symptom should be investigated separately from scan results. For example, a computer may still be able to scan using its currently installed security information even while an update fails. Such a scan can have value, but its result should be interpreted in light of the older information. Do not pretend that an unsuccessful update has taken place.
Microsoft’s malware detection troubleshooting guide discusses update failures and the importance of maintained protection. For an unresolved problem, follow the vendor’s supported instructions rather than installing definitions from an unverified mirror or accepting a purported update delivered by an unsolicited popup.
Some devices belong to organizations that distribute security updates through managed channels. An unsuccessful manual update may therefore call for administrator assistance rather than a change to local network, proxy or certificate settings. Do not expose the device to another network or bypass its access restrictions simply because a tutorial assumes an unmanaged home computer.
The operating system and applications themselves also need maintenance. Antivirus scanning addresses a different security task from applying supported software fixes. A harmful attack might exploit an outdated application even when the antivirus is running, so a healthy configuration requires more than the scanner alone. Our Windows update troubleshooting guide covers appropriate ways to handle update difficulties.
Where the security interface supplies the most recent update time or version, inspect it and retain only necessary information if you need to contact support. You do not need to share screenshots containing private user details or all the files visible in your workspace. When the update status is understood, choose the type of scan that answers the practical question you have.
Step 4: Choose The Appropriate Windows Security Scan

Microsoft Defender Antivirus provides different scan choices because not every situation requires the same examination. Open Virus & threat protection and look for a quick scan control or the scan options area. The precise labels may vary across supported Windows releases and managed configurations. Microsoft’s official scan-options reference describes the quick, full, custom and offline choices.
The quick scan is a sensible first examination for an ordinary check or a general suspicion. It concentrates on relevant areas rather than exhaustively examining every file. It is useful when you want an initial result without committing to a much larger inspection. If the software recommends further action after completion, read the recommendation.
A full scan examines a broader collection of files and programs. It can take considerably longer, depending on the storage involved, the device’s activity and the configuration. Choose a time when the computer can remain available for that operation. Do not assume that a particular file count or duration is required on every machine.
A custom scan addresses specific selections, such as a particular accessible folder. This may be appropriate if you want additional examination of an installer or files that have recently arrived. Do not open or execute a questionable file to find out whether the scan will recognize it. The scanning action can examine its contents without deliberately launching the program yourself.
Microsoft Defender Offline is a different kind of scan. It requires a restart into a recovery environment and can be useful when you are concerned about persistent threats that may be difficult to examine while Windows is running normally. Save important files, close ongoing operations and verify that restarting is appropriate before selecting it. On a managed device, consult the responsible administrator before initiating a disruptive recovery procedure.
| Scan type | Appropriate use | Practical consideration |
|---|---|---|
| Quick | Initial or routine examination | Smaller scope than a full scan |
| Full | Broader examination of device files and programs | Allow additional time and device resources |
| Custom | Selected files or folders | Verify the intended selection |
| Offline | Additional investigation of suspected persistent threats | Requires a restart; save work first |
These choices are not scores indicating your probability of being infected. A more extensive scan does not necessarily resolve every type of security incident. If unauthorized account activity is the central concern, you must also investigate the relevant online account and its sessions. Our malware guide explains why device symptoms and account compromise need to be considered in context.
Select the scan matching your actual situation. Keep the normal security settings enabled and allow the approved tool to finish. Avoid changing the entire device configuration just because you want to inspect one particular file.
Step 5: Start A Quick, Full Or Custom Scan
To perform a quick scan through the built-in antivirus interface, open Windows Security and return to Virus & threat protection. Select Quick scan if it is available. Follow the displayed progress information. A scan can involve substantial file access and processing, so allow it to proceed rather than repeatedly opening the same command.
For a full scan, open Scan options and choose the full option. Confirm the selection and start the examination using the interface’s scan control. Save your current work and schedule the task for a suitable period. Device responsiveness may vary during an extensive examination. There is no need to judge the operation by the file count achieved at a particular minute.
When the concern relates to one folder, a custom scan may be more appropriate. Choose the custom option and select the intended folder using the supported interface. Confirm that you have selected the right data location. Windows paths may point to several folders with similar names, especially on computers that synchronize documents or contain duplicate downloads.
Microsoft also describes scanning an individual item through File Explorer. On a typical Windows 11 setup with Microsoft Defender available, right-click the file or folder and inspect the context menu. You may need to select Show more options before locating the Defender scan action. If another legitimate antivirus is responsible for the device, use its own supported file-scanning controls.
This is useful for a file that you have intentionally obtained through a verified source. However, scanning an unknown installer does not transform it into trusted software. A legitimate-looking filename, expected icon or clean scan result does not establish its publisher independently. Review the source before deciding whether execution is appropriate.
During the scan, avoid repeatedly interrupting and restarting it. If it appears to have stalled, inspect the interface for an actual error and consider how much data is involved. A large scan can be slower than expected without being defective. If the approved product repeatedly fails with a recognizable error, consult its support documentation.
A result saying that nothing was detected should be recorded accurately. It describes the outcome of the scan, not a certificate that every file and account is safe. If your concern persists because you observed a particular suspicious event, investigate that event separately and consider an appropriate additional examination. Useful troubleshooting depends on the observed result and the original reason for performing the scan.
Step 6: Prepare Carefully Before A Microsoft Defender Offline Scan
The offline scan deserves separate preparation because it restarts the computer. Before selecting this option, save all open documents and ensure that ongoing transactions, file transfers and other important work have completed safely. Choose a suitable time when the device can restart and return to normal operation without interrupting something essential.
If the machine belongs to an employer or school, check its incident-handling rules before restarting or attempting remediation. Some incidents require collection of evidence or coordinated isolation. An administrator may provide an approved scanning and recovery process suited to the device’s configuration.
On a personal computer using the appropriate Microsoft Defender configuration, open the antivirus area and locate Scan options. Select the Microsoft Defender Offline option when it is available. Read any confirmation and proceed only after preparing for the restart. The official Microsoft documentation linked in the preceding section explains the scan’s recovery-environment behavior.
Do not confuse the word offline with a guarantee that every kind of malicious activity is discoverable. Running an examination outside the normal Windows session changes the conditions under which the scanner works. It can be helpful against certain threats that have a stronger ability to interfere with an ordinary running system. However, a scan still depends on detection capabilities and does not necessarily address compromised cloud accounts or malicious permissions granted to applications.
After the computer returns to Windows, open Windows Security again and inspect Protection history for the relevant result. Avoid assuming that the absence of a popup means a particular threat was removed. Review the actual recorded entries.
If the device fails to return to normal operation, use trusted Windows recovery guidance or authorized technical support. Do not install a purported recovery tool from a random search advertisement. Keep necessary recovery information and separately maintained backups available in accordance with your device configuration. The scanner is one part of a recovery process, not a replacement for those preparations.
An offline scan is appropriate when the circumstances justify it; it is not a required daily task for every healthy computer. Select it deliberately when persistent malware is a concern or the approved security guidance recommends it.
Step 7: Review Results And Protection History
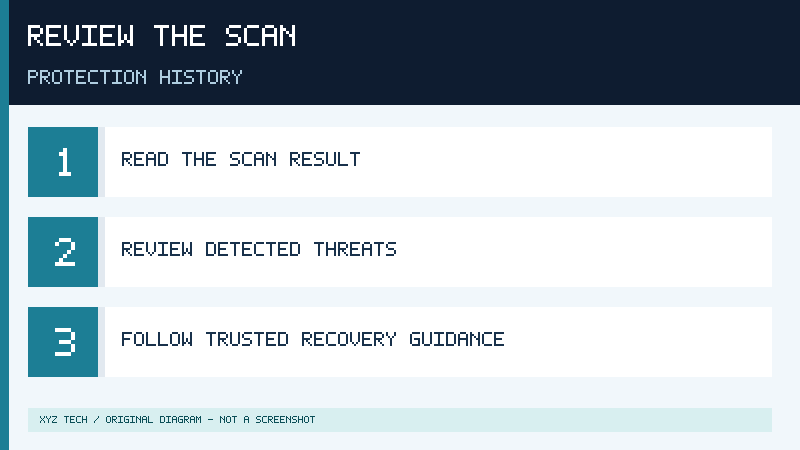
After an examination completes, read the displayed result carefully. The interface may report that no threat was detected or that it identified an item requiring attention. Protection history provides further records of security events and actions, including entries connected with detected or quarantined items. Examine the actual event relevant to your concern.
Avoid assuming that every unusual filename is a confirmed malicious file. A detection can identify suspected malware, potentially unwanted software or another condition that the security product considers significant. Different classifications can require different responses. Review the provided details and follow the supported guidance rather than restoring an item just because you recognize part of its name.
Quarantine is intended to keep the detected item from being used normally while appropriate action is considered. Do not restore or allow an untrusted file simply to complete an installation. If you suspect a false positive involving genuine software, contact the verified publisher and the security product’s supported reporting channel. Microsoft’s unwanted software guidance describes relevant protections and ways to handle questionable software.
Repeated detections can indicate an unresolved source or additional unwanted activity. Inspect the timestamps and any path or product information that you are allowed to review. Do not upload confidential files to a public analysis service without permission. The report may contain sensitive document or user information even when the filename itself seems harmless.
If you suspect active malware, avoid using the device for sensitive account activity until the situation is understood. Use another trusted device to inspect important accounts when necessary. Our ransomware explainer discusses why recovery may involve decisions about data and backups, not simply removing one detected executable.
Professional assistance may be appropriate when the device continues to display unexplained behavior or when sensitive information may have been exposed. If the device belongs to an organization, report the event through its approved incident channel. A useful support report includes the approximate time, relevant status message and actions already taken, without copying secret credentials or unnecessary private file contents.
Once the response is complete, verify that the intended antivirus provider is active and that relevant updates are working. Continue monitoring the original symptoms. A supported scanner can provide valuable evidence, but responsible security maintenance also considers trustworthy software sources, account security and appropriate backups.
Build A Practical Security Maintenance Routine
A reliable routine begins with a known, supported antivirus provider and a clear understanding of its status. Check the application’s alerts when they appear and keep the relevant software maintained. Choose an extra manual scan when there is a concrete reason, rather than turning routine protection features off between examinations.
Remember that safe software installation starts before the scan. Obtain applications from verified publishers and use appropriate file-handling practices. If a browser warns you that a file is dangerous, investigate its source rather than attempting to force the download. Our browser download troubleshooting guide distinguishes security-related blocks from ordinary transfer errors.
Protect your accounts independently of device scanning. An antivirus examination cannot tell you that an account’s password was never disclosed on a fake login page or that you never approved an unauthorized sign-in. Use appropriate authentication features and inspect unexpected activity through the genuine service. Maintain separately recoverable copies of important personal files.
You can now open Windows Security, check the active antivirus, confirm supported protection settings and select an appropriate scan. By reviewing the result and investigating the original concern, you avoid the common mistake of treating one successful examination as an unconditional security guarantee. The most effective routine combines maintained protections with deliberate decisions about what you download, execute and authorize.
Sources And Further Reading
- Windows Security app overview
- Scan an item with Windows Security
- Stay protected with Windows Security
- Virus and threat protection scan options
- Troubleshoot malware detection and removal
- Protect your PC from unwanted software
Frequently Asked Questions
How Do I Turn On Windows Security Antivirus Protection?
Open Windows Security, identify the active provider and, when Defender is your approved antivirus, open Virus & threat protection settings and confirm real-time protection is enabled.
Do I Need To Run A Full Scan Every Day?
No, choose manual scans according to the situation and retain appropriate continuous protection.
Can I Scan A File Without Opening It?
Yes, use the approved antivirus’s file-scanning control without deliberately executing the file.
Will An Offline Scan Restart Windows?
Yes, save your work first because the offline option requires a restart.
Does A Clean Scan Guarantee My Computer Is Safe?
No, it reports what the tool detected within that examination. Other threats and compromised accounts may require additional investigation.


