Identify The Exact Night Light Problem
Windows 11 Night Light not working can describe several different symptoms. The switch may be grayed out, the switch may appear to work without changing the displayed colors, or a schedule may fail to activate the feature at the expected hour. Another common experience is a laptop screen becoming warmer while an external monitor continues to display its usual colors. These symptoms deserve separate tests.
Night Light is a Windows display feature that changes the appearance of colors toward warmer tones. It is not a repair for screen flickering, a replacement for monitor calibration or a general method of adjusting physical brightness. Recognizing its purpose will help you avoid spending time on unrelated settings.
Begin by recording the symptom and identifying the display affected by it. Open Settings using Windows + I and select System, then Display. Find the Night light control and note whether it is available. If you can open its settings, note the current strength and scheduling preference without changing every option immediately.
Also record whether the problem started after a Windows update, graphics driver change, new monitor installation or connection to a docking station. A recent change is a useful clue rather than proof of the cause. A laptop’s built-in screen may follow a different display path from an attached monitor.
Use a simple controlled test throughout this guide. Open an ordinary document containing a large white area, observe its appearance and compare it before and after manual activation. Keep the surrounding lighting and monitor settings reasonably consistent. This establishes whether the visible effect is changing rather than relying only on the status of a switch.
Test Night Light Manually In Windows Settings
Begin with manual activation because it separates the color adjustment itself from the timing controls. Open the Display settings and select Night light. If a schedule is enabled, record its original setting before temporarily disabling the schedule for the test. Activate Night light using the available control.
Move the Strength slider toward a more noticeable level and compare the appearance of the same white document. Do not judge the result solely by looking at an already dark or heavily colored desktop wallpaper. At low strength, the visible difference may be subtle, especially on a monitor that is already configured with warm colors.
Microsoft’s display brightness and color guidance describes the ordinary activation and adjustment controls. This is the supported starting point for changing the feature.
Turn the effect off and on once more and observe whether the document changes accordingly. If it does, the basic feature is working in that display configuration. A recurring failure at a particular time is then more likely to warrant investigation of the schedule.
If the switch is selected but there is no visible difference at a clearly noticeable strength, continue with graphics and monitor checks. When the switch is unavailable entirely, examine the display driver rather than repeatedly clicking the disabled control.
Restore your preferred strength after the test. A very pronounced color adjustment can be useful for recognizing whether the feature operates, but you do not have to keep it at that level during everyday use. Choose a comfortable appearance rather than assuming the highest strength is necessarily the right setting.
Compare Quick Settings With The Full Settings Page
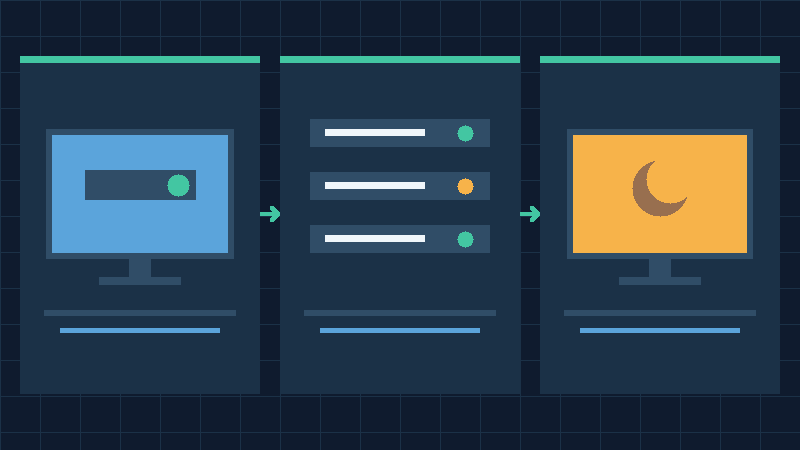
Windows 11 also offers access to commonly used display and connectivity features through Quick Settings. Depending on the installed version and its layout, Night light may appear there as a control. If a familiar shortcut disappears, that does not necessarily mean that the underlying feature has stopped working.
Use Windows + A to open Quick Settings and inspect the available controls. Scroll through the panel where the current interface provides additional controls. If Night light is present, test whether activating it causes the visible display effect. Compare that result with the full Display settings page.
The important comparison is between the status of the two controls and the appearance of the same display. If the ordinary Settings page changes the screen correctly but the shortcut is absent, concentrate on the interface arrangement rather than changing the graphics driver solely to restore the shortcut.
Conversely, if neither route can activate the feature, the problem is not simply an absent shortcut. Record whether both interfaces display the same availability state. A control that appears selected may still require further investigation if the actual monitor colors remain unchanged.
If the interface is temporarily unresponsive, save your work and restart Windows normally. Do not repeatedly force shutdown while the operating system is responding. After startup, use the full settings route first and then compare Quick Settings again.
A computer may have customized or managed desktop settings. Respect those arrangements if the device belongs to an organization. The full Display page can provide a more useful diagnostic baseline than trying to make Quick Settings look exactly like another Windows installation. Interface details can change between releases even when the basic Night Light capability remains available.
Separate Strength Brightness And Color Temperature
Night Light strength determines how visibly the feature changes the colors on a compatible display. It should not be confused with brightness, which controls how bright a screen appears. Reducing brightness may make a display less intense without producing the color warmth expected from Night Light.
To see the difference, use the same document and leave the brightness level unchanged while adjusting Night Light strength. Compare the white or neutral areas before and after the adjustment. Then restore the original strength and inspect the usual brightness control separately if necessary.
On a desktop computer, brightness may be controlled through the monitor’s own buttons or on-screen menu rather than through an ordinary Windows brightness slider. The absence of that slider does not establish that Night Light is broken. Each control has a different purpose.
Look for an existing warm color preset in the monitor menu. A display already using a warmer preset may make the additional Windows adjustment harder to distinguish. Record the existing preset before making a reversible comparison with a neutral standard mode. Do not reset the entire monitor merely to perform this check.
Users who edit photographs, prepare print materials or perform other color-sensitive work should consider the effect of deliberate color changes on their workflow. A warm appearance may be desirable for reading but inappropriate for evaluating accurate neutral colors. Switch off intentional color adjustments when the task requires a calibrated display.
Night Light is a display preference, not a guarantee of medical benefit or good sleep. Choose a comfortable strength and maintain suitable lighting and screen habits. If brightness or color is abnormal even with Night Light turned off, investigate that separate display issue rather than increasing the strength to compensate.
Repair A Night Light Schedule That Does Not Activate
If manual activation works but the feature does not start at the desired time, investigate scheduling rather than reinstalling the display driver immediately. The success of the manual test establishes a useful distinction: the current display configuration is capable of showing the adjustment.
Open Night light settings and review the scheduled activation option. Choose custom hours for a controlled comparison if they suit your circumstances. Set a start time shortly ahead of the current local time and an end time afterward. Ensure the schedule is enabled and the intended hours are correctly selected. Keep the computer awake for the short test and observe the white document as the activation time passes.
If the color changes as expected, restore the hours you actually want to use. If the test fails, verify the date, time and time zone before repeating it. Avoid making repeated changes to graphics drivers while an incorrectly configured schedule remains a plausible explanation.
A schedule that crosses midnight can involve an evening start time and a morning end time. Read the selected hours carefully, particularly where the interface uses twelve-hour time and AM or PM indicators. An accidental reversal can explain apparently random daytime activation.
The sunset-based option has a different dependency from a manually specified schedule. If custom hours work but sunset-based scheduling does not meet your expectations, investigate the location and time information used for the calculation. There is no need to grant unrelated applications access to your location for this comparison.
Remember to restore any temporary test hours. The final configuration should produce the intended effect as part of your normal routine, rather than simply succeeding during one artificial test.
Check Date Time And Location For Sunset Scheduling
The timing of sunrise and sunset varies by geographic location and date. A schedule based on these events therefore needs suitable time and location information. Start with the less intrusive checks. Open Settings, select Time & language and then Date & time. Confirm that the displayed time, date and time zone match your circumstances.
When available and appropriate, use the normal automatic clock settings and the built-in synchronization control. Microsoft’s Windows troubleshooting documentation also describes these clock synchronization controls. You should not change the clock to an incorrect time just to make the display effect appear.
If the sunset-based option is unavailable or behaves unexpectedly, inspect Location under Privacy & security. Determine whether the feature can obtain the location information it needs. Respect family, organizational and personal privacy settings. Do not remove device management or enable unrelated app permissions in order to test a display preference.
There is a useful alternative for people who prefer not to make location available. Choose fixed activation hours that fit your own routine. Those hours do not automatically follow seasonal changes in sunrise and sunset, but they can provide a predictable schedule without relying on the same location-based calculation.
Travel and recent time-zone changes are also worth considering. A schedule that once matched an evening routine may need adjustment after moving to a different location. Verify the device clock instead of assuming the graphics subsystem is at fault.
Repeat the manual and scheduled comparisons after correcting an actual discrepancy. If manual activation remains successful and the fixed schedule works, keep the arrangement that meets your requirements.
Test The Built-In Screen And External Monitors Separately
A Windows laptop or desktop can drive displays through several different connection paths. A laptop’s integrated screen, a directly connected HDMI or DisplayPort monitor and a monitor attached through a USB docking station may not all behave identically. Compare each screen rather than generalizing from one result.
Use the intended normal display arrangement and move your harmless white test document between the available screens. Turn Night Light off and on manually at a visible strength. Record which screen changes and whether the other screen remains at its previous color temperature.
If only the built-in screen responds, save your work and investigate the external monitor’s connection. When the equipment supports it, a direct connection to the computer can help distinguish a native graphics output from a dock-based display path. Use suitable cables and ports, and do not force unsupported connectors or interrupt active storage attached to a dock.
Open Display settings and verify that Windows recognizes the intended monitor. Our second monitor troubleshooting guide provides further checks when a screen is missing entirely. Detection and Night Light compatibility are different conditions: an otherwise functioning display may still lack support for particular color adjustments.
Also inspect the monitor’s own picture mode. Some televisions and external monitors apply their own color processing, which can make an operating system adjustment difficult to assess. Compare a standard mode when it is safe and appropriate, recording the original setting first.
If the feature works through one supported arrangement but not another, retain that evidence for the equipment manufacturer. A different connection or an independent monitor color preference may be more practical than an intrusive repair of an otherwise functioning Windows installation.
Identify DisplayLink And Basic Display Driver Limitations
A grayed-out Night Light control can be associated with the way Windows drives the display. Microsoft specifically identifies certain display drivers, including DisplayLink and Basic Display, as configurations in which Night Light is unavailable. Consequently, an ordinary visible desktop does not guarantee access to every optional color feature.
Open Device Manager by right-clicking Start and selecting the appropriate entry. Expand Display adapters and record the listed devices. If the computer is using Microsoft Basic Display Adapter in place of its proper graphics driver, consult the computer or graphics hardware manufacturer’s supported driver installation method. Do not install an arbitrary package simply because its description mentions graphics.
A DisplayLink-based dock or adapter deserves a different assessment. Its display path may not support the standard Windows adjustment even though the monitor itself works correctly. Check the exact dock model and its official technical documentation. A compatible direct output may allow you to use the desired feature, but access to that output depends on the hardware available.
A computer with hybrid graphics can list more than one adapter. Record the models and determine which supported driver arrangement the manufacturer recommends. Do not disable one adapter at random; doing so could create new display or power-management problems.
If the driver listing is unfamiliar, our Windows 11 device driver guide explains how to identify and obtain drivers from trusted sources. Use the exact computer model and operating system architecture.
The key decision is whether you have a missing appropriate driver or a genuine compatibility limitation. The first may be resolved through a supported update, while the second may require an alternative display connection or an independent monitor adjustment.
Update The Graphics Driver Safely
When the Night Light switch is unavailable or its operation changed after an installation, inspect the graphics driver before proceeding to more disruptive system repairs. Microsoft recommends Windows Update as the preferred route for ordinary device driver updates. Use the built-in update interface to check for a relevant compatible package.
Save open work and make sure you can identify the actual display adapter before changing it. Note the existing driver version where possible. If a suitable driver update is offered, install it through the supported process and allow any required restart to finish. Do not interrupt a driver update because the display briefly changes appearance.
If ordinary Windows Update does not provide the appropriate package, consult the official support resources for the specific computer or graphics device. A laptop manufacturer may supply a graphics configuration tailored to that model. The correct choice depends on the device, not just the brand name printed on a component.
Microsoft’s Device Manager driver documentation explains supported driver update, reinstallation and rollback methods. Use the documented steps that match the evidence. Avoid unfamiliar driver download sites, generic driver updater applications and instructions to disable driver signature checks.
After the update, reopen Display settings and repeat the manual white-document test. Also verify ordinary display resolution, external screen detection and any graphics features you rely on. A driver installation should restore the intended operation without breaking other functionality.
If a graphics problem appears during an update, preserve the error details and follow the manufacturer’s recovery guidance. The Windows black screen with cursor guide covers a separate screen problem that may require different diagnostic steps.
Investigate Problems After A Recent Driver Or Windows Update
A problem that begins after an update can justify comparing the current driver with the previous working configuration. Establish the timeline rather than assuming the latest update is responsible. Verify whether Night Light worked on the same physical display and connection before the change.
In Device Manager, inspect the properties of the relevant display adapter and open its Driver tab. If a previously installed driver is available and the rollback action is appropriate, an authorized administrator can consider that supported option. A rollback is not always available, and its effects depend on the device and driver history.
Record the version and the reason for the change. Follow the confirmation and restart instructions when required. Test the original Night Light symptom using the same screen and strength setting. If the symptom remains, avoid repeatedly switching between packages without a specific diagnostic reason.
A successful rollback still needs appropriate follow-up. Check official support information for a corrected compatible driver and consider the security and stability implications of retaining an older package. Keep the rest of Windows appropriately updated.
If general system performance changed at the same time, our slow Windows 11 after an update guide offers a separate diagnostic approach. Do not uninstall a broad operating system security update solely because a display preference no longer behaves as expected. A targeted driver or scheduling correction is usually more proportionate.
For managed computers, let the administrator assess any approved update or rollback. Organizational systems may rely on a particular tested graphics package. The aim is to resolve the demonstrated fault while preserving stable graphics operation and ordinary security protections.
Check Competing Color Controls And Display Modes
Several layers of settings can influence the appearance of a Windows display. The graphics driver may expose color adjustments, the monitor may have its own picture presets, and specialized applications may make intentional changes to color appearance. When the Night Light status seems inconsistent with what you see, isolate those influences.
Start by recording the current settings. If you use a separate display color-temperature application, review its documented controls and temporarily disable only its relevant color adjustment when appropriate. Do not uninstall useful software merely because it also affects display colors. Repeat the Windows manual test after the reversible change.
Check whether accessibility color filters or a custom color-management arrangement is deliberately active. Some users depend on these settings. Do not remove them without understanding the impact. Microsoft’s color and contrast guidance describes different display preferences with distinct purposes.
For an HDR-capable screen, record whether the behavior differs between ordinary supported display modes. A comparison can be useful, but changes in display processing require careful interpretation. Do not infer universal incompatibility from a single monitor’s behavior. Restore the preferred HDR configuration if the comparison does not help.
Users working with calibrated color profiles should avoid deleting them casually. Preserve an existing calibration and consult the relevant display or calibration documentation if the color behavior changes unexpectedly. A warmer display is not always suitable for accurate image editing.
When a particular application alone looks different, compare it with an ordinary document and desktop settings. This helps determine whether the problem affects the overall displayed output or is limited to a particular application’s presentation.
Use Proportionate Recovery And Verify The Final Result
If the supported display checks resolve the issue, verify the original symptom one more time. Test manual activation, restore your preferred strength, and confirm the schedule if you use one. Check each relevant physical display and connection. Save work and repeat the ordinary test after a normal restart if the problem originally returned at startup.
If the issue persists, document the Windows version, graphics adapter, installed driver, monitor models, connection method and manual versus scheduled behavior. These details are more useful to a manufacturer or technician than a report that Night Light simply does not work.
Avoid popular registry-deletion instructions that remove operating system settings without an established cause or verified backup. A display preference does not ordinarily justify manipulating protected system data, clearing every display profile or reinstalling Windows. If other operating system features also malfunction, our Windows system file repair guide explains the distinct purpose of supported system integrity tools.
Where the display path is genuinely incompatible, consider using a supported direct connection or the monitor’s own documented warm-color preset. Adjusting a monitor independently may change its appearance, but it is not the same as restoring Windows’ automatic Night Light feature.
This guide uses Microsoft’s official display and graphics-driver documentation alongside controlled diagnostic reasoning. The illustrations are conceptual rather than actual screenshots. The procedures were not independently performed on a physical Windows 11 computer for this article. A reliable result should preserve the display quality, accessibility settings, privacy preferences and functionality that you need in everyday use.
Frequently Asked Questions
Why Is Night Light Not Working In Windows 11?
Possible explanations include a disabled schedule, low strength, incompatible display drivers or a particular monitor connection. Test manual activation before investigating the schedule.
Why Is The Night Light Toggle Grayed Out?
The display driver may be missing or incompatible. Microsoft identifies certain Basic Display and DisplayLink configurations as unsupported. Check the exact display connection and compatible driver.
Why Does Night Light Work Manually But Not Automatically?
Check the enabled schedule, selected hours, date and time zone. For sunset scheduling, also consider the availability of location information. Test custom hours first.
Can Night Light Work On An External Monitor?
Yes, compatible external display configurations can support it. Results depend on the graphics driver and connection path, so compare each connected monitor.
Do I Have To Enable Location To Use Night Light?
No, manual activation and fixed-hour scheduling are alternatives to the location-dependent sunset schedule.
Does Night Light Reduce Screen Brightness?
It primarily changes displayed color warmth. Adjust brightness separately using the supported Windows or monitor controls.
Should I Reset Windows To Repair Night Light?
No, an isolated display preference rarely justifies a complete reset. Use supported settings, scheduling and compatible graphics driver checks first.