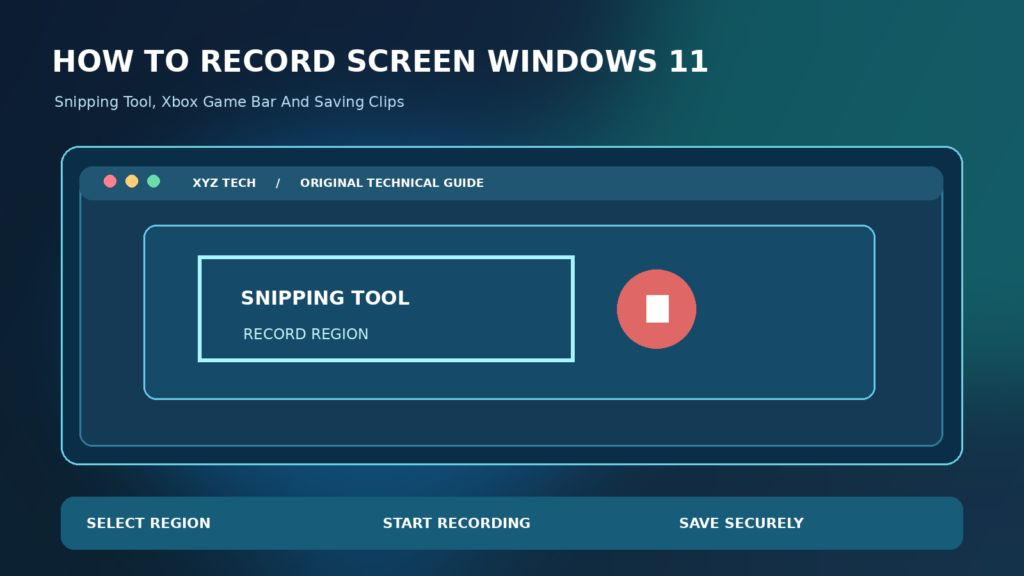

This guide explains both built-in methods, their limitations, audio options, file locations and verification checks.
Choose A Built-In Screen Recorder
Windows 11 offers built-in options for capturing video without installing an untrusted recorder. Snipping Tool records a selected screen region and is generally convenient for tutorials, while Xbox Game Bar focuses on supported applications and games. The best choice depends on what you need to show, not merely the presence of a red Record button.
Begin by deciding whether you need a short region-based demonstration or a supported app/game capture. Microsoft’s Snipping Tool documentation describes its Record and New controls. Its Game Bar guide covers supported application recording.
Before recording, confirm the selected tool supports the window or area you intend to show. A limitation of one tool does not mean that Windows cannot record any screen. Avoid downloading unknown screen capture software from advertisements merely because one built-in shortcut behaves differently from a tutorial.
Prepare The Screen And Protect Privacy
Screen recording can capture notifications, personal documents, account names, messages, access tokens and other information the author never intended to publish. Even a brief moment when a password manager appears may create a privacy problem. Preparation matters as much as video quality, particularly when a clip will be shared outside your organization.
Close confidential windows and use sample files or a test account where practical. Temporarily silence unrelated notifications through supported settings and arrange the target app so the required controls are visible. Do not record people or private meetings without appropriate authorization and consent.
Reviewing the desktop before recording is easier than attempting to hide an accidental exposure in every frame afterward. A proper tutorial should present only the information necessary to explain the task. If a secret appears in the captured video, rerecording is usually safer than relying on a rough visual blur.
Open Snipping Tool In Windows 11
Snipping Tool is an official Windows application that can capture screenshots and, on supported Windows 11 releases, video snippets. Its interface can change as Microsoft updates the app. Looking for a screenshot button alone may cause confusion because the application supports multiple capture modes.
Open Start, search for Snipping Tool and launch it. Find the Record option in the toolbar and select it. If recording is absent, inspect Windows Update and the official Microsoft Store for supported app updates, respecting workplace administration policies. Avoid installing a similarly named third-party program.
A short test is sufficient to confirm that the feature is available. If Snipping Tool fails to open, solve that separate app issue before committing to a full tutorial. Our Snipping Tool Not Working Guide explains related application troubleshooting.
Record Using The Windows Shortcut
Microsoft documents Windows logo key + Shift + R for opening Snipping Tool’s video-region selection on supported Windows 11 devices. This is different from Windows + Shift + S, the commonly used screenshot shortcut. A keyboard shortcut can fail if another program captures it or the relevant Windows feature is unavailable.
Press Windows + Shift + R, then observe the screen selection controls. If nothing happens, open Snipping Tool directly and use its visible Record option. Compare the two methods without repeatedly restarting Windows or installing a keyboard remapper. Our Keyboard Shortcuts Not Working article addresses broader shortcut conflicts.
Do not assume that a shortcut working on another person’s device proves the same feature is installed on yours. App versions, managed configurations and keyboard layouts can differ. Verify the functionality through the interface before attempting deeper repairs.
Select The Area You Want To Capture
Snipping Tool video capture is built around selecting an on-screen region. A tight selection improves clarity but can cut off pop-up menus, dialog boxes or a mouse movement that forms part of the demonstration. Too large a selection can make interface text difficult to read on a phone.
After choosing Record > New, drag around the required application area. Include sufficient margin for windows that open during the task, and avoid showing personal information outside it. If the workflow moves across separate monitors, consider recording separate segments when one region cannot capture everything cleanly.
Perform a short trial run before producing the final clip. If an essential menu falls outside the border, adjust it and try again. A readable video that captures every relevant step is better than one that looks large but conceals the needed controls.
Start The Recording And Perform The Steps
Once a suitable region is selected, use the recording Start control in the supported Snipping Tool interface. The recording begins after the tool indicates it is ready, so do not assume that actions performed during setup were captured. Give viewers enough time to see what you select.
Move through menus deliberately and pause briefly before clicking an important control. Avoid talking about a different screen from the one currently shown. If you make an error, consider repeating the step cleanly or trimming it later rather than rushing to conceal the mistake.
When finished, use the supported Stop control. Review the resulting clip before saving it. A stopped recording is not necessarily a file stored in your intended folder. Verify the actual saved artifact separately to avoid losing the only usable copy.
Save The Recording To A Known Folder
A video is useful only if you can retrieve it. Snipping Tool offers a save workflow after a capture, and the exact destination depends on the app version and your choice. A filename such as ‘file-001’ reveals little about the content and can be confused with other clips.
Choose Save or the appropriate control, select a trusted local folder, and give the video a descriptive name. Check the file extension and use File Explorer to open it. Our File Extension Guide explains what extensions mean and why merely renaming one does not convert a video.
Do not delete the original captured work until a separate playback test succeeds. If the destination is cloud-synchronized, verify that the local file exists before relying on a cloud icon. A video that appears in a file list but fails to open needs more investigation.
Record Audio And Narration If Supported
Screen video and microphone narration are separate features. Some Windows tools and versions can capture microphone or system audio with their supported recording options, but the behavior may differ across apps and updates. Do not assume a visible audio icon guarantees that the intended microphone is selected.
Make a ten-second test and speak at a normal distance. Play it back to confirm whether your voice, app audio or both are present. If narration is too quiet, review the input device and recording settings rather than amplifying the exported clip blindly. Our Microphone Volume Too Low Guide explains relevant controls.
Check whether the recording accidentally captures private conversations or system notification sounds. If audio is unnecessary for the tutorial, a silent clip with accurate written steps may be preferable. Accessibility and privacy should guide the choice.
Open Xbox Game Bar For Application Recording
Xbox Game Bar is another built-in Windows tool, intended particularly for games and supported applications. It has controls for capturing activity and may be more appropriate than a region snip for specific programs. That focus also means it is not a replacement for every full-desktop recording need.
Open a supported game or app, then press Windows + G to view Game Bar and its capture controls. Check the official Microsoft guide for the available recording commands and supported workflow. Make a brief trial clip and look for the saved result before recording something important.
Do not assume all windows and protected content can be captured. If Game Bar refuses to capture an unsupported surface, use a legitimate alternative workflow rather than trying to bypass security or content restrictions.
Use Game Bar Recording Shortcuts Carefully
Game Bar offers supported keyboard shortcuts for starting and stopping certain captures, including Windows + Alt + R on compatible systems. Keyboard mappings and app policy can differ. A recording shortcut that does nothing may mean the current window is unsupported or Game Bar is disabled, not necessarily that the keyboard is defective.
Test with a normal supported application. Confirm that Game Bar controls appear and that the capture progresses. Avoid recording the Windows desktop or sensitive security prompts unless the tool and policy explicitly permit it. The purpose of a troubleshooting clip should determine whether Game Bar is the appropriate tool.
After ending the clip, verify the file opens and contains the requested program. Do not rely solely on a notification claiming the recording was saved. A captured clip may omit content outside the supported application window.
Locate Saved Xbox Game Bar Videos
Game Bar commonly saves clips in a Captures folder under the current user’s Videos library, although settings can vary. Searching random system directories or deleting video folders is unnecessary when the built-in recording application can show its captures.
Use the capture interface or File Explorer to locate the latest saved clip. Sort by modification date if necessary, then open and verify it. If File Explorer itself is unusually slow, our File Explorer Slow Guide covers that separate performance issue.
If a recording does not appear, confirm that the capture actually started and that the selected application was supported. A failed save is different from a successful save into an unfamiliar destination. Do not install a file-recovery tool until you have distinguished those cases.
Understand Desktop Capture Limitations
A video recorder can capture a game, one app, a selected region or an entire desktop depending on its technology. Those capabilities are not interchangeable. Game Bar focuses on supported games and apps, while Snipping Tool provides a region recording workflow in current supported versions.
Decide which surfaces need recording before selecting a tool. If the process requires switching among windows, Snipping Tool’s region may need to include those windows or the demonstration may need separate clips. Do not assume an unsupported capture is a bug requiring driver manipulation.
Protected video, security-sensitive screens and some special overlays may intentionally prevent capture. Respect those restrictions. When creating legitimate tutorials, use a demonstration environment or written instructions for screens that should not be recorded.
Check Resolution And Readability
Small interface text becomes unreadable when a large desktop recording is played on a phone. High resolution does not guarantee legibility if the recording is scaled down heavily. The selected region, display scaling, clip dimensions and eventual hosting platform all influence the result.
Make a short sample of a screen showing typical menu text and play it at the likely audience’s viewing size. If the labels are hard to read, record a smaller region or adjust the presentation. Avoid changing system scaling during a critical recording without testing its effect on open windows.
Keep the pointer visible and make deliberate movements. A tutorial should allow viewers to identify exactly which button was selected. Clear sequencing often matters more than visual effects or an unusually large file size.
Add Accurate Narration Or Captions
Captions and narration make a recording more useful for viewers with different accessibility needs and working environments. Automatic captions can be helpful, but technical terms, commands and filenames are often transcribed incorrectly. An inaccurate command in a caption can mislead users even when the video looks polished.
Provide a written step list alongside the recording when practical. If you generate captions automatically, review the important terms against the actual interface. Avoid uploading confidential footage to an unapproved transcription service. Keep narration synchronized with the actions shown.
A silent video can still be accessible when paired with clear text descriptions, depending on its purpose. Evaluate whether viewers need audio cues, captions or a transcript. Do not treat auto-generated captions as proof that instructions were verified.
Edit A Clip Without Losing Important Context
Trimming removes unnecessary pauses and can improve a tutorial’s pacing, but aggressive editing may conceal error messages or skip prerequisites. Microsoft’s Snipping Tool documentation refers to supported editing options, including Clipchamp in applicable configurations.
Keep an original raw recording and export a distinct edited version. Review the exported result from beginning to end to ensure it still shows the complete procedure. Do not publish a demonstration that removes the step explaining why a setting was changed.
Preserve context such as the version and application being demonstrated. If you obscure account details, confirm the masking covers every relevant frame. When a sensitive secret appears briefly, rerecording can be safer than editing it out incompletely.
Reduce Video File Size Sensibly
Long captures and large video dimensions can produce files that are inconvenient to upload or share. Compression, trimming and targeted capture areas can help, but indiscriminate conversion may make interface text unreadable or break playback compatibility.
Start by eliminating unnecessary footage. Use supported export controls when the editing tool offers them and preserve a copy of the source. Test the encoded video on a second device before deleting any original file. Renaming a filename extension is not actual video conversion.
If the finished clip will be hosted online, inspect the uploaded version because the platform may recompress it. A small clear clip with all relevant information is more useful than a massive recording that viewers cannot play smoothly.
Fix A Recording That Shows Black Frames
A recording that appears black can reflect a capture limitation, protected content or application-specific graphics behavior. It does not automatically mean the laptop’s display is failing. Test a normal, nonprotected application with the same recorder before changing display drivers.
If the normal test works, inspect the original app’s capture permissions and restrictions. Do not use unknown drivers or software intended to bypass protected video. If every recording is black, verify the Windows and recording app versions and consult official support guidance.
Capture limitations are sometimes intentional. A written description or a different authorized test environment may be more suitable than trying to circumvent them. Avoid exposing personal information while testing video recording settings.
Protect Meeting And Workplace Privacy
Recording a live meeting, workplace application or someone else’s content can require consent and authorization. A technical ability to capture a window does not automatically grant permission to store or share its contents. Security policies and data-protection rules can apply.
Check your organization’s approved recording process before creating clips containing customer data or employee conversations. Use sample accounts and fictional information for public tutorials where possible. Confirm that local and cloud storage permissions match the sensitivity of the material.
Do not post sensitive recordings to public troubleshooting forums as evidence. Redact or recreate the issue safely, and share confidential diagnostic material only through authorized channels. The same caution applies to screenshots and logs.
Diagnose Missing Screen Recorder Controls
If Snipping Tool lacks Record, check whether your Windows and app versions support the feature. If Game Bar capture is unavailable, confirm whether the active application is supported and whether managed-device policy restricts recording. The two issues can have different causes.
Use Settings, the official Microsoft Store and the relevant support documentation rather than downloading a modified copy of Windows tools. Restart the individual app after a supported update when needed. Do not assume a factory reset is necessary for a missing toolbar button.
Record the exact Windows build and app version when seeking support. A shortcut conflict, an unsupported window and an application update can look similar to a casual user but require very different steps.
Verify The Final Video From Start To Finish
A recording is not complete merely because a save dialog closed. The file must open and contain the intended procedure, with readable text and appropriate audio. Playback from the destination folder tests more than the editor’s preview alone.
Open the exported file and inspect the first and last steps, key menu transitions, mouse pointer visibility, audio quality and privacy. If possible, play it on a smaller screen to test legibility. Confirm the filename and folder so the correct version is shared.
For a published technology tutorial, compare the video’s menu wording with the written guidance. If Windows changes the interface later, note the version or revise the tutorial rather than pretending old screenshots apply universally.
Choose A Reputable Advanced Recorder When Needed
Specialized tasks such as multi-track audio, simultaneous webcams, multiple monitors and long-form broadcast production may require capabilities beyond built-in tools. A third-party program should be evaluated on security, support, compatibility and real workflow needs, not advertising alone.
Test the actual recording and export features with sample content before subscribing or installing additional plugins. Download from verified vendor sources, and do not disable Windows security prompts at the request of a suspicious installer. Unnecessary software introduces more settings and more failure points.
For a short everyday tutorial, Snipping Tool may be entirely sufficient. A larger professional workflow can justify advanced software, but only when its benefits outweigh setup, privacy and maintenance requirements.
A Practical Screen Recording Decision Table
A quick comparison helps choose between a region recorder and an application capture tool. It also reminds users that the recording surface, audio capability and privacy constraints should guide the selection. Do not treat a tool’s name as a guarantee of full desktop capture.
Use the table below to choose a starting point, then validate a sample before recording the final session. If the tool cannot capture your intended area legitimately, use a different approved method or a written walkthrough. The goal is to demonstrate a process accurately.
Saving and replaying the output remains essential whichever recorder you choose. A successful test should show the whole selected area, preserve readable text and avoid personal information. That is a more meaningful quality check than a single screenshot of a Record button.
Final Checklist For Clean Windows 11 Recordings
Choose the supported recording tool, confirm the app or region can be captured, hide private information, perform a short video and audio test, and save the clip with a clear filename. Review every important action and check whether interface text remains readable.
Keep an original when editing could remove context. Provide captions or written instructions if the audience needs them. Respect managed-device policies and content restrictions. There is no benefit in sacrificing privacy or reliability merely to capture a window that a tool does not support.
The strongest result is a video someone else can follow with confidence. Official Windows tools cover many ordinary recording needs, and careful framing, verification and sharing decisions matter as much as the capture feature itself.
| Need | Suggested Tool | Limit |
|---|---|---|
| Region Video | Snipping Tool | Check Audio Options |
| Game Capture | Xbox Game Bar | Supported Games And Apps |
| Advanced Multi-Track | Trusted Dedicated Recorder | More Setup And Permissions |
| Private Business Screen | Organization-Approved Method | Consent And Security Policy |
Frequently Asked Questions
How Do I Record My Screen On Windows 11 For Free?
Use Snipping Tool’s Record mode for a selected region, or Xbox Game Bar for compatible games and applications.
What Does Windows + Shift + R Do?
On supported Windows 11 releases, it opens Snipping Tool’s video-region recording interface.
Is Windows + Shift + S A Video Shortcut?
No. It is a screenshot shortcut. Use Snipping Tool Record or Windows + Shift + R for supported video capture.
Can Xbox Game Bar Record The Entire Desktop?
Not every desktop surface is supported. Game Bar is designed for compatible games and applications.
Where Does Windows Save Screen Recordings?
Snipping Tool lets you save the clip to a chosen location. Game Bar commonly uses the Videos > Captures folder.
Can I Record My Microphone Along With The Screen?
Audio options depend on the app and version. Make a short test and check microphone permissions and input selection.
What If Snipping Tool Has No Record Button?
Verify that the installed Windows 11 and Snipping Tool versions support video capture and use official update channels.
Why Does My Recording Show A Black Screen?
Protected content, unsupported capture surfaces or an application graphics limitation may be involved. Test a normal nonprotected app.
How Can I Make The Video Easier To Share?
Trim unnecessary footage, capture only the required region and use a suitable supported export format while preserving readability.
Should I Review A Screen Recording Before Sharing It?
Yes. Play the complete file and check for missing steps, private information, unreadable text and audio problems.