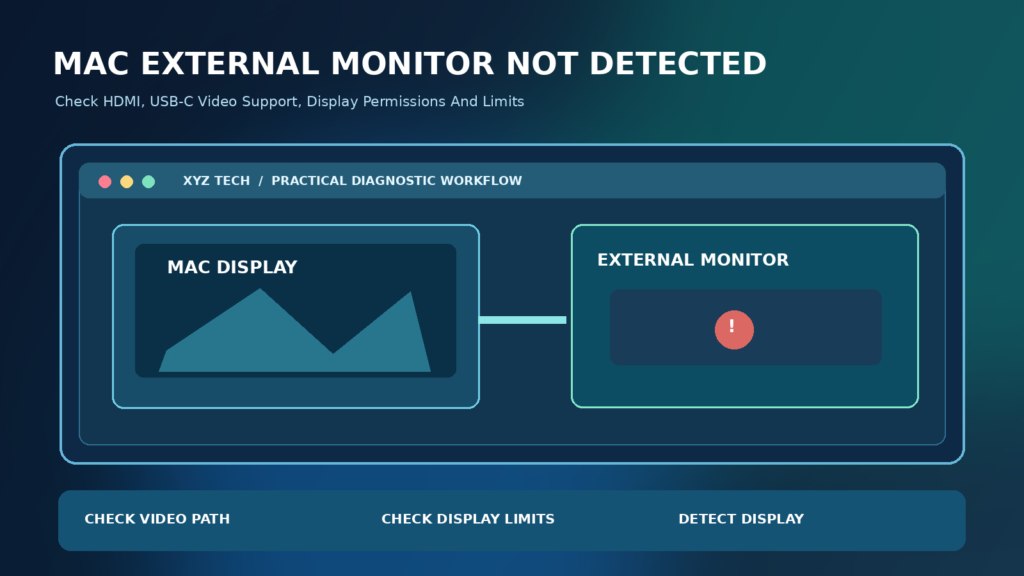

This original guide separates a truly undetected monitor from a detected display that is black, extended to an empty desktop or limited by a particular cable or dock. See our Mac Wi-Fi Troubleshooting Guide for an unrelated connectivity issue.
Before You Change Anything
A Mac can fail to recognize an external monitor because of the selected monitor input, a loose cable, an incompatible adapter, the Mac model’s display limit, accessory authorization or software. A dark panel is not automatically a defective graphics processor. If your Mac continues to work on its built-in display, begin by checking the physical video path and the exact symptom rather than resetting the computer.
Distinguish a monitor that says No Signal from a monitor that is detected in macOS but stays black. Also distinguish a screen that works when connected directly from one that fails only through a dock. These three patterns require different next steps. Apple’s External Display Troubleshooting explains how the physical connection, display modes and software may affect what you see.
The Safest Five-Minute Troubleshooting Sequence
Confirm that the monitor is plugged into power and its built-in input menu selects the HDMI, DisplayPort or USB-C socket actually in use. Reseat the video connection gently at both ends. If possible, try a known video-capable cable directly between the monitor and a supported Mac port, bypassing a hub. Then choose Apple menu > System Settings > Displays to see whether the external display is recognized.
Apple’s Connect Displays To Your Mac guidance notes that a supported display normally appears automatically. If it does not, use Detect Displays where offered and verify your Mac’s supported display count. A new accessory permission prompt may also require attention on some Apple silicon notebooks. Test one change at a time, and do not purchase an expensive dock until you know which component is responsible.
Confirm Power And Monitor Input
Use the monitor’s own buttons or on-screen controls to verify that its panel and input menu work. A powered display can still show no picture if it is listening to the wrong input. A cable connected to HDMI 2 usually will not show an image if HDMI 1 is selected. Some displays switch inputs automatically, but relying on that behavior can make a simple setup look broken.
Check whether a different device can display an image on the same input. If the monitor’s on-screen menu never appears, investigate its power source before blaming the Mac. If it shows No Signal, the panel may be working while the video path is not. Record the input and cable used so later tests can isolate a change. Avoid firmware updates as the first response to a black screen.
Reseat Cables Without Damaging Ports
Disconnect and reconnect the video cable carefully. Do not force a connector into a port or bend an adapter at a sharp angle. Inspect both ends for visible wear and the port for foreign material, using safe handling methods recommended by the manufacturer. A slightly loose plug can cause a display to appear briefly, flicker or vanish after a minute.
A spare cable is useful only if it supports the video mode you need. USB-C cables are not interchangeable merely because their plugs fit. Some carry charging or data without the video capability required by a monitor. Try a documented compatible cable rather than a random spare. For a general connector-capability discussion, see our USB-C Port Troubleshooting Guide, while following Mac-specific directions for this repair.
Disconnect The Dock For A Direct Connection Test
If the monitor uses a docking station, hub, converter or chain of adapters, simplify the setup. Connect the display directly to a supported Mac video port using a compatible cable. A direct connection tests the Mac and monitor without introducing the dock’s power, firmware or output limitations. When direct output works, the intermediate hardware becomes a more likely cause.
Reconnect the dock and then one monitor at a time. Verify the dock’s specification for the number of displays, their supported resolutions and how it handles USB-C or Thunderbolt video. Some docking stations need particular software or external power. Avoid installing a third-party driver from a search advertisement; use the original vendor’s documentation. A corporate Mac or docking station may require IT approval before changing its configuration.
Check How Many Displays Your Specific Mac Supports
Apple silicon models and generations do not all support the same number of external displays. A Mac that supports one independent external monitor cannot necessarily drive two simply because a hub has two sockets. Resolution, refresh rate and whether the built-in screen is active may also affect documented support. Apple’s MacBook Pro Display Support and MacBook Air Display Support pages give model-specific requirements.
Choose Apple menu > About This Mac and identify the exact model and chip. Then review its specifications for Display Support or Video Support. Do not rely on a video showing a different Mac generation or a different type of dock. If the planned display setup exceeds your Mac’s native capability, look for an officially supported configuration rather than repeatedly resetting macOS. Be especially cautious of claims that any multiport USB hub provides independent screens.
Understand USB-C And Thunderbolt Video Capabilities
A USB-C connector does not guarantee identical behavior across every cable, port and accessory. Depending on the equipment, a supported video-capable USB-C or Thunderbolt connection may transmit display signals, while a charging-oriented cable may not. Apple’s External Display Connection Guide describes the supported Mac ports and adapters.
Check the exact adapter model and its stated video output. Confirm whether it supports the monitor’s required resolution and refresh rate. If one cable works and another does not, note that result rather than changing system security settings. A computer can charge through a USB-C accessory while still being unable to send video through it. Charging success is therefore not proof of display compatibility.
Check HDMI, DisplayPort And Adapter Direction
An HDMI output, a DisplayPort input and a USB-C video connection may look straightforward but adapters can be directional. A cable intended to convert one source into another format may not work in reverse. Verify the intended direction of signal conversion, the required connector version and whether the monitor’s selected input matches the connection.
Start with one cable path that the manufacturer documents as compatible. If it produces an image, add adapters only when necessary. This approach distinguishes a converter problem from a missing macOS setting. Avoid purchasing a generic replacement by appearance alone. An adapter that physically fits can still lack the electrical or protocol capability needed for the exact display combination.
Locate The External Display In System Settings
Open Apple menu > System Settings > Displays. A connected and recognized monitor should normally appear among the available display controls. If it appears, inspect resolution, arrangement and the selected use mode. If it does not, focus first on cable compatibility, display support and accessory authorization rather than trying to adjust a monitor macOS cannot see.
The Apple Displays Settings Reference identifies which controls may be available. Settings can vary by macOS release and by monitor. A missing button is not automatically evidence of a faulty Mac. Confirm the monitor is powered and connected, then consult the current guidance matching your system instead of following screenshots from an unrelated release.
Use Detect Displays When macOS Offers It
When the display should be supported but has not appeared in Settings, Apple documents a Detect Displays action in supported macOS releases. Open Displays settings and hold the Option key if needed to reveal the control. Click it after reseating a known-good cable. Allow macOS a moment to enumerate the connected display before interpreting the result.
If nothing changes, return to the physical connection and display-count checks. Repeatedly pressing the detection control cannot compensate for an adapter that lacks video functionality. Do not interpret Detect Displays as a guarantee that every screen can be used at every resolution. The feature is a diagnostic option that can refresh detection when a compatible connection exists.
Review Accessory Permission Prompts
Some Apple silicon Mac laptops can ask for approval when a new accessory is connected. If a permission prompt appears after connecting your dock or external display, determine whether it is a device you intentionally attached. Apple’s Mac Ports And Accessories Reference explains that declining an accessory can allow charging but restrict data communication.
Do not approve unknown accessories or disable an organization’s security settings to make a screen work. If the Mac is managed by your employer, ask IT about approved docks and authorization policies. If you never saw a prompt, do not assume this is necessarily the cause. Use observed behavior, device specifications and a direct-connection test to decide what to investigate next.
Understand Extended Desktop And Mirroring
A recognized external monitor can look blank simply because macOS is using an extended desktop. A window opened on the built-in screen may not automatically appear on the second one. In Displays settings, inspect Arrangement and whether the external screen is set to mirror or extend. Apple’s Displays Settings Guide describes these options.
Move a harmless test window toward the edge corresponding to the external screen. If it appears, the video connection is active and the remaining problem is arrangement or expected window placement. With mirroring, both screens show the same desktop. Changing mirroring will not repair a physically disconnected monitor, and unnecessary resets are not appropriate when the screen is already receiving a valid image.
Test A Conservative Resolution And Refresh Rate
A Mac and a monitor can be compatible at one video setting but not at the highest advertised resolution or refresh rate through the chosen cable or adapter. If macOS recognizes the display but the image stays dark or unstable, choose a supported default or lower setting, then test whether the picture becomes reliable.
Apple notes that software and connection capabilities affect the available modes in its External Display Guidance. A docking station may impose a different limit than a direct cable. Do not force an unsupported mode or assume that an unavailable high-refresh option means the hardware is defective. Compare the entire connection path and monitor documentation before increasing settings again.
Check Brightness And Monitor Sleep
A non-Apple monitor may require its built-in menu to adjust brightness. The macOS keyboard controls do not necessarily change its backlight. Verify that the display is awake, that the brightness is not set near zero and that the selected input has not entered standby. These checks are distinct from determining whether macOS has detected the screen.
Wake the computer with its keyboard or trackpad and inspect the monitor’s power indicator. If the screen displays an image after you move the mouse, it may have been sleeping rather than disconnected. Do not diagnose a dark full-screen application as a loss of video without testing a normal desktop window. Keep any working brightness and sleep settings recorded.
Test Another Compatible Cable, Port Or Monitor
Replace one variable at a time. Try a second compatible cable, then a different supported Mac video port, then another monitor if one is available. If the same Mac and cable work with another display, investigate the original monitor’s settings or capabilities. If both displays work directly but fail through a dock, the dock becomes the stronger suspect.
A swap test is more informative when you keep the cable, input and display mode consistent. If a monitor works on another computer, that does not guarantee it will work with an unsupported adapter on the Mac. Record both successful and unsuccessful combinations so you can explain the issue to the manufacturer without repeating random purchases.
Why A Dock With Two Video Sockets May Show One Screen
Some docks depend on native video streams supplied by the Mac. Others use specialized display technology that requires software. Two physical HDMI sockets do not imply the dock can produce two independent external desktops with every Mac. Power, firmware, bandwidth and software support may also constrain the arrangement.
Compare the dock model with the Mac’s documented display limits before changing any settings. Apple’s MacBook Pro and MacBook Air support pages describe model differences. For a work setup, note each intended monitor’s resolution and refresh rate and confirm that the computer, dock and cable path can support them together.
Test With The MacBook Lid Open First
Users who normally close a laptop lid may mistakenly diagnose a black external screen as a video failure when the problem is a closed-lid power or input-device condition. Apple notes that supported closed-lid use can require an external keyboard, mouse and suitable power arrangement. Test the monitor with the laptop lid open before investigating a closed-lid configuration.
If the external screen works while the lid is open, you have separated basic video support from a sleep or power behavior. Review Apple’s closed-lid display instructions for your Mac and macOS version. Avoid forcing the computer to stay awake through untrusted utilities. A compliant setup should preserve the intended power-management protections.
Restart And Update macOS Through Official Controls
After confirming that the video path is supported, save your work and restart the Mac normally. Reconnect the display and inspect System Settings > Displays again. If the system offers a relevant macOS update, use System Settings > General > Software Update and follow Apple’s supported instructions. Software can affect detection and display mode negotiation, but an update does not add video capability to an incompatible cable.
Back up important data before major operating-system changes. Do not install drivers or firmware from pop-ups that claim to scan your Mac’s display hardware. For a managed Mac, obtain approval before applying updates or accessory software. A restart should be one controlled test in a broader diagnosis, not a repeated substitute for checking the physical connection.
Inspect Connected Hardware In System Information
System Information can show relevant details about the Mac’s graphics and attached accessories. Use the supported macOS interface to open it and inspect the display and USB or Thunderbolt sections as appropriate. This can help establish whether the dock itself is recognized even if the connected monitor is not.
Do not assume every connection reports identical details or that one missing entry proves hardware failure. Use System Information as additional evidence alongside Displays settings and direct-connection testing. The Mac Accessories Guide explains the availability of the tool. When seeking public help, remove private identifiers and serial numbers from screenshots.
If The Monitor Is Visible But Text Is Blurry
A blurry image means the monitor is receiving video, which is distinct from an undetected display. Review the resolution and scaling controls in Displays settings. Test the default resolution and check whether the selected mode matches the screen’s intended pixel dimensions. An adapter may also limit available modes.
If the display remains stable but text appears soft, do not repeatedly disconnect cables just because a page discusses missing monitors. Read the relevant Apple display-quality instructions and change one picture setting at a time. If you use color profiles or accessibility zoom, distinguish those choices from failure to detect the physical screen. The symptom should guide the repair.
What To Do With A Mac Managed By Work Or School
Organizations may specify approved docks, accessory policies, software versions and connected-display procedures. If a managed Mac cannot detect an authorized monitor, contact the organization’s support team with the device model, macOS version, dock model, display input and results of direct tests. Do not bypass security restrictions by changing hidden settings or downloading unofficial scripts.
IT can confirm whether the dock requires an approved driver, whether the Mac supports the requested number of screens and whether accessory permission is restricted. For a personal Mac, use Apple’s support channels and the monitor manufacturer’s own help resources. A concise evidence-based report avoids unnecessary device resets and protects work data.
How To Distinguish Mac And Windows Guidance
Mac and Windows computers may use the same monitor and cable, but they do not share the same operating-system controls. On macOS, use Apple menu > System Settings > Displays and verify model-specific Apple specifications. Do not follow Windows Device Manager or registry changes on a Mac simply because a search result mentions HDMI.
For comparison, our Second Monitor Not Detected On Windows 11 guide covers Windows-specific checks. Our Mac Screenshot Not Saving Guide explains a separate macOS settings issue, and Laptop Screen Flickering covers an active but unstable picture. Use the appropriate workflow for the symptom and operating system.
A Decision Table For Common Display Symptoms
Match the visible problem to the safest first test. A No Signal message points toward input and cable checks, a missing second screen toward display-count limits, and a display that works only with a direct cable toward the dock or adapter. A screen detected in settings but showing no picture calls for brightness, sleep and video-mode inspection.
The table below is an original editorial guide, not an automatic hardware diagnosis. It does not replace the technical specifications for your exact computer, cable or monitor. Use it to prioritize reversible checks and preserve the settings that already work. A full macOS reinstall is not the right first response to a monitor whose input is set incorrectly.
| Symptom | First Check | Next Action |
|---|---|---|
| No Signal | Input And Cable | Direct Connection |
| Dock Fails, Direct Works | Dock Compatibility | Review Video Output Limits |
| Display Detected, Screen Black | Brightness And Sleep | Test Supported Mode |
| Second Monitor Missing | Mac Display Support | Check Exact Model |
| Empty External Desktop | Extend Versus Mirror | Move Test Window |
Verify The Repair Before Ending Troubleshooting
After the monitor returns, test whether the picture remains stable when you move a window to the external desktop, change between supported display arrangements and wake the Mac from sleep. Confirm the expected resolution and refresh rate. If you use a dock, reconnect additional accessories one at a time so you can identify whether any combination triggers the failure again.
Keep a record of the cable, port, adapter and display mode that worked. A monitor that turns on for a few seconds but loses signal later should not be marked fully repaired. If a known-compatible direct connection continues to fail, give Apple or the display vendor a concise record of the tests instead of making repeated high-impact system changes.
Frequently Asked Questions
Why Does My Mac Not Detect My External Monitor?
Possible causes include the wrong monitor input, incompatible cables or docks, unsupported display count, accessory authorization or a software issue. Test the direct video path first.
Where Is Detect Displays On A Mac?
Open System Settings > Displays. On supported macOS versions, hold Option to reveal Detect Displays when available.
Does Any USB-C Cable Work With An External Display?
No. USB-C describes a connector shape, not guaranteed video capability. Verify support for the required video mode on the cable, port and adapter.
Can My MacBook Drive Two External Displays?
This depends on the exact model, chip, resolution and refresh rate. Check Apple’s model-specific specifications.
Why Does The Monitor Work Directly But Not Through My Dock?
The dock may have power, compatibility, bandwidth, firmware or native-output limitations. Compare the dock’s supported configurations with your Mac.
Why Does A Monitor Show No Signal?
It may be on the wrong input or not receiving a compatible video signal. Check the monitor menu, cable and Mac output.
What If macOS Detects The Screen But It Stays Black?
Check sleep, brightness and supported video modes. A recognized monitor is different from a display that macOS never detects.
Does A New Display Accessory Need Approval?
Some Apple silicon Mac laptops require permission for new accessories. Approve only an accessory you recognize and intended to connect.
Why Does The Monitor Go Dark With My Laptop Lid Closed?
Closed-lid display use may require appropriate power and external input devices. Verify the display works with the lid open first.
Should I Reinstall macOS To Fix An External Display?
Not as an initial step. Verify the input, cable, Mac display support and direct-connection behavior first.