Identify What Is Actually Failing
A Mac camera not working can interrupt a video meeting, stop a local recording or prevent you from joining a remote appointment. The first response should be to distinguish an unavailable camera from a camera that produces an image that does not reach the intended recipient. An application may say there is no camera, display a blank preview, show an unexpected camera source or capture an image that freezes only during an internet call. These are not interchangeable symptoms.
Start by identifying the computer’s model and the version of macOS it runs. Determine whether you expect to use a built-in camera, a camera integrated into an external display, a separate USB webcam or an iPhone through Continuity Camera. Not every Mac includes an integrated camera. A desktop without one needs a supported external device; the absence of a built-in camera is normal in that situation.
Note whether the camera worked immediately before a change, such as a software update, display replacement, new webcam, altered privacy setting or installation of a video utility. If you can reproduce the failure in a particular program, write down the exact error and the camera listed in that program’s preferences.
The central diagnostic question is whether a simple local preview works. If a local preview succeeds but a remote participant sees nothing, start with the meeting software and connection rather than assuming the camera sensor has failed. If the same camera fails in several independent applications, investigation of the shared system and hardware becomes more appropriate.
Test The Built-In Camera In Photo Booth
Photo Booth provides a convenient local comparison even when the problem was discovered in another application. Save any ongoing meeting or recording work and quit the programs that may be using the camera. Open Photo Booth from Applications or search for it using Spotlight. On a Mac with an available built-in camera, observe whether the application presents an ordinary live image.
Use an adequately lit room and position the display normally. You do not need to upload a photo or send a recording to someone else to carry out this basic test. Move your hand briefly in view and observe whether the preview responds in real time. A frozen picture should be recorded as a different result from a completely black or unavailable preview.
Apple’s guide to using the Mac camera explains its automatic activation and visible indicator. The built-in camera is designed to activate when an appropriate app or feature needs it. There is no universal physical power button for the integrated camera that you must switch on before opening Photo Booth.
If multiple cameras are attached, check which camera Photo Booth has selected before interpreting the result. A successful preview from an external webcam does not establish that the internal camera works. Conversely, if the internal camera works normally, the external webcam may still require troubleshooting.
If Photo Booth functions correctly, keep the result as your baseline and move to the application that originally failed. If the preview cannot be obtained, continue with privacy restrictions, restart and connection checks rather than repeatedly opening and closing the same program.
Understand The Green Camera Indicator
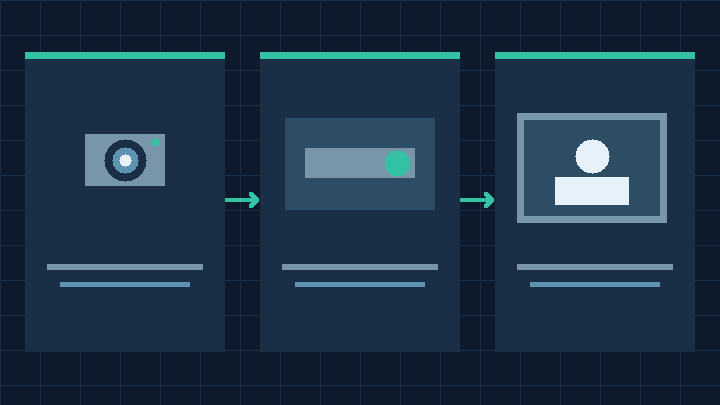
Many Macs with built-in cameras have a small green indicator near the lens. It helps communicate when the camera is active. The light can remain illuminated if another app or feature continues using the camera after you close one window. Treat the indicator as a privacy signal, not a complete test of image quality.
Quit the application you were testing and see whether the light switches off. If it remains on, check which other programs are open and whether you intentionally left a call, video preview or accessibility feature active. Closing a single meeting window may not be the same as quitting the application itself.
If you are concerned about unexpected use, review access permissions for installed applications and close any program you do not recognize or intend to use. Do not grant access to an unknown utility that claims it can reveal or repair the camera. On a managed computer, report unexpected input activity to the responsible technology team.
Apple’s built-in camera troubleshooting guidance identifies persistent camera failure or a flashing green indicator as circumstances in which service may be needed. A flashing light is different from the normal steady indicator during a preview. Do not interpret it as confirmation that the camera is healthy.
A webcam attached through USB may have its own indicator and control behavior, which can be different from Apple’s integrated camera. Check the camera manufacturer’s documentation to interpret its status correctly. Keep those observations separate when comparing two devices.
Check Camera Access In Privacy And Security
An app that has not been authorized to capture video may show a black preview or an access error even when the camera is working normally. On recent macOS releases, open System Settings from the Apple menu and find the camera controls within Privacy & Security. Older releases place equivalent controls in System Preferences or Security & Privacy.
Look for the specific installed application that needs video access. Grant permission only if you trust the application and intend to use its camera feature. If you make a change, follow any prompt to quit and reopen the app. Then repeat the same preview or call test so you can determine whether the permission was involved.
An installed app may appear in the list only after requesting access. Apple’s own built-in camera apps have different access handling from third-party applications. The absence of Photo Booth or FaceTime from this list does not by itself indicate missing hardware. See Apple’s camera access instructions for the relevant distinction.
If a trusted app has not requested access, open its legitimate video setup or preview feature and respond to the macOS permission prompt when it appears. Avoid using unofficial tools to rewrite privacy databases or bypass operating system protections.
Where the settings are restricted by a work or school administrator, contact that administrator. Authorization exists to protect users and devices, and removing an enforced policy is not a routine camera fix. Once the test is finished, review whether each application still needs the access you granted.
Review Screen Time And Managed Restrictions
Screen Time can restrict access to applications or device capabilities. A camera-related restriction may affect a program even when its ordinary privacy permission looks correct. Consider this possibility if the problem affects a child’s account, a shared Mac or a computer on which limits were recently changed.
Open the Screen Time settings and inspect the relevant content, privacy and application restrictions. The exact section names depend on macOS. Check whether camera use is allowed and whether the affected app has reached a configured usage limit. Do not assume that lifting every restriction is required.
If the device is managed by a parent, school or workplace, discuss the issue with the person responsible for those settings. They may be able to permit the necessary app without changing unrelated limits. Use authorized settings access rather than attempting to remove a password or evade management controls.
If you test the camera in another existing account with permission to use it, compare the result under that account’s own policies and privacy permissions. A working camera in one account but not another suggests a difference in configuration or software rather than proving that the camera is physically damaged.
When you have confirmed an appropriate change, reopen the original application and verify that its camera preview works. Restore temporary diagnostic adjustments that do not need to remain enabled. Do not unnecessarily weaken restrictions merely because another unrelated program has difficulty opening the camera.
Select The Correct Camera In FaceTime And Meeting Apps
When a Mac has an internal camera and one or more external cameras, a meeting app can choose a source that is not the one you intended. You might see a black preview from a covered webcam even though the built-in camera is available. Automatic selection can also change the source when you connect a display or bring an eligible iPhone nearby.
Open the affected application’s video settings and inspect its available camera list. In FaceTime, the Video menu contains camera selection controls when relevant devices are available. In other meeting programs, look for the video preview and camera selection before joining a call. The labels differ between applications.
Choose each verified camera individually and observe the preview. Disconnect optional camera accessories when appropriate and test the built-in camera on its own. If a connected display contains the camera you actually want to use, verify its supported connection and keep that display attached.
Apple’s FaceTime camera and microphone selection guide explains the options for compatible devices. A successful video preview does not guarantee that microphone capture also works. For audio problems, see our separate guide to Mac microphone troubleshooting.
If the application works only after you choose a different camera, record which source was selected previously. This can prevent a recurring issue when you return to the same desk configuration. If no cameras appear at all, continue with the connection and system checks rather than cycling repeatedly through unavailable options.
Check Browser And Website Camera Permissions
A meeting in a webpage depends on two layers of authorization. The operating system must allow the browser to use the camera, and the browser must allow the actual meeting website to capture video. Both can be correctly configured while the site itself still has the wrong video source selected.
In Safari, review the website-specific camera settings. Open the browser settings, find the Websites section and locate Camera. Identify the actual meeting domain and select an appropriate permission for it. Apple documents this functionality in its website settings guide.
For another browser, consult its own site permission controls. Check the address carefully before allowing camera access. A website asking for video unexpectedly should not receive permission simply because you are investigating a technical problem. Keep the default restrictions for unknown sites.
Reload the page or rejoin the meeting after a legitimate permission change. Verify the device shown within the meeting service itself. Test a local preview first, then arrange a short call with a willing participant if necessary.
If the camera works in Photo Booth and a native meeting app but not a particular browser site, examine website permissions, browser compatibility and relevant extensions. Our Firefox connection troubleshooting guide describes a related way to distinguish browser-specific failures from network faults. Do not disable certificate verification or browser security protections to make a camera request succeed.
Make A Short Local Video In QuickTime Player
A local video provides additional evidence beyond a live preview. A preview might appear correctly while recording fails because of the selected capture device or another application condition. A short controlled recording helps establish whether the expected camera can deliver a moving image that the computer can save and play back.
Open QuickTime Player and choose the new movie recording command from the File menu. Inspect the capture options and pick the intended camera. Choose an appropriate microphone if you also want to test audio, but remember that an audio input problem is separate from a video input problem.
Record a neutral scene for several seconds. Move a hand or an object slowly in view so that you can tell whether the image updates. Stop the recording and inspect playback. If the application offers several recording quality settings, choose an ordinary setting for this diagnostic clip instead of creating an unnecessarily large file.
The QuickTime movie recording documentation covers supported input choices and recording controls. No internet meeting service is required for this basic test.
If playback is clear, but the other person on a video call sees nothing or receives intermittent images, prioritize the meeting application’s camera selection, video setting and network conditions. If the local recording fails with the built-in camera and succeeds with an external one, document the specific difference for service. Delete the test clip when it is no longer required; avoid recording private documents, people who have not consented or sensitive surroundings.
Inspect The Lens And Physical Condition Safely
A camera that captures a black, blurred or very dim image may have a simple optical explanation. Check whether the lens has been covered by a removable accessory, dust or an unusual object positioned near the display. Make this observation in normal light before deciding the camera itself is defective.
If ordinary cleaning is needed, follow the Mac model’s exterior care instructions and use an appropriate soft cloth. Do not push sharp objects into the camera area, spray cleaning liquid directly onto the display or attempt to detach the camera assembly. If the machine has been dropped, exposed to liquid or has a damaged display, consult a qualified service provider.
Be particularly careful with sliding camera covers on laptops. Apple warns in its camera cover guidance that closing a laptop with a cover installed can damage the screen. The display and keyboard have limited clearance. Do not close the lid over a thick accessory or attempt to flatten it through pressure.
Compare the image in a moderately bright room with the light in front of you rather than a bright window directly behind you. If the difference is primarily exposure or contrast, adjust the environment before pursuing system repair. A sensor capable of presenting a clear moving image in one lighting condition is not necessarily broken because another room produces a poor picture.
If the preview remains black regardless of lighting and the correct camera is selected, record whether the indicator illuminates. That observation helps distinguish the remaining possibilities but does not establish a definitive hardware diagnosis.
Troubleshoot External USB Cameras And Display Cameras
An external webcam adds several variables: the accessory, its cable, any adapter, the computer port and the software that controls it. Inspect the entire connection before turning to advanced macOS repair. Verify that the webcam is designed to work with your version of macOS and that its privacy shutter, if present, is open.
Close the programs using the camera and reconnect it using the appropriate cable. Where practical, connect it directly to a compatible Mac port rather than through a chain of hubs. Some accessories require a cable that carries data rather than power alone. If the equipment requires a particular power arrangement, follow the manufacturer’s instructions.
Apple describes supported app-specific input selection in its external camera guide. Select the external camera explicitly in Photo Booth or a recording app and inspect its preview. If its name does not appear, test a known-working compatible connection or confirm whether the accessory requires current vendor software.
A webcam embedded in a monitor may require a data connection in addition to the path that delivers the display image. Check the monitor manual rather than assuming that a functioning display means its webcam is also connected. Some cables or port combinations transfer video to the monitor without providing the corresponding upstream USB connection for its peripherals.
If the camera works after bypassing a dock, test the same arrangement with a supported cable or port. Check for vendor updates that specifically address the dock or webcam. Avoid downloading random driver packages from unofficial websites. Comparing the accessory with another compatible computer can provide useful information, particularly when the internal Mac camera still works.
Investigate Continuity Camera Separately
A compatible iPhone can act as a camera for a Mac through Continuity Camera. The feature has its own requirements involving the devices, operating systems, account configuration and connection. If you are trying to use an iPhone rather than the built-in Mac camera, establish that distinction before changing the internal camera’s settings.
Check Apple’s Continuity Camera requirements and troubleshooting instructions for the exact devices and software involved. Verify that the feature is enabled on the iPhone and that the applicable connection and account conditions are satisfied. Mount the phone securely where its intended camera is unobstructed.
In the Mac application, select the iPhone source when it appears. Inspect the iPhone for an indication that the camera session is active, paused or disconnected. If the app falls back to the built-in camera, check whether the phone was moved out of range or its camera session was interrupted.
When the feature is unstable, compare a supported wired arrangement if appropriate and follow the official instructions for trusting or connecting your device. Do not reset the iPhone or sign out of its account simply to resolve an intermittent camera selection issue. A new trust prompt should appear only in a connection you recognize.
If the built-in Mac camera works and Continuity Camera does not, the failed feature does not establish a defective Mac camera sensor. Conversely, a working iPhone camera is a possible temporary alternative when a built-in Mac camera needs service. Keep track of which source you are using in the original meeting application.
Separate Video Call Quality From Camera Failure
A stable local video and a poor video call can coexist. An online meeting must capture the image, encode it, transmit it through the network and deliver it to the other participant. Problems at any stage can make the incoming picture freeze or become soft even when the camera itself works normally.
Start by comparing your local preview with what the recipient sees. If you can see a steady moving image while the recipient receives nothing, confirm that video transmission is enabled within the meeting. A host setting, application choice or unusual connection condition may explain the problem.
If calls have poor quality, compare the same service while connected to a reliable internet connection. Reduce unnecessary large transfers you control and move closer to a trusted wireless access point where appropriate. If another device on the same network experiences similar failures, investigate the shared network rather than exchanging camera hardware immediately.
Apple’s FaceTime troubleshooting guide separates video device issues from connection and account problems. Our guides to Wi-Fi connected without internet and checking router and ISP outages offer further diagnostic comparisons.
If an entire meeting service is unavailable or account sign-in fails, check that provider’s official support information. A camera that makes a clear local movie is not responsible for every failed remote connection. Once you have a usable network, retest with the same selected camera and a consenting contact.
Restart The Mac And Consider Supported Software Updates
When simple settings and local tests do not resolve the issue, save your work and perform a normal restart. Reopen only the application required for a local test at first. Optional video effects utilities, virtual cameras and conferencing applications can make a complicated starting environment harder to interpret.
Consider software changes made near the start of the problem. A new virtual webcam, capture utility or meeting update may influence source selection or processing. Consult the developer’s supported update or uninstall instructions if there is a clear reason to suspect it. Avoid manually deleting system extensions or services from directories based on generic repair commands.
Check for supported macOS updates through the normal update interface. Back up important documents before installing substantial software updates and make sure the computer has adequate storage and reliable power. If you already have a problem installing an update, consult the separate macOS update troubleshooting guide before undertaking additional system changes.
Apple’s camera troubleshooting advice differentiates Apple silicon and Intel systems. A normal restart is the recommended initial step for a Mac with Apple silicon; Intel models may call for a model-specific System Management Controller reset. Do not apply an Intel reset sequence blindly to an Apple silicon Mac, and do not improvise shortcuts without confirming the hardware model.
If the restart restores the camera, verify it in the original program before reintroducing optional camera utilities. If it fails again after a particular device or application is used, record that relationship. This is more informative than repeatedly restarting without controlling the conditions.
Know When To Seek Service And Confirm The Repair
A persistent internal camera failure across multiple trusted local applications deserves a qualified assessment, especially if the correct hardware should be available and you have already checked permissions and restrictions. A flashing green camera light, physical damage or failure after display repair can be particularly useful information for a technician.
For an undamaged computer, Apple’s Apple Diagnostics instructions describe how to start the diagnostic environment for Apple silicon and Intel machines. Follow the directions for the exact model and record any reference codes. The tool is not designed to certify every possible camera function or detect every intermittent problem. It also does not test all third-party external equipment.
Prepare a concise report of the model, operating system version, camera type, indicator behavior and results in local apps. Include whether an external webcam works, whether the problem occurs under more than one account and whether it started after a particular change. Back up important files before sending the computer for repair. Avoid opening the display assembly yourself without the appropriate service procedure.
After a successful fix, confirm the built-in camera independently in a local preview and return to the program that originally failed. Check the selected source, image quality and permission settings, and perform a brief video call if relevant. Restore any temporary changes that are not needed.
A dependable repair should make the intended workflow usable without unnecessary privacy compromises. This guide is based on Apple documentation and a structured diagnostic comparison. The diagrams are original conceptual illustrations, not screenshots or evidence of a physically tested Mac repair.
Frequently Asked Questions
Why Does My Mac Camera Work In Photo Booth But Not In A Meeting?
The meeting application may use the wrong camera, lack permission, have video disabled or experience a connection problem. Test its local preview and compare the selected camera.
Where Are Camera Permissions On A Mac?
On recent macOS versions, open System Settings and find Camera under Privacy & Security. Older versions use corresponding Security & Privacy preferences.
Why Is The Built-In Camera Light Green?
A steady green indicator normally means the built-in camera is being used. Check which applications or features are active if you did not expect camera use.
Can I Use An External Webcam If My Mac Camera Is Broken?
Yes, a compatible external webcam may be an appropriate alternative. Verify its connection and select the correct source in the intended application.
Does A Black Camera Preview Mean The Camera Is Broken?
No, it can also result from an obstructed lens, the wrong input, software settings or an application problem. Compare a local test in another trusted app.
Should I Reinstall macOS To Repair The Camera?
Not as an initial response. Check permissions, restrictions, camera selection and supported updates first. Back up your data before substantial system changes.
What If The Green Camera Light Keeps Flashing?
Apple identifies persistent camera failure or a flashing green indicator as situations where service may be necessary. Record the symptom and seek qualified help if ordinary checks do not resolve it.