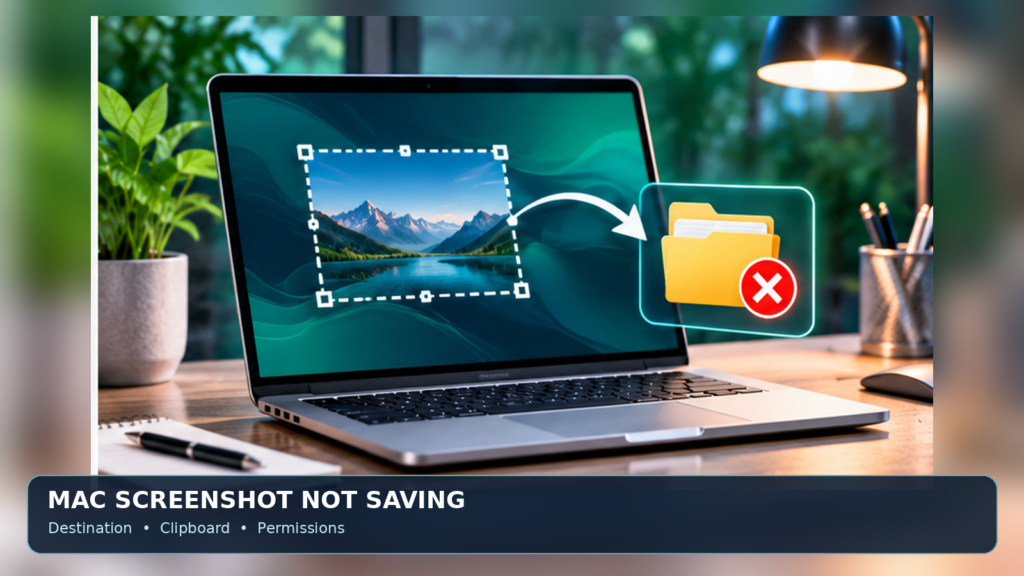

If a Mac screenshot is not saving, press Shift-Command-5, open Options and check Save to. Choose Desktop or another writable folder. A screenshot may have been copied to the Clipboard, left in a floating thumbnail workflow or saved to a custom location rather than lost. Test a normal Finder window before changing permissions or resetting anything.
This guide covers built-in macOS screenshots, keyboard shortcuts, file locations, Clipboard, Finder searches, iCloud and folder permissions. It distinguishes failure to capture from failure to create a file.
First Check Whether The Screenshot Was Captured
A screenshot that does not appear on your Mac desktop may have been saved somewhere else, copied to the Clipboard, moved by a cloud-sync feature or prevented from being captured by an application. Those possibilities require different fixes. Before changing system settings, reproduce the issue with an ordinary Finder window or an empty desktop rather than protected video, a password screen or a confidential application.
Press Shift-Command-3 to capture the full screen, then wait a moment and look on the Desktop. Apple’s Mac screenshot guidance describes the built-in tools. If a floating thumbnail appears at the lower-right corner, it may indicate the screenshot was taken even if you cannot yet see its file. Note the time so you can search for it.
Know The Three Standard Screenshot Shortcuts
The Mac normally provides Shift-Command-3 for the entire screen, Shift-Command-4 for a selected area and Shift-Command-5 for the Screenshot toolbar. On some Mac models, other capture options may be available. With the toolbar you can choose an entire screen, a window or a selected portion. If you are unsure which shortcut you used, start with Shift-Command-5 so you can inspect the save location.
Apple documents these commands in Take Screenshots Or Screen Recordings On Mac. The keyboard combination matters because adding the Control key to a screenshot shortcut can send the image to the Clipboard rather than writing the usual desktop file. A missing filename is not proof that the capture failed.
Check The Screenshot App’s Save To Setting
Press Shift-Command-5 to display the Screenshot controls, then select Options. Look under Save to. Depending on macOS version, you may see choices such as Desktop, Documents, Clipboard, Mail or another destination. Choose Desktop for a straightforward test, close the toolbar if needed, then capture a harmless screen again.
Apple’s Mac screenshot support article confirms that the default location can be changed through Options. When a custom location was selected earlier, the app may continue using it until changed. Record the existing choice before modifying it so you can restore your preferred workflow. If ‘Other Location’ is selected, check whether that folder still exists and is writable.
Understand Save To Clipboard Instead Of A File
If Save to is set to Clipboard, or you held Control with the screenshot shortcut, the result may exist only as an image available to paste. Open a suitable app such as Preview or Notes and use Command-V to see whether an image is on the Clipboard. A screenshot can be captured successfully without appearing as a new item in Finder.
Apple explicitly documents Control-Shift-Command-3 as a clipboard-oriented screenshot option. If pasting works, return to Shift-Command-5 > Options and choose Desktop or another genuine folder for future saved files. Do not paste private screenshots into a public chat or online form merely to test whether the Clipboard works.
Search For A Screenshot In Finder
Open Finder and examine the Desktop, Documents, Downloads and any custom folder specified by Screenshot’s Options. A screen capture might have been renamed, moved or saved in a folder you do not normally browse. Use Finder’s Recents view, sort by date or search for the approximate time you made the capture. The file naming convention can vary with language and macOS release.
Search for common filename words such as ‘Screenshot’ or ‘Screen Shot’ but do not rely on English-only names. You can also inspect recent PNG, HEIC or other image files if the software supports different capture formats. Apple’s screenshot documentation notes that supported newer systems may allow format choices. A reliable clue is the newly created file and timestamp, not only its extension or name.
Use Spotlight When The File Seems To Disappear
If Finder navigation does not reveal the capture, use the Mac’s Search or Spotlight facility to locate files created around the test time. Spotlight can find documents across indexed locations, though searches can lag or omit external and unindexed folders. Search by part of the name or file type, and confirm the result’s location before moving it.
If Spotlight itself is giving incomplete results, our Mac Spotlight Search Not Working guide covers that separate issue. Do not rebuild an entire search index as the first reaction to a single missing image. The Screenshot toolbar’s Save to setting and a direct Finder check are more targeted ways to determine the actual destination.
Wait For The Floating Thumbnail To Finish
After taking a screenshot, macOS may display a floating thumbnail for a few seconds. You can click it to mark up the image, drag it into another app or let it finish before the screenshot is placed in the selected location. If you open the thumbnail and make edits, the save action may follow a different interaction than the original capture shortcut.
Apple’s Screenshot User Guide explains the thumbnail workflow. Do not treat a temporary delay while the thumbnail is on screen as a persistent save failure. If thumbnails distract you, the Options menu may offer a way to change that behavior, but disabling thumbnails is not necessary for basic saving.
Look For A Different File Extension
People often search only for .png images because that has long been a common default. Depending on your macOS release, capture settings or third-party screenshot tool, files may be created in another image format. A document may therefore be present even if a search filtered to PNG does not find it. Use Finder’s Date Created or Kind filters to look broadly.
If a screenshot must be sent to another application, verify its supported file types rather than assuming one format works everywhere. Do not rename only the extension to force compatibility, as that does not necessarily convert the underlying image. Preview or another trusted image editor can export a different format when required. The purpose here is to find the saved file before changing it.
Create A Fresh Local Test Folder
If the selected save destination is an external disk, network share, cloud folder or an older custom directory, try a new ordinary folder on the internal drive as a controlled test. Create a folder under an area where your account can normally write files, then select it through Shift-Command-5 > Options > Other Location if that choice is offered.
Take a harmless screenshot and check that exact folder. If the file appears locally but not in the original destination, the Screenshot app probably works and the remaining problem may involve that destination, its availability, permissions or synchronization. Avoid altering every folder’s permissions to make one tool function. Restore your preferred destination only after you understand what changed.
Check Whether The Destination Still Exists
A screenshot location stored in preferences might refer to a folder that has been renamed, deleted, disconnected or moved. External drives may not mount automatically, and a network folder can be unavailable when offline. The screenshot controls do not create every missing directory on demand. Recheck the selected destination in Finder and verify that you can manually create a harmless text file there.
If a test file cannot be saved to the folder either, the issue may extend beyond Screenshot. Use a valid local folder temporarily, then investigate the actual disk or share. Our File System Guide explains how files and folders are represented. Do not reformat an external drive to solve a screenshot problem.
Review Folder Read And Write Permissions
Select the intended folder in Finder, choose File > Get Info and examine Sharing & Permissions when available. Your account needs an appropriate ability to write to the destination. Apple’s file and folder permission guidance explains how those controls work. A folder owned by another account or mounted as read-only can prevent saving even though you can browse it.
Make permission changes only to material you own or are authorized to manage. Do not apply Read & Write access to everyone or recursively change system directories just to save screenshots. A fresh folder in your own home directory is safer for diagnosis. If the destination belongs to a company or shared project, ask its administrator for the intended access procedure.
Check Internal Storage Space
A Mac with little remaining available storage may have difficulty creating new files or performing ordinary tasks. Open System Settings > General > Storage, or use the storage interface appropriate to your release, and examine capacity. The screenshot files themselves are often relatively small, but an almost-full disk can cause more general problems.
Do not delete random system files to make room. Remove only content you recognize, back up irreplaceable data and use Apple’s supported storage-management tools. Test another tiny file after freeing an appropriate amount of space. A screenshot still failing when you have normal storage available suggests that the save destination or capture workflow deserves further investigation.
Check iCloud Desktop And Documents Sync
If you use iCloud Drive with Desktop and Documents syncing, the Desktop you see may be synchronized or mirrored in iCloud. A screenshot saved to Desktop can appear in a cloud-managed location and may take time to sync to another device. A delayed sync to another Mac is not necessarily failure to save on the first Mac.
Check whether the screenshot exists locally in Finder before diagnosing the network. If it exists on the source Mac but not elsewhere, investigate iCloud status and connectivity. Our Mac Wi-Fi Connected But No Internet guide explains separate connectivity troubleshooting. Do not disable iCloud Desktop syncing without understanding what will happen to files stored in that service.
Distinguish Saving From Sending To Another App
Screenshot’s Options can route the capture to an application or workflow rather than a simple file location. If you chose an app or Clipboard target, opening Finder may not reveal a newly saved standalone image. The tool may instead prepare a new message, document or edit session, depending on what your macOS version offers.
For reliable diagnosis, select an ordinary folder and test again. Once a file saves correctly, restore the application workflow that you prefer. If an external editor opens but fails, check that application’s own export and save behavior. The built-in screenshot capture, the handoff to another app and that app’s final save are separate operations.
Inspect Screenshot Keyboard Shortcuts
If nothing happens when you press the keys, open System Settings > Keyboard > Keyboard Shortcuts and inspect Screenshots, using the path shown for your macOS release. Apple documents the relevant settings in its screen-capture instructions. A custom shortcut, external keyboard or remapping utility can change the expected combination.
Use Shift-Command-5 or launch the Screenshot application through Spotlight to distinguish a broken shortcut from a saving problem. If the toolbar opens and successfully saves a test file, the underlying screenshot system is likely available. Avoid deleting keyboard preference files or installing shortcut repair applications before testing the built-in controls.
Check Whether You Are Capturing Protected Content
Some apps and protected video environments deliberately prevent normal capture of particular windows or content. Apple warns that applications such as video players may block screenshots of some windows. A blank or missing capture from one restricted app does not demonstrate that the Mac screenshot feature is broken across the operating system.
Test with Finder or a normal desktop window. If that saves successfully, respect the application’s intended capture restriction and consult its support documentation. Do not attempt to disable digital rights management or bypass a secure screen just to obtain an image. The guide concerns legitimate user screenshots, not evading protected-content controls.
Third-Party Screenshot Apps Have Separate Permissions
If a dedicated screenshot utility, browser extension or meeting app fails to capture or export, its behavior may depend on macOS permissions for screen capture and for accessing selected files or folders. Those settings are separate from the built-in Screenshot toolbar’s destination. Review System Settings > Privacy & Security and the app’s documentation before modifying permissions.
Apple’s files and folders privacy guidance describes how some applications require explicit access to Desktop, Documents and other locations. Approve only applications you trust. Do not give a random screenshot tool broad screen-recording or full-disk privileges solely because an installer displays a warning.
If Screenshots Save On Desktop But Not An External Disk
The test result is useful: the Mac’s capture process works, but the alternative destination needs checking. Verify the drive is connected, writable and compatible with your workflow. A removable disk formatted in a filesystem that macOS cannot write to natively may allow reading files without ordinary write access. Network shares also depend on account permissions and connectivity.
Use our NTFS Vs exFAT Vs FAT32 comparison to understand common format differences, but do not reformat a drive without a verified backup. Changing formats can erase its data. If the external location is shared, confirm the correct mount, credentials and folder permissions with the owner.
Restart Screenshot Or The Mac Only After Simple Checks
After confirming the destination, permissions, keyboard shortcut and available storage, closing and reopening Screenshot or restarting the Mac may resolve a transient interface fault. Save other open work before restarting. You should not need to reset NVRAM, reinstall macOS or delete preference databases merely because the default screenshot location changed.
Test immediately after restarting, using Shift-Command-5 and an ordinary local folder. If it works, reintroduce your preferred destination and workflow one change at a time. If the issue returns only when an external editor or cloud share is involved, investigate that component instead of blaming the screenshot service.
What If The File Appears And Then Disappears
An image that exists for a moment but later vanishes suggests a file-management process rather than a failure to capture. Review recent file movement, synchronization, cleanup utilities and any automation that manages Desktop or Downloads. Search for the filename across the likely folders and check relevant trash or cloud-service recovery features when appropriate.
Do not immediately run a broad undelete application. First determine whether a script or cloud sync is moving files to a new folder. Keep a local test folder outside any automated cleanup arrangement and observe a new screenshot there. If it remains, review the automation rules that affected the original location.
When The Screenshot Thumbnail Shows But No File Appears
A visible thumbnail indicates that the capture path may have started successfully. Tap or click it and inspect whether the image opens in the supported markup interface. If you edit the image, check whether a save, Done or close action is needed before the completed result appears. If you dragged the thumbnail into another document, the ordinary file may not have been saved where you expected.
Choose a local save destination in Shift-Command-5 > Options and take a new screenshot without interacting with the thumbnail. Wait for it to disappear, then inspect the folder. This controlled experiment separates an editing or sharing workflow from the basic file output.
A Quick Finder And Screenshot Diagnostic Table
Map the actual symptom to the most relevant first check. A file found in Clipboard needs a save-location adjustment; a missing file at a custom destination calls for folder and permission checks; an absent toolbar suggests a shortcut or app problem; and a screenshot that fails only in protected video may reflect a deliberate capture restriction.
Keep the test conditions simple and change one setting per attempt. Document the chosen destination and whether the screenshot was visible in Clipboard, the toolbar or Finder. A short repeatable sequence will also help official Apple Support or your organization’s technician investigate the problem without asking you to reinstall the computer.
| Symptom | First Check | Avoid |
|---|---|---|
| Image Pastes, No File | Save To Clipboard Or Control Modifier | Reinstalling macOS |
| Not On Desktop | Options Save To And Finder Recents | Assuming Image Was Lost |
| Fails On External Disk | Drive Mount, Format And Write Permission | Reformatting Without Backup |
| Only One App Blocks Capture | App’s Content Protection | Bypassing Restrictions |
| Thumbnail But No File | Editing Workflow And Save Choice | Deleting System Preferences |
Capture Only Information You Are Allowed To Share
Screenshots often include account names, browser tabs, private conversations, network identifiers and customer records. Before attaching a file to a support request, crop or redact sensitive content using a trusted editor. Remember that selecting a smaller area through Shift-Command-4 can be safer than capturing every display.
A successful screenshot is not a reason to publish the entire screen. Use the principle of minimum necessary information. Our PDF Editing Feature Checklist includes document-handling considerations when screenshots are inserted into shared materials.
How To Prevent Future Screenshot Save Confusion
Pick a consistent destination that you can locate easily. If screenshots are for occasional personal reference, Desktop may be convenient. For professional work, a dedicated Screenshots folder with sensible naming and an appropriate backup can prevent clutter. Use a folder with known write permissions and avoid saving critical captures only to the Clipboard when you need an archived file.
Periodically review screenshot files for sensitive information and delete unneeded copies carefully. If you change Macs or restore settings, check Shift-Command-5 > Options again before assuming the old destination was preserved. A repeatable workflow is more reliable than memorizing a terminal command or a custom script whose behavior you have not tested.
When To Contact Apple Or Your IT Team
If the built-in Screenshot app consistently fails to save a simple desktop capture into an ordinary writable local folder after basic checks, contact Apple Support or your organization’s help desk. Provide the macOS version, whether Shift-Command-5 opens, the Save to choice, the exact error and whether other files can be written to that folder.
Do not share a screen recording of private accounts, login prompts or confidential work just to demonstrate the failure. A clear description plus a harmless test result is enough to begin troubleshooting. More invasive repair should follow a specific diagnosis rather than generic advice to wipe the Mac.
Frequently Asked Questions
Where Do Mac Screenshots Save By Default?
Ordinarily on the Desktop, although the Screenshot app’s Save to choice can redirect them. Press Shift-Command-5 and inspect Options to confirm.
Why Did My Mac Screenshot Go To The Clipboard?
You may have held Control with the screenshot shortcut or selected Clipboard under Save to. Paste into a trusted app to verify.
How Do I Change Screenshot Save Location On Mac?
Press Shift-Command-5, choose Options, then choose Desktop, Documents or another supported location.
How Can I Find A Screenshot That Is Missing From Desktop?
Use Finder’s Recents or search for recent image files, check the Screenshot save location and search other likely folders.
Why Does The Floating Screenshot Thumbnail Appear But No File Save?
The capture may still be in the thumbnail editing or sharing workflow. Set a local save destination and let a new test capture finish without dragging it.
Can A Mac Screenshot Fail Because Of Permissions?
Yes, a selected folder or external disk may not be writable. Use Finder > Get Info to inspect an authorized folder’s access settings.
Does Low Storage Prevent Screenshot Saving?
Very low available storage can interfere with creating files. Check System Settings > General > Storage and manage space safely.
Why Does Screenshot Work In Finder But Not A Video App?
Some apps restrict capture of protected content. Test a normal desktop window before assuming the screenshot service is faulty.
Can iCloud Make Screenshots Appear Missing?
Desktop syncing can change where files appear across devices. First confirm the local file exists and then check synchronization.
Should I Run A Terminal Command To Reset Screenshots?
Not as the first fix. Check Shift-Command-5 Options, Clipboard, Finder, destination permissions and storage before advanced changes.